Posted in Commercial Van, Ideas & Tips

Van Insulation Guide: Make an Educated Decision

https://i2.wp.com/parkedinparadise.com/wp-content/uploads/roamingwithrob.jpg
Van Insulation Guide: Make an Educated Decision

Heat Transfer 101

The goal of adding insulation is to combat heat loss. Heat loss happens because of heat transfert (a.k.a.heat flow). Heat is always transferred from warm to cool and continues as long as there is a temperature difference; a larger temperature difference means more heat transfer potential.  There are 3 heat transfer mechanisms: Conduction, Radiation & Convection.

Conduction

  • Conduction is heat transfer through a material.

Examples:

  • A pot handle (see picture above!)
  • A spoon in a hot cup of tea
  • A van metal surfaces getting hot inside the cargo area on a sunny day
HOW:

Energy is stored in the vibration of atoms. More heat = more energy = more vibrations. The collision of atoms between each others transfer heat.

Insulating for conduction:

The more dense a material, the closer the atoms are from each others and the more they transfer energy to their adjacent atoms (by physically colliding to each others). Therefore:

Radiation

  • Radiation is heat transfer through electromagnetic waves.

Examples:

  • The sun
  • A Mr. Heater Buddy (there is some convection too but it’s mainly radiant)
  • A van dash getting hot when exposed to the sun
HOW:

Any hot (or warm) object radiate electromagnetic waves and can heat up other objets at distance (and therefore loose heat themselves). Energy is transferred through the electromagnetic waves, therefore thermal radiation can propage through vacuum (without the presence of matter).

Insulating for radiation:

Convection

  • Convection is heat transfer through fluid (or gas) movement.

Examples:

  • Hot air rising above an intense heat source (i.e. electric heater); Cold water falling towards the bottom of a lake
  • A vehicle ventilation system (hot/cold air travels with the air being pushed by the fan)
HOW:

Heat is “transported” from one part of a fluid (or gas) to another by the bulk movement of the fluid itself. Hot regions are less dense, so they tend to rise and are replaced by cooler fluid from above. 

Insulating for Convection:

While heat transfer can be separated in 3 separate mechanisms, heat loss normally implies all 3 of them together. For example, a hot cup of coffee:

  • Heat is transferred from the liquid to the cup surfaces (conduction + convection from the circulation),
  • From the cup to the air and objects nearby (convection+radiation), 
  • From the cup to the cold table underneath (conduction),
  • Blowing on coffee to cool it down (convection).
  • (Heat is also lost through evaporation -change of phase-, but that’s out of our scope)

2.2- R-Value

Insulation materials are good at resisting heat flow. To quantify how good is an insulating material and compare them between each others, a neat dude came up with R-value.

R-VALUE

R-value denotes the capacity of an insulating material to resist heat flow. The higher the R-value, the greater the insulating power. It is normally noted (for example) “6.5 per inch“; it means applying one inch thickness of the material will provide 6.5 R-value; applying two inches will provide 13.0 R-value; and so on. R-value takes into account all three heat transfer mechanisms (conduction, radiation, convection). R-value is determined with test ASTM C518 (“Standard Test Method for Steady-State Thermal Transmission Properties by Means of the Heat Flow Meter Apparatus”).

2.3- Condensation and Moisture Control

Vapor Barrier or not?

The purpose of a vapor barrier is to prevent moist air (from inside the van) of migrating towards cold surfaces. The idea is that moist air from respiration, cooking, drying gear, etc. won’t reach cold surfaces and therefore that eliminates condensation issues. However if, for any reason, moist air makes its way past the vapor barrier, it would be very hard to dry that moist air because it would be sandwiched between two vapor barrier layers (remember that metal is a vapor barrier too).

Even if one could achieve the perfect vapor barrier (which is unlikely sorry), there are paths for outside air (charged with moisture) to infiltrate and there are potential leak points as well:

Van-Insulation-Issues-Water-Infiltration-Outside-Air-Circulation

Therefore, we believe that moist air will inevitably come in contact with cold structure, so our approach is to let the insulation layers “breathe” (no vapor barrier).

Condensation and moisture is quite complex, there is much more to talk about… we think this article should help you understand the phenomenon and help you take a better informed decision about your insulation:

Moisture-Condensation-Control-Van-Heading-(Fullpx)

CONDENSATION AND MOISTURE IN A VAN | WHY IT HAPPENS AND HOW TO CONTROL IT

2.4- Thermal Bridges

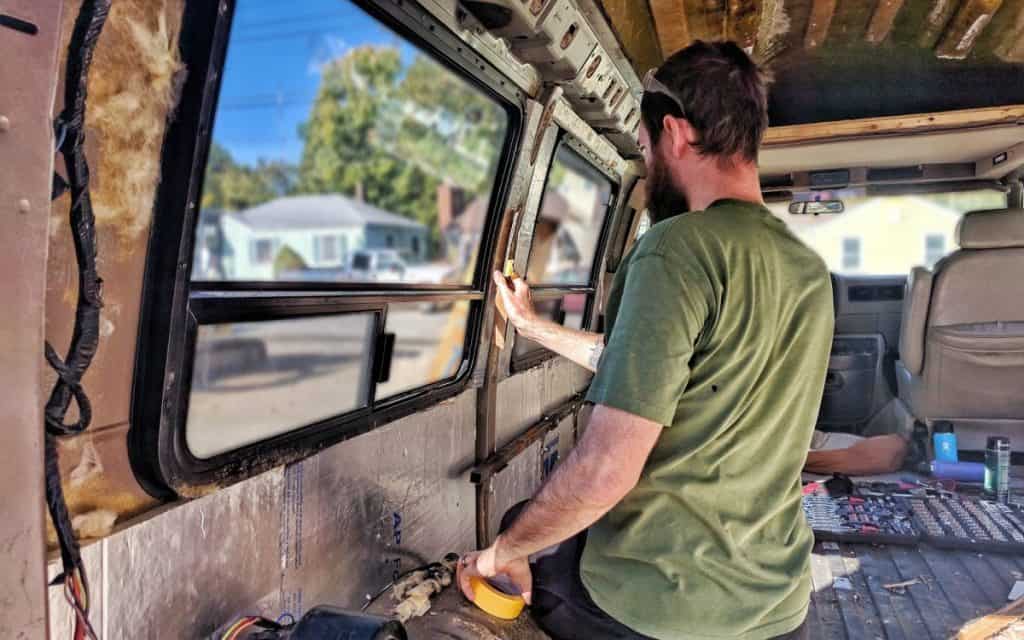
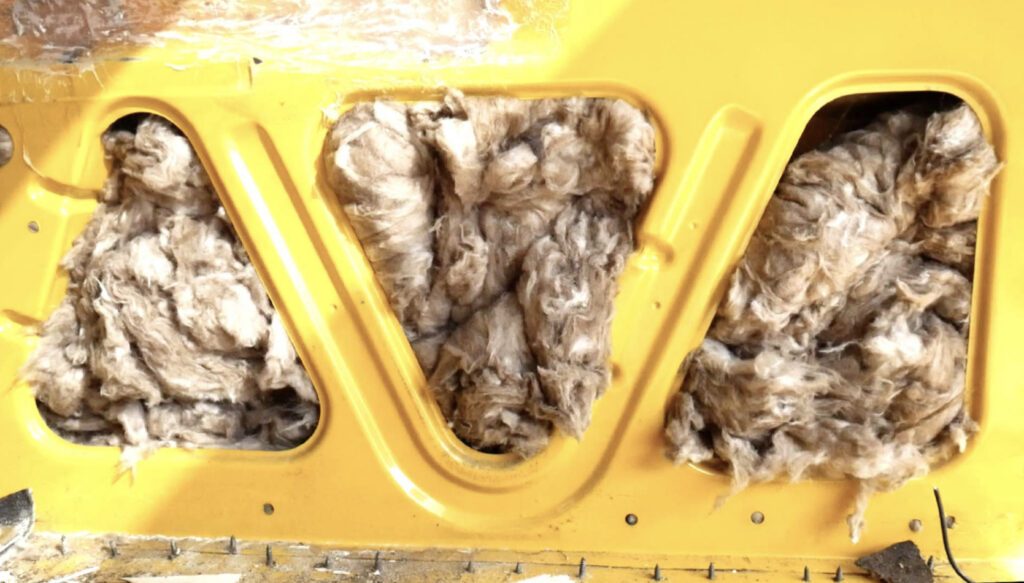
A thermal bridge is a path of least resistance for heat transfer. In other words, it’s a path for heat to “cheat” your insulation and find a way around it. It normally occurs via conduction through a dense material (such as metal).

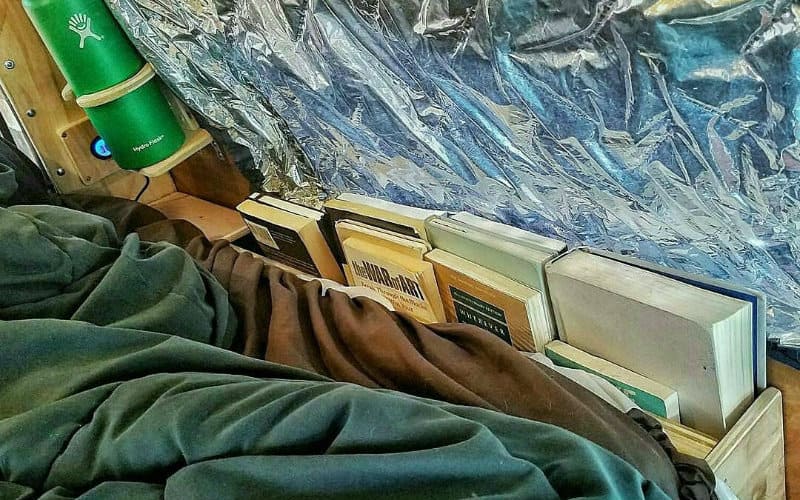
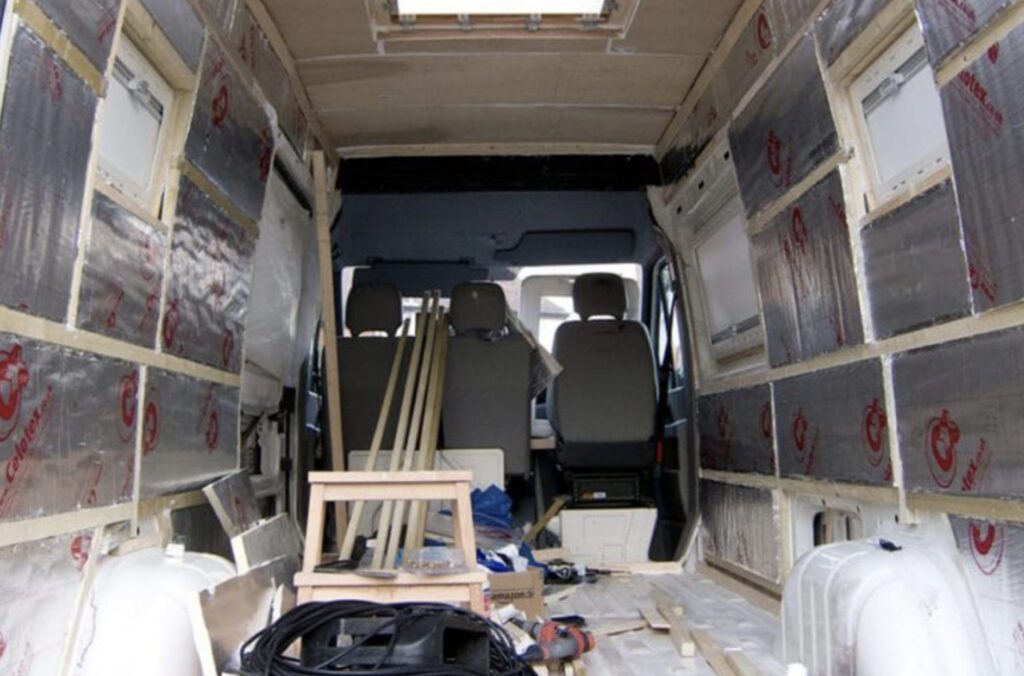
Take for example the following picture. We added Thinsulate pretty much everywhere, except on the frames and pillars where we will attach our structure (cabinets, etc). All the exposed metal is considered a thermal bridge and heat will flow through it around the Thinsulate.

Van-Insulation-Conductivity-Thermal-Bridges-Annotated

To mitigate the thermal bridges, a thermal break is added. We added Low-E EZ-COOL since it pretty resistant to compression (applied by the structure attached to the van’s frames).

That’s important, especially if you’re using 80/20 aluminum extrusions for your build (structure, cabinets, etc). Indeed, attaching the 80/20 aluminum directly to the van metal creates excellent thermal bridges and as a result, the 80/20 inside your van will be almost as cold as the van metal!

2.5- Air Loops

Hot air is less dense, so it tend to rise and be replaced by cooler air from above. That’s called an air loop and it’s a phenomenon that happen in non-insulated hollow structure, such as in frames and in pillars. So, to the question “Is it worth shoving insulation inside frames, knowing heat will find a way around (thermal bridges)?”, we think it’s worth it. The total heat loss of your van is the sum of all the small pieces and bits… It all adds up! 

Air-Loop-Convection-Heat-Transfer
Van-Insulation-Convection-Hollow-Structure

3- Van Insulation Materials

At this point, we’re still on our quest to find THE BEST van insulation material… But in order to find out, let’s review our different options:
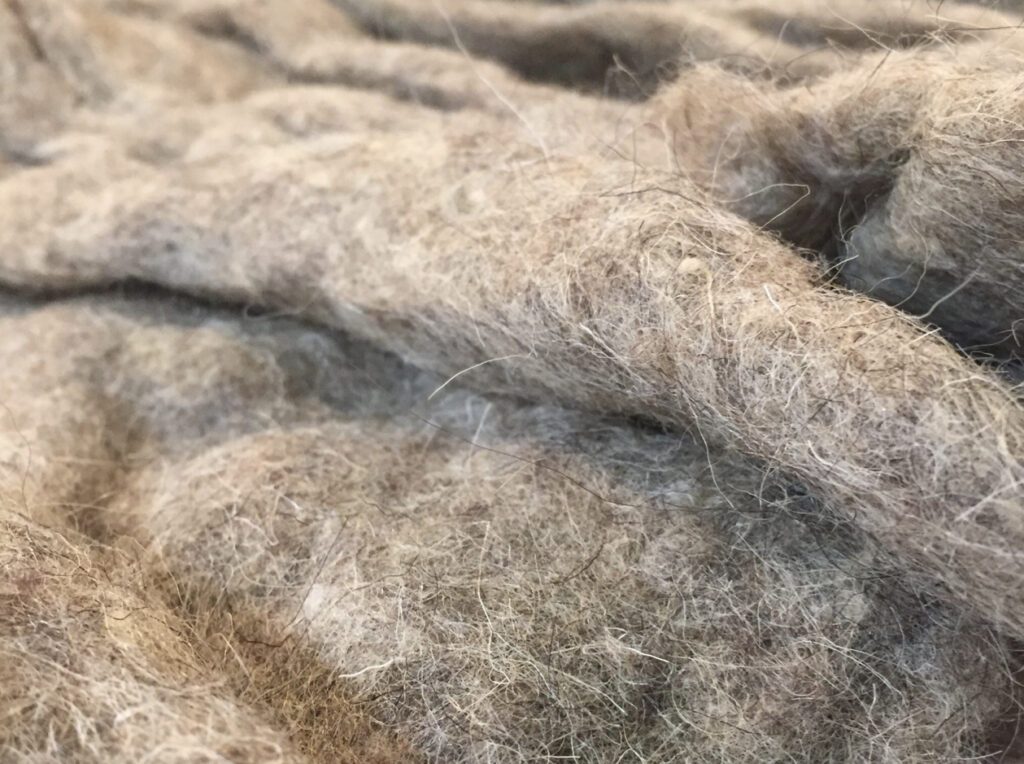
Thinsulate

  • R-Value: 3.3 per inch.

PROS

  • Very easy to install
  • Hydrophobic (doesn’t retain moisture)
  • Doesn’t off-gas
  • Doesn’t loose fibers and not itchy
  • Good noise insulation
  • Can be stuffed in hard-to-reach places

CONS

  • More expensive

Bottom word: it’s a popular tried-and-true product that gives a added value to higher-end builds.

Polyiso Rigid Board

  • R-Value: 5.6 per inch at 75F, 5.0 per inch at 15F.

PROS

  • Impermeable to water vapor.

CONS

  • R-value decrease substantially at cold temperature.
  • Create air gaps on funky surfaces (which is mostly the case in vans) = water traps.

XPS Rigid Board

Home Depot

  • R-Value: 5.0 per inch at 75F, 6.0 per inch at 15F.

PROS

  • Provides more reliable thermal performance than Polyiso.
  • Impermeable to water vapor.

CONS

  • Create air gaps on funky surfaces (which is mostly the case in vans) = water traps.
  • Maximum service temperature: 165F. (dark painted roof will get hotter than that in the sun! source: phys.org)

By now we know that efficient insulation materials are low-density. A coat of paint is everything except low density…

The manufacturers don’t provide any data (i.e. R-value, etc.) to backup their claims; there’s probably a good reason why (it would be fairly easy to test and publish data).

According to this American Scientific Article, EPA does not recommend insulating paint: “We haven’t seen any independent studies that can verify their insulating qualities“. They noted some heat gain reduction on surfaces directly exposed to sun only, and that “the reflectivity of the painted surfaces decline considerably with time”. It’s all about reflectivity, not insulation capacity. Are you really gonna paint the exterior or your van with insulating paint..?

Until independent studies show a benefit of insulating paint through standardized test, save your money and your time.

4- Insulation Strategy

Going from theory to real-life implies making compromises; there is no perfect solution! The best van insulation is not just about R-Value, it’s also about:

  • Ease of installation for the average DIYer
  • Risk of messing things up (i.e. warped van panels)
  • Condensation and moisture control
  • Conformity to curved and uneven surfaces
  • Material properties (i.e. maximum temperature, resistance to pressure)

With that in mind, here is how we insulated our campervan:
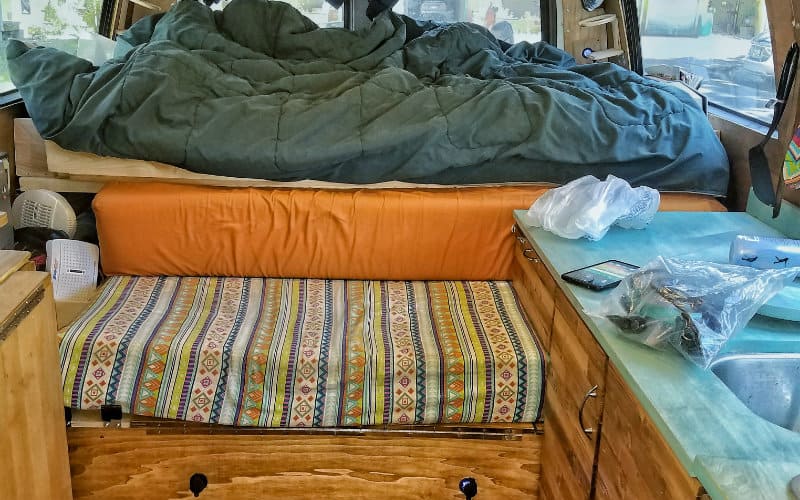
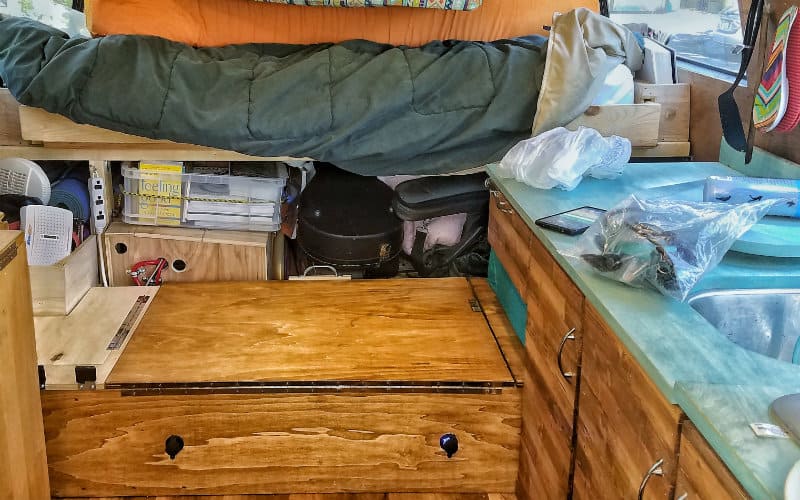
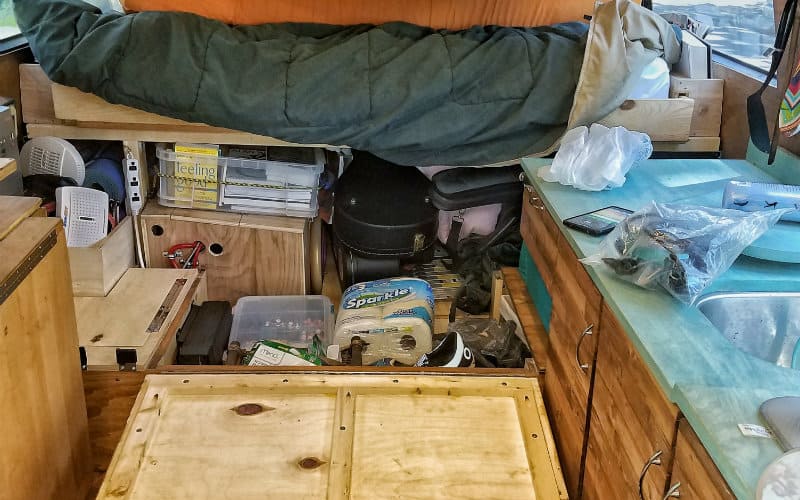
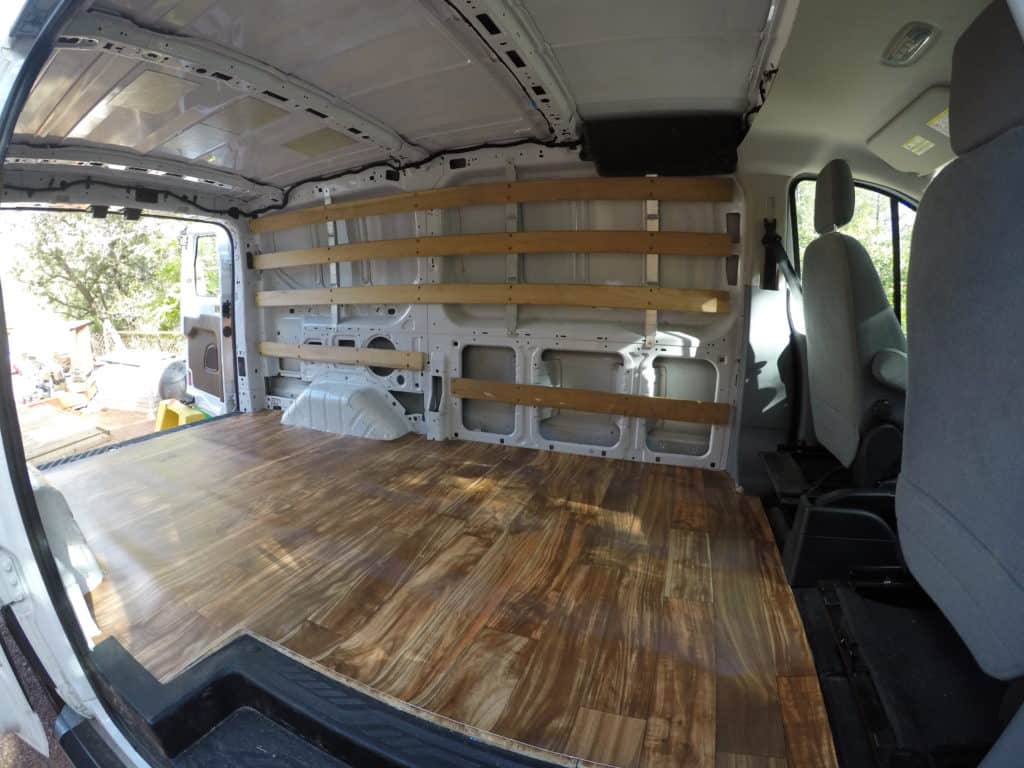
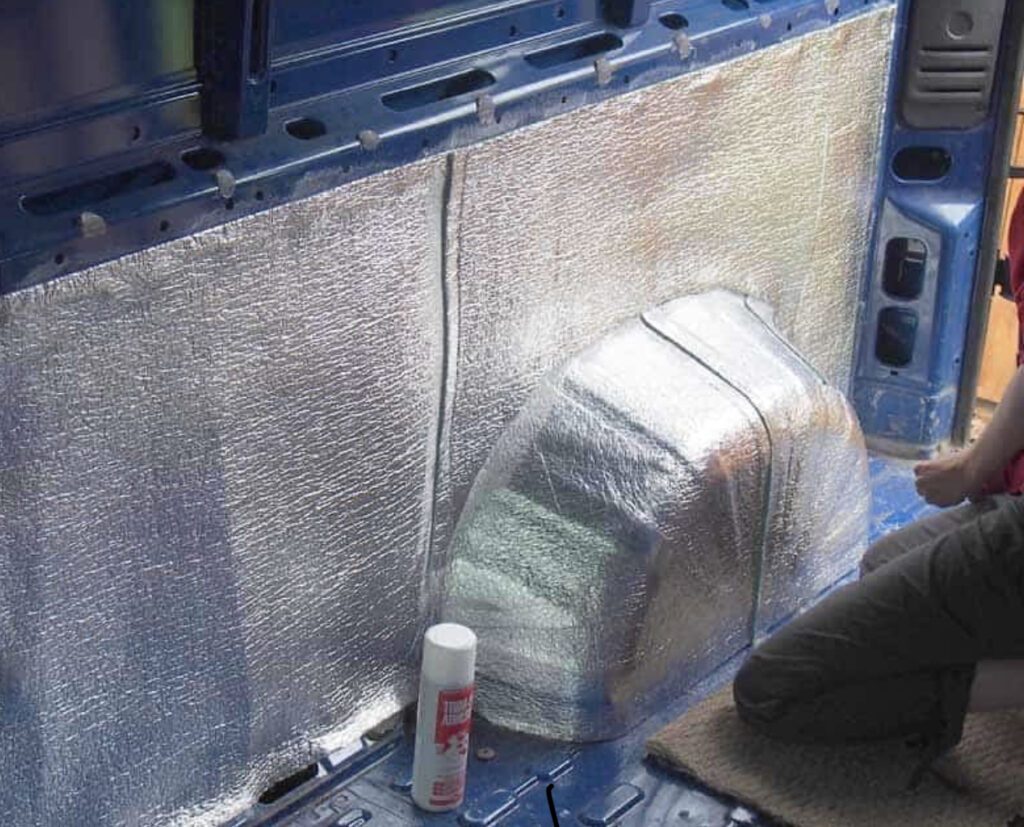
4.1- Floor

  • XPS RIGID BOARD

To be efficient, any compressible insulation material (thinsulate, wool, etc.) must be fully expanded. As a result, they’re not ideal for floor insulation. On the other hand, XPS is an excellent insulator, provides a solid and flat fondation for our floor, it’s quite cheap and readily available at your local hardware store.

So, does it work in real-life? Definitely! We installed our Webasto so it blows hot air in our living space near and parallel to our floor; as a result the floor is nice and warm, even in sub-freezing temperatures. But don’t get us wrong: the farther you go from the Webasto, the colder the floor gets. Cold air falls, remember? So even a perfectly insulated floor won’t be nice and warm all over, unless it’s heated somehow. No, we don’t think radiant heated floor is necessary (but could be a nice luxury); a pair of slippers is just fine and much more energy efficient!

We chose XPS Rigid Board C-200 to insulate our floor. The C-200 is rated 20PSI capable; human footprint = 16 PSI.

Here are our layers from bottom-up:

  • 1/2″ thick XPS (to fill the corrugations)
  • 1″ thick XPS
  • MLV -not show on the picture- (noise insulation, but we’d skip that layer if we had to start over)
  • 1/2″ thick Plywood
  • Vinyl Flooring -not shown on the picture-
Van Conversion, Floor, weigth on top

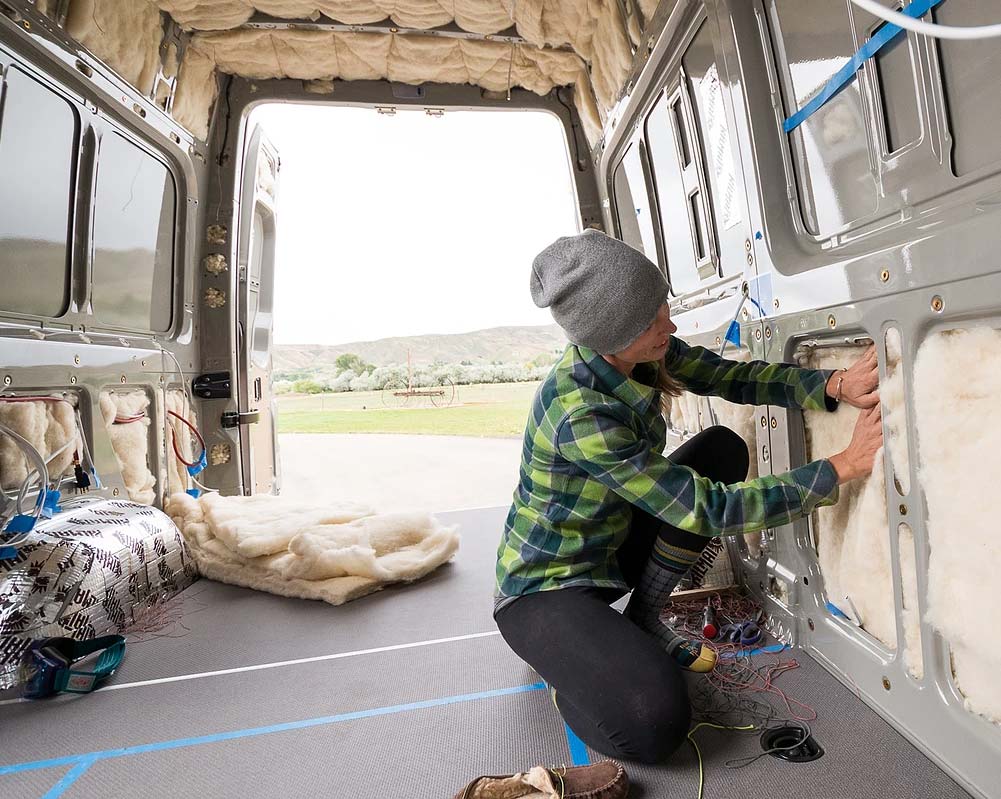
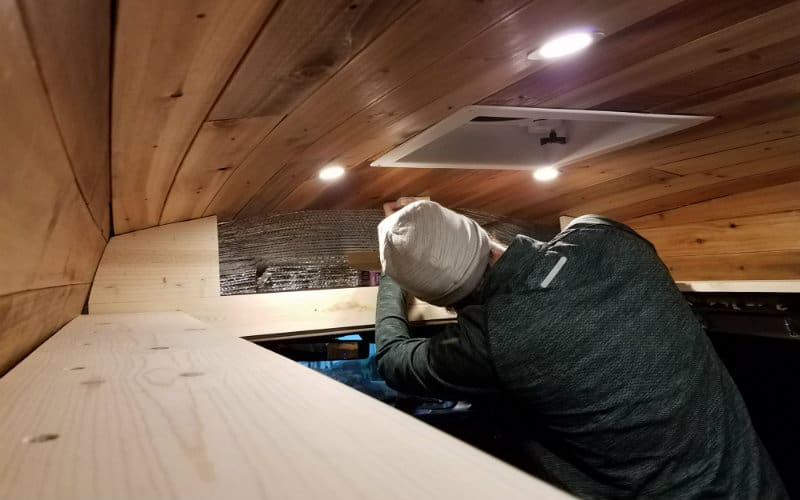
4.2- Walls, Ceiling, Overhead cabin & Sliding Door

  • THINSULATE

Installing Thinsulate insulation to a DIY conversion is a piece of cake: there’s no mess, no risk of messing things up, it’s not permanent and it’s easy to work with. You’ll be all done in a weekend. Here is how it goes:

  1. Cut Thinsulate to size (using tailor scissors)
  2. Apply 3M 90 spray adhesive to the van wall and on the white face of the Thinsulate
  3. Wait 30-60 seconds for the adhesive to become tacky
  4. Press the Thinsulate against the wall
  5. That’s all!

How does it performs in real-life? Since we moved full-time in our van (2017), we had anything between -22F (-30C) and +95F (+35C) and we’re in a good position to say it’s a tried-and-true van insulation material. If we had to build another van, we’d use Thinsulate insulation again without any hesitation.

Posted in cargo van, Commercial Van, Ideas & Tips

The million dollar question: ‘How do i insulate my van?

https://gnomadhome.com/wp-content/uploads/2018/01/Van-Build-Insulation_2000x1250-1024x640.jpg
The million dollar question: ‘How do i insulate my van?

How you decide to insulate (and ventilate) your van conversion could mean the difference between living comfortably for years to come or handing in the towel as soon as you experience a cold night. Sleeping in a freezing cold van, damp from condensation is not something anyone wants. Good insulation is paramount for living a long and happy vanlife.

A quick google or search through van conversion forums and you’ll find yourself a bottomless pit of opinions. It’s a bit of a minefield and it can sometimes leave you with more questions than answers.

By no means am I claiming to know the absolute best method for insulating your van; I am simply sharing a guide to what I have done, why I have done it and most importantly, sharing my opinion on how well it has or hasn’t worked.

BENEFITS OF GOOD INSULATION AND VENTILATION:

  • Temperature Control: Quicker to warm in the winter and easier to keep cool in the summer.
  • Minimise Condensation: helps keep condensation to a minimum = no damp/mould.
  • Smells better:  Good ventilation helps reduce any odours, such as cooking, dogs or damp smells.
  • Protects your van:  Your van may last longer. less damp means less rust/rot.
  • Creates a sound barrier: Insulation can significantly help block outside noise.

These are just some of benefits from a well insulated van. For me, installing the insulation and creating good airflow was a game changer and has made our van a more comfortable place to live.

No doubt, there will be plenty who say our idea of insulation is wrong and you should follow their way. One look online and you see hundreds of different opinions on the “correct” way to insulate. My advice is to take advice from those who have real experience with building and living in a van and then do what makes sense to you.

For me, good insulation comes down to two things:

  1. A sealed moisture barrier that prevents condensation.
  2. A good quality non-absorbant insulator to retain heat.

Condensation is the bane of Vanlife. It leads to damp, which leads to mould and rot, which leads to a very unhappy camper.
I cannot stress enough just how important it is to keep moisture at bay, it will be one of the biggest factors to your comfort level while travelling.

As well as keeping moisture away, you’ll want to keep heat in. Whichever way you decide to heat your van, you’ll want to retain that heat for as long as possible, a good insulator like Celotex is essential for keeping warm.

 FLOOR

STEP 1: LAY BATTENS AND FOAM INSULATION. 

Once the paint had cured and we had applied the sound deadening, we then measured and cut  the wooden battens and foam boards to fit and rested them in place, spacing roughly 30cm apart. (NOTE: our van floor is not flat, it has high and low ridges, we made sure they all sat at the same depth ridge to ensure a level floor).

TIP: This may be an ideal time to pre-cut the ply sheets roughly to size to make it easier later. We didn’t do this and found it difficult lifting the sheets in and out once the supports and foam were installed. The reason i measured and cut afterwards was because our van (Mercedes Sprinter) widens and narrows over the height of the van and i was worried i’d cut the ply too small if i measured before the battens were in.

STEP 2: LAY THE FOIL MOISTURE BARRIER.

One of the key components in keeping condensation at bay is a good moisture barrier. This such a crucial step as it stops any moist, cold air from making contact with the metal panels behind the insulation, which in turn will create condensation. For this to work, the space between the moisture barrier and the van needs to be completely sealed. Any gaps in the barrier will allow moisture build up and before you know it, you’ll have a damp and smelly camper van.

WALLS AND CEILING

The walls and ceiling are fitted with roughly the same method as described for the floor. Celotex boards were cut to shape and held in place with adhesive spray, and expanding foam used to fill any awkward gaps. The battens were then fixed vertically every 500mm using self 35mm self drilling screws and adhesive spray was used to hold the foil barrier in place while we used foil tape to secure and seal.

It could have done the same thing and only used only cladding on the walls, but it wouldn’t have had the same strength and stability as ply. Ply-lining also has the added benefit of being able to fix cabinets etc at any place on the wall.

VENTILATION:

Insulation without ventilation is a train without its tracks, to have a comfortable home-on-wheels, you need a balance of the two. Air circulation is essential for providing sufficient clean air and to help remove water vapour and pollutants. We achieved this by installing a skylight that has fixed ventilation at the front of the van (Dometic Seitz Mini Heki) and windows (Dometic S4 window) that have the ability to lock in a vented position at the rear.

This allow us to keep the van secure, allow ventilation and help keep the van cool in the summer months. I have seen people tackle this in many different combinations, such as two skylights (one at either end of the van), or a floor vent and a skylight/window, some skylights even have fans built in, some may work better than others and it will largely depend on you interior layout. One thing that is for sure: Ventilation is key.

CONCLUSION:

Van insulation can be perplexing, especially when there are infinite options and methods on how to go about it. My advice is to keep in mind that although your van may be your ‘home’ it’s definitely not a ‘house’ and you can’t apply the same rules as you would to brick and mortar. A well sealed moisture barrier and good ventilation are key, this is the process we used to insulate our camper and after living in it through this cold and wet winter, its safe to say it’s been an absolute success.

Posted in Commercial Van, Ideas & Tips

5 Van Life Ideas For Your Next Campervan Conversion

van life ideas - kitch 2
5 Van Life Ideas For Your Next Campervan Conversion

Looking for work van shelving ideas to create the perfect work van conversion? Here is a list of 5 inspirational van builds to help you out. Whether you’re starting a new build or renovating your old van, be sure to give this article a read, first.

From electronic beds to a log cabin on wheels, we’ve scoured the internet to find the best and craziest van life ideas out there.

The Best Van Life Ideas You Must See To Believe

Here below, I present the culmination of our collective firsthand experiences (plus copious amounts of browsing the Internet): the top 5 best van clan ideas for any adventure!

Van Life Ideas 1-10: Practical Considerations

First and foremost, your van life ideas should be grounded in reality. It’s easy to daydream and go on flights of fancy about what you might do and how you might live on your adventure van. But remember that quality of life is important–as you’re going to be spending a lot of time in that space!

Idea #1 – A Stow-able Bed that Retracts into the Ceiling

This electronic, movable bed is our top van life ideal not only because it’s amazingly practical–it is just so cool! Struggling to decide between the convenience and comfort of a fixed bed and the thought of being able to pack it away and have more space? Well with a bed that can retract up into the ceiling, you can have both.

There are four posts that the bed base moves up and down; stowing away in unused ceiling space by day, then lowering down again just in time for bedtime. The advantages of this are that you simply make your bed in the morning, then send it zooming up, out of sight, giving you so much more space to play with through the day time.

This is the best, quickest way to have two completely different day and night setups. On the downside, the systems can be heavy and expensive, but if you can make it work then we think the positives greatly outweigh the negatives!

Idea #2 – Clever Storage Throughout the Van

Storage is essential within any home, but that’s especially true in van life. Because this is an alternative lifestyle, you’ll have to get clever with your storage ideas to meet your needs.

There are many different types of storage out there. Drawers work better than cupboards in a van, as it is easier to access their contents and they can be kept organised more easily. Pockets and pouches on the walls of your van can be a great way to store small items such as books and phones–especially in the bed area.

When thinking about storage, remember that things slide around when driving. Smaller spaces work well, as the items within them have less room to move. Also remember that any shelving will need something to keep the items from falling out; rope can be a good solution for this. Get clever and us every nook and cranny in your van, you can never have enough storage!

Idea #3 – Solar Panels for True Off-grid Living

If you’re wanting to build a true off grid home, then solar panels are a must have on your van! This is one of the most practical van life ideas: Endless free power to charge all of your gadgets while you’re on the go. 

Being able to draw as much power as you like, completely independent of campsite plug-ins will greatly enhance the feeling of independence of and self-suficiency. Once you’ve gone solar, you will never want to go back. 

I know what you’re thinking: “what about when it isn’t sunny?” Well first, solar panels don’t need bright sun and clear blue skies to be effective, although they obviously work better in these conditions. Second, it’s quite possible to rig your van with a batter, where you can store the sun’s energy for a rainy day. Finally, producing your own power to cook, heat showers, and power gadgets is a great way to lower your carbon footprint. So, what are you waiting for?!

Idea #4 – Nothing Beats Fixed Beds at the End of the Day

Just picture this; you’ve had an amazing day out on the trail, you’ve just finished eating a beautifully cooked meal, and you’re more than ready to climb into your warm, soft bed. But wait, where is the bed? Oh, of course, it’s packed away and needs putting together and then making with a sheet and the duvet and pillows… nooooo! Avoid the bed building doom and consider a fixed bed in your campervan conversions.

Having a bed constantly out really makes a campervan feel like somewhere you could spend a lot of time. Having to build your bed at the end of each day just isn’t ideal, and anyone that’s been in this position would agree that having a fixed bed is a true luxury.

Some may argue that you lose so much space in the daytime but more often than not, you’ll find that even with a fixed bed you’ll still have enough space to have everything else you may want in a van, even a seating area and table. Plus, you gain so much handy storage underneath the bed, and by not having a space to pack your duvet into every day. This is one of the van life ideas that is seriously worth considering.

Idea #5 – Swivelling Van Seats Up Front

The cab area in campers is often lost to those hours spent driving–and is rarely more than a dumping ground for outdoor coats and shoes that have nowhere else to go. Try making a feature out of the seats, rather than leaving them an afterthought for a little van life Aikido.

Enabling one or both of the front seats to spin round and become chairs in the living area of the van means that you don’t need to take up extra space in the back of your van by building another seating area. The front seats in a campervan are usually more comfortable than the standard bench seating, so it makes sense to utilise the comfort! To really tie it all together, add some beautiful covers that go with the interior of your van.

Posted in Commercial Van, Ideas & Tips

5 Space-Saving Storage Ideas for a DIY Van Conversion

https://havelockwool.com/wp-content/uploads/2018/03/Van-Insulation-Installation-e1529003652744.jpg
11 Space-Saving Storage Ideas for a DIY Van Conversion

It’s incredibly important to keep your space organized when you live in a van. You may not have many belongings, but in a small space things can quickly get out of hand if you don’t have a good place to put everything. That’s why planning your storage areas and using every available inch is so vital.

In this post, i will go over the best van shelving ideas for your van build. If you’re looking for ways to maximize the space inside your van, I hope these give you some inspiration!

1. Underneath the Bed Platform

underbed trunk storage

Built your bed platform tall enough to have plenty of storage space underneath. The bed is two feet above the floor of the van, which easily allows us to store all of our bulkier items. Instruments (guitar, banjo, mandolin, and ukulele), tools, a telescoping ladder, extra fuel for our alcohol stove, propane, our battery box, extra dog food, shower stuff, gas can, spare water jug, extra solar panel on a folding stand, and all of our camping/backpacking gear. You name it, it’s under there.

inside van storage access

Because of the way we built our pullout bed frame, we can also access this underbed storage from the main living area inside the van. All we have to do is move the back cushion out of the way. We may not be able to get out the guitar without opening the trunk, but it’s easy to grab the ukulele and mandolin for an impromptu jam sesh while it’s raining outside.

2. Bedside Storage Shelves and Cup Holders

bed shelf and cup holder john

When you are laying in bed, we like to have easy access to our books, phones, and water bottles. So we built storage shelves in the space between the bed and the van’s walls that hold everything we need nearby.

The shelves sit a few inches below the sides of the bed frame, allowing us to snugly set things in there so they won’t tip over or move around.

cup holder

The cup holders are also made out of ½” birch plywood, which is much stronger and sturdier than typical plywood. We cut a square platform and a horseshoe-shaped piece with a jigsaw, and screwed them both to a rectangular support piece using 1-⅝” self-tapping screws. Then, we screwed the support pieces directly to the walls, and added 1-½” angle brackets underneath for extra stability.

3. Front-Access Storage Compartments Over Wheel Wells

workout storage box

The space around the wheel wells can be tough to put to good use, and it’s very easy for it to end up as dead space. In our van, we decided to build front-access storage compartments above each wheel well. One side holds all of our workout stuff – yoga mats and accessories, weights, resistance bands, jump rope, and XTF90 DVDs. The other side holds our GoPro and miscellaneous camera gear.

To build these, we once again used ½” birch plywood, cut to fit the gap between the bed frame support legs and the walls. The plywood shelf sits directly on top of the wheel wells, secured using 1-½” angle brackets attached to the wall on one side and the bed frame on the other.

workout storage box empty

The rear support wall is another piece of birch plywood, bracketed to the wall, floor, and shelf.

These storage compartments are great for tucking things out of the way, while also allowing us to access them quickly and easily.

4. Flip-Top Storage Bench

Fliptop Bench Closed

Our bench has a hinged flip top that lets us access the space underneath it. This area is home to a lot of the items we may not need on a daily basis. Things like our shoes, our “extras” box (which is filled with spare items or things we may need for repairs), batteries, paper towels – and anything else we don’t need immediate access to. There’s also a separate compartment that holds all of our electrical components.

storage bench no cushion

The storage bench integrates fully into our layout design. The cushions are actually pieces of our mattress, and they fit into the bed frame when it’s fully extended.

storage bench open

The bench also works in concert with our kitchen cabinets to save space and maximize storage. It’s always important to think about how everything fits together when designing your van. It can be like a big game of Tetris sometimes.

5. Front and Back Closets Under High Topper

pantry closed

Our conversion van originally had a media center with TV/VCR above the front cab and little storage cubbies above the rear bench seat. When we gutted the van and ripped all this out, we discovered spacious shelves in these areas that were perfect for storage. So we decided to build a pantry over the front cab and a closet for our clothes in the rear.

building the pantry

To turn these into storage areas, we first insulated them by lining them with reflectix and foil tape. The shelves were already framed with wood, so we were able to screw 1×3 facing directly to the frame. The facing also creates a lip to the shelf, which prevents things from sliding out while driving.

Posted in cargo van, Commercial Van

The Benefits of Work Van Flooring for Your Vehicle

The Benefits of Work Van Flooring for Your Vehicle

If you’re looking at upfitting your commercial van, there are plenty of parts and accessories to choose from. Don’t overlook work van flooring – it offers several benefits that make it a great addition to your vehicle.

Safety

No tradesperson should overlook the benefit of improved safety. Work van flooring is designed to prevent slips. When you’re on the clock, you move quick. Especially when the weather is rough, losing your footing could pose a major risk.

Adrian Steel’s most popular workmats use a unique rubber diamond tread that gives you extra grip. This keeps your feet on the ground when you’re surrounded by sharp metal tools.

Protection

Your vehicle is inseparable from your success. If it gets damaged, it could mean days of lost work and income. Work van flooring adds an additional layer of protection to your vehicle. You won’t need to worry about dropping your hammer or sharp turns sending power tools crashing into your van.

Reduce Noise

While partitions are the best way to help minimize noise for contractors on the go, work van flooring plays a big role too. Rubber workmats go a long way in dampening any sound in the cargo area of your van, further reducing the metal clangs and bangs of your day-to-day operation.

Noise isn’t just annoying. It can be a distraction on the road. When you reduce the noise in your van, you’re further increasing safety. That keeps you working and earning.

Easier to Clean

No matter what type of trade you work in, things can get messy in the back of your van. Every time you step into the back during a rainy day, you’re tracking mud and moisture inside.

Cleaning up the back of a work van isn’t fun, but it is necessary. When you have custom van flooring, it’s typically easier to keep spotless than the standard cargo area.

Professional Appearance

Presentation is key for any contract worker. You want to leave a good impression at every step of the process. Well-kept van exteriors are obvious, but your clients will often get a chance to see in the back of your van too.

In addition to being easier to keep clean, work van flooring just looks better. It offers a finished appearance that can make your van or fleet look well-maintained. That impression will play a role in generating repeating business.

Finding the Right Work Van Flooring

Depending on the model of your vehicle, you may have multiple options for readily-available flooring. There are three types of work van floor materials:

Rubber – The most affordable option, rubber mats are popular for the increased grip, sound dampening and low cost.

Composite– For vehicles like ProMaster, composite flooring is another great option that uses special texture to improve gripping and give your work van a more professional appearance.

Finding the Right Upfitter

As custom flooring for your van will act as a foundation for other upfit parts to rest on, it’s important that you trust its installation to a reputable work van upfitter. You don’t want to install custom work van flooring only to later find out that it’s uneven or damaged!

Posted in Commercial Van, wheelchair van

Advantages Of Wheelchair Accessible Vans

Advantages Of Wheelchair Accessible Vans

There are a lot of people who utilize wheelchairs that don’t enjoy traveling because of how difficult it is.  This can make traveling, as well as daily tasks such as going to the grocery store, more difficult.  That being said, there are now wheelchair vans that make it easier to travel in a wheelchair. Wheelchair vans are vehicles that have been modified to comfortably transport wheelchair passengers.  These vans can be bought if you need them for long periods of time or rented for short-term trips as well.  Here are some of the advantages of a wheelchair van.

Easy To Get In And Out

When you’re in a wheelchair, it’s challenging to get in and out of a regular sized car. wheelchair vans, on the other hand, use ramps and lifts so that the passenger can safely and easily enter and exit the vehicle.  They also have lowered floors and higher ceilings to make the process easier.

Comfortability

As said before, it is easier to get in and out of a wheelchair van, meaning that the wheelchair passenger, along with the caregiver, won’t feel the pressure on their back and shoulders.  In addition, since these vans are specially made for wheelchairs, they are more spacious inside the wheelchair van.

Multiple Passengers

There are different sizes of wheelchair vans so that you are able to choose the van that best fits your needs.  Some vans are designed to carry one wheelchair, while others are designed to carry 2.  The amount of other passengers that a van can hold also varies; some of the bigger vans can hold 9 to 12 other passengers.  The advantage of this is that a van can transport an entire family.

Increased Safety

These wheelchair vans are built for safety and have wheelchair locking systems that keep the passengers safe while riding in the van. If you’re interested in a wheelchair van, contact your local provider for more information.  They will help you select the wheelchair van that best fits your needs.

Posted in Commercial Van, wheelchair van

Will Medicaid Pay for a Wheelchair Van?

Will Medicaid Pay for a Wheelchair Van?

When it comes to buying new wheelchair van, there can often be a lot more to consider than when you purchase a standard vehicle off a dealership lot. Not only is that because there are accessibility features to choose like transfer seats, tie downs and hand controls, but there are also other factors that may come into the equation like disability vehicle grants or disabled veterans benefits. That’s why the most common questions we get from customers browsing our inventory of handicapped accessible vehicles for sale are related to financing.

More specifically they inquire about outside financial assistance from health insurance companies like Medicare or Medicaid. So, do these companies provide assistance for a wheelchair van purchase? For example, will Medicaid pay for a wheelchair van? Unfortunately, the answer is usually no. But, let’s take a closer look at the answer to this question.

Let’s Start with the Basics: Medicare vs Medicaid

More than 100 million people in the United States are covered under Medicare and Medicaid programs combined. Both of these are government funded health insurance programs, but have varying qualifications for the people they cover. Medicare generally covers those who are over 65 years of age or people living with disabilities who are under 65 years of age. Medicare insures anyone no matter what their income level is. Anyone utilizing Medicare as their health insurance coverage, helps cover expenses by paying monthly premiums and deductibles towards medical services.

Medicaid, however, is only offered to individuals or families with very low incomes. The people this program covers often pay no costs for covered medical services, and often only a small co-payment towards many other services. Medicaid often follows many of the same policies as Medicare when it comes to covering necessary medical expenses.

While both programs are very similar in what they will or won’t cover when it comes to medical expenses, it is important to remember that coverage and eligibility can vary based on the state you live in. It is always best to check with Medicare or Medicaid to see if you are eligible for coverage and what they will or won’t cover on your behalf.

Health Insurance Coverage for Wheelchair Vans

There are many people living with mobility disabilities who rely on programs like Medicare and Medicaid for health insurance coverage. Many of these individuals are living with disabilities causing them to rely on a wheelchair and thus needing to have a wheelchair in order to maintain mobility. Because their wheelchair can be covered (or parts of it covered) by their health insurance program, it’s easy to see why wheelchair users or their caregivers may assume that a wheelchair van is also covered by their health insurance plan.

While this is generally not true, in some states and instances it may be possible for some conversion features to be covered. Medicare Part B covers medically necessary durable medical equipment (DME) as prescribed by a doctor. DME must meet strict criteria to be covered such as the ability to be used repeatedly, used for a medical reason, not useful for someone who is not sick or injured, and has a lifetime expectancy of at least three years.

Often the DME must also be used within a person’s home, however some states may allow a doctor to prescribe wheelchair van conversion features like hand controls or transfer seats as medically necessary for a wheelchair user needing to drive themselves to appointments or to their job.

Other Financial Options for Wheelchair Vans

While health insurance coverage for a wheelchair van is highly unlikely for most wheelchair users to obtain, there are many other great options to help fund a wheelchair van. Some of these options include:

Disability Nonprofit Grants. 

Nonprofit organizations like The ALS Association, Muscular Dystrophy Association, National Multiple Sclerosis Association, the Paralyzed Veterans Association and many, many more like them may have grants available to assist wheelchair users in purchasing a wheelchair van or wheelchair van conversion. While these grants are only available for wheelchair users who are eligible based on their disability or other criteria, they are an incredibly valuable resource for wheelchair users when they are available to them.

Veteran’s Affairs Funding. 

Veterans may be eligible for financial assistance towards a wheelchair van or wheelchair van conversion through the Veteran’s Affairs office. Paperwork is often required to determine eligibility and can be obtained at your local VA Offices.

State or County Grants. 

Wheelchair users may also be eligible for local grants made available through their State or the County they live in. These grants can be used for a variety of accessible conversions including making a person’s home more wheelchair accessible. These grants may not be available in all areas, but contacting your local government offices is a great way to determine if any grants are currently available or may become available in the near future.

Financing.

Wheelchair users that still need additional funds for a wheelchair van can take advantage of financing.

Posted in Uncategorized

Van Insulation Tips For Your Campervan Conversion

https://gnomadhome.com/wp-content/uploads/2018/01/Van-Build-Insulation_2000x1250-1024x640.jpg
Van Insulation Tips For Your Campervan Conversion

Van insulation may sound like a boring topic, but if you’re converting a camper yourself, then it is one of the most important things to do correctly. Choosing the wrong type of insulation, or not using it correctly, can lead to uncomfortable temperatures inside your rolling home. Being too hot or too cold is annoying and can really lower morale on your trip. This is especially true if it interferes with your sleep.

Installing van insulation is one of the first steps in a conversion, so you will want to do your research before starting your build. It is also tough to go back and add insulation once your build is complete. You would basically have to deconstruct your whole van to add it in and then rebuild, something you definitely want to avoid. This is a process you want to get right the first time.

What Is Van Insulation For?

Van insulation is the first defence against the outside temperature. Without it, your camper is little more than a tin can, and heat will escape, or enter very quickly. You will also find it challenging to keep your van warm when the heater is on, as all of the heat will escape through the walls. The same goes for keeping it cool inside if you have an air conditioning unit.

Proper insulation is especially important if you plan on travelling in colder climates or anywhere you might want to wear a coat outside. You don’t want to have to wear a jacket inside too! Even if you plan on only using your camper in warm climates, you will probably find it gets cool enough at night to warrant installing insulation, and you will want it to stop your van getting too hot.

Types Of Insulation

There are many different types of insulation that you can use in a camper van. Some factors in choosing what is right for you include, price, efficiency, how environmentally friendly the product is and how you plan on installing it.

We’re going to go through several types of van insulation to help you decide what will work best for your camper.

1. Spray Foam Insulation

Van insulation - spray foam

Spray foam insulation is the most efficient form of insulation that you can find. It creates a thick, even layer of insulation that expands to fill every crevice on the surface it is applied to, creating an airtight seal in all areas.

This means there won’t be any draughty spots and that you can insulate even the trickiest places. Spray foam insulation also creates a moisture barrier, ensuring no damp will build up behind your walls, due to condensation.

On the downside, spray foam insulation isn’t something you can do on your own as it requires specialist equipment. Therefore, you will need to hire a company to complete the task for you, which will be considerably more expensive than any other DIY solutions.

Another hurdle unique to spray foam insulation is trimming the foam down once it has been installed, to create a flat surface to build on. This process can be time-consuming, tricky and messy.

2. Foam Board (e.g., Celotex)

Foam board insulation in camper

One of the most popular van insulation types is a foam board product such as Celotex. These rigid boards of insulation are easy to work with, as you can cut through them with a saw to fit the space you are working with.

Celotex comes in different thicknesses, so you can adjust accordingly depending on how much van insulation you desire. It is a very efficient product that is relatively affordable.

While the rigidity makes Celotex easy to use, it does mean it is not suitable if your camper walls are even slightly curved, which is the case for many vans.

If your insulation isn’t flush with the wall of your van, you will create an air pocket, meaning the insulation is less effective and moisture could build up. If your walls are straight, then you will need to build a frame to secure the foam boards in place.

3. Roll Insulation (e.g., Rockwool)

Van insulation - Rockwool in camper

If your van does have curved walls, then Rockwool is a good van insulation solution. The easiest way to install this insulation is as you construct the wall.

As your build can feed the insulation behind your wall panels, so they hold it in place. This means you do not need to create a whole frame just for the insulation. Roll insulation is the most affordable insulation option as it is widely used and is easy to source.

However, although roll insulation is an efficient product, you may need to use more Rockwool to achieve the same level of insulation as the foam boards, as it is not as dense.

4. Sheep’s Wool Insulation

Sheep’s wool insulation

If you are conscious of the environment and are looking to convert your camper in the most sustainable way possible, then sheep’s wool insulation could be the option for you.

This product works much in the same way as roll insulation but is more environmentally friendly as it uses only natural fibres, from sheep. It is also renewable as the sheep need to be sheered every year and it can be recycled at the end of its life, or made from recycled products.

The main downfall to using sheep’s wool insulation is that it is much more expensive than other forms of insulation, except for spray foam. This is often the case with sustainable products, and if you can afford it then, in my opinion, the pros outweigh the cons.

5. Foil Insulation

Van insulation - foil insulation

Foil insulation is a good form of van insulation when used in conjunction with other products. The idea of foil insulation is that is reflects heat back into your van. This won’t be sufficient as your only form of insulation but might help he overall effect. It is cheap and easy to work with.

Insulating The Floor

Insulating the floor of your campervan is essential to keeping your tiny home warm. We somehow forgot to insulate our floor and regret it massively every time the cold weather kicks in.

Many heaters in campers are stored at floor level, and without insulation, much of this heat instantly escapes through the thin floor.

Any type of van insulation can be used on the floor of your camper, but I think foam boards would be most effective due to their rigidity. This solid platform would make a great base to lay your flooring on and would be easy to work with.

Posted in Commercial Van, Van Ladder Racks

Best Van Ladder Rack of 2020

Van ladder Racks - Utility Rig - System One aluminum ladder racks, truck  racks, van racks, truck tool boxes
Best Van Ladder Rack of 2020

Businesses that imply working with own equipment require proper transportation means, or else, it will not work. Contractors, small and large companies usually have trucks or vans that can be sent out on the field whenever required and, in those vehicles, there is every single piece of equipment that the workers might need. Giving the fact that some tools and accessories are bigger in length and width than the actual vehicle, additional racks are needed. Ladder racks for trucks are some of the most commonly used among contractors, as it represents the only safe way to transport a ladder.

If you are wondering whether a ladder rack is optional when doing field work, the answer is 100% no. Although it is not mandatory by law, it is crucial to own one in order to be able to perform your duties well. Otherwise, how would you be able to climb or to reach items at height? Borrowing a ladder or asking your clients to provide you with one is not really a professional approach.

There are a few benefits that come with the use of a ladder rack:

  • You save space and can use it to store other pieces of equipment
  • You save time by optimizing the unloading and reloading process
  • You get to protect your equipment
  • You get to transport the ladder safely

If you are currently doing your research in order to buy a new ladder rack for van, but you aren’t sure what is the difference between one product and the other, then you are in the right place. We have selected five of the best-selling models and reviewed them for you, based on personal observations and consumer feedback. Below, you will see the pros and cons of each and every product in particular, so that you can compare the advantages and the downsides and make the best choice for your needs.

Best Products of 2020

Oklead Truck Ladder Rack for Pickup Trucks

Ladders are sturdy pieces of equipment that allow you to reach a wide variety of spots, electrical systems and even the roof. To be that sturdy, that have to be made of heavy-duty materials, which is why transporting them has to be done carefully, as they can scratch or damage the interior of the car.

Using a truck ladder rack is the wisest choice. This product from Oklead comes at a fair price. It is worth the price, giving its features and high-quality materials. It can be adjusted anywhere between 46 and 67 inches. It is made of steel and has sturdy steel racks with a capacity of 500 pounds. installing this rack on your truck is a breeze. It comes with all the installation hardware that you need: 12 bolts, 12 lock washers, 12 flat washers, 12 nuts, a set of 8 screws and a hexagonal wrench.

This model includes detailed instructions, so you will be able to set it up without any additional help. The only challenge could be the fact that some drilling is required in order to install it. If you have experience setting up racks, then it will be easy for you. This product is practical and safe to use. The fact that it is adjustable makes it easier for you even take it off your truck and install it on a different one.

What’s to like?

  • It is fairly priced
  • It has a sturdy design
  • It is made of steel
  • It is a heavy-duty rack
  • It is adjustable
  • It includes all installation hardware
  • It has matt black powder coating
  • It has a 500-pound capacity
  • It is covered by a one-year warranty

What’s not to like?

  • It requires drilling

AA-Racks X35 Truck Rack with (8) Non-Drilling C-Clamps

This standard bed rack model is known to be extremely efficient when it comes to ladder transportation, as well as the transportation of any other type of large sized equipment. Thanks to the extendable top bar, it fits different kinds of truck beds. Unlike other similar models, this product requires no drilling and includes a set of 8 C-clamps that help with the installation. However, just like any other non-drilling model, it isn’t compatible with utility track systems. Thanks to its easy-to-use set up system, it is easy to put on and take down whenever needed. It features a rope hook on the side of the uprights, so it provides the security you need.

Being powder coated in matte black, it is rust-resistant and has more durability over time. the C-clamps are made of aluminum, which also makes them durable, but more than that, lightweight. The top cross bar of this rack is extendable and can be adjusted for different size bed width, with a maximum of 71 inches. Thanks to its design, it offers 30.5 inches height to the clearance and 26 inches to the cross bar, so the roof of the vehicle will be protected at all times. Although this is a product that is compatible with most vehicles, it is important to check the on-drilling and compatibility list that the manufacturer offers.

What’s to like?

  • It is medium-priced
  • It is made of heavy-duty materials
  • It is adjustable
  • It is a non-drilling model
  • It includes 8 C-clamps made of aluminum
  • It is easy to install and take down
  • It has a side rope hook on all 4 sides
  • It is powder coated in matte black
  • It weighs 50 pounds
  • It is ideal for ladder transportation

What’s not to like?

  • It isn’t compatible with utility track systems

AA-Racks Model X3501 Short Bed Truck Ladder Rack

This is another ladder rack model manufactured by AA Products Inc. that is known for its high-quality. By comparison to the previous products presented in this list, it is pricier. However, it is worth every cent, as it has a unique design and it is made of heavy-duty materials that last in time. It comes with a bracket bar that is capable of strengthening the basic truck rack. There are two bracket bars included, each with 6/4 grade 8 carriage bolts. It includes two one-piece handrails that facilitate setting up the rack. Thanks to this system, you can enjoy the benefits of the grab and hop method.

This X35 rack is ideal for ladder transportation, but it can also be used for kayaks or canoes. It can be installed on almost all kinds of trucks, having an extendable top cross-bar. It has an inner bed width that can be adjusted between 51 and 71 inches and a height that can be set to 30.5 inches to the clearance and 26 inches to the cross bar. Its wide compatibility is also due to the adjustability of the over-cab extension bar and side bars. Most users of this product don’t only transport ladders on it, but also find it convenient for large tool box transportation.

What’s to like?

  • It has a great design
  • It is ideal for ladder, toolbox or kayak transportation
  • It is adjustable
  • It has two bracket bars
  • It is easy to install
  • It has 30.5 inches distance to the cross bar
  • It has adjustable over cab extension and side bars
  • It has nicely designed support bars
  • It has a grab and hop system for the truck bed
  • It includes all required installation hardware

What’s not to like?

  • It is pricier than most ladder rack models
  • It required drilling

AA-Racks Model DX36 Universal Two Bar Drilling

If the previous products that we analyzed in this list so far were mostly designed to truck use, this model is suitable for van use. Its advantage is that it is smaller in size and more inexpensive. The same model is also available in 3-bar, so you might want to check that out, too. This product from AA Products Inc. has a 13-gauge steel construction, a maximum capacity of 350 pounds and a 4-inch total height clearance. Its cross bars are 1.2 inches in diameter. One of the nice features of this model is the fact that the length of the bars is adjustable and can be set anywhere between 35 to 63 inches. Another important detail is the fact that it has an 11-gauge high-strength steel mounting base.

Although this is a great product that can be easily installed, it requires drilling, so you might want to think twice whether you can do that or not. A downside is the fact that it doesn’t include accessories for the height clearance, so you need to buy them separately. The total size of this model is 36.6 x 8.3 x 10.6 inches and it weighs 17.6 pounds. It is painted in sandy black and it is fixed, not folding.

What’s to like?

  • It is inexpensive
  • It is practical
  • It is easy to install
  • It mounts on the roof of the van
  • It has a steel construction
  • It has adjustable cross bar
  • It has high-strength steel mounting base
  • It has 4-inch total height clearance
  • It has 2 bars
  • It comes in sandy black

What’s not to like?

  • It doesn’t include accessories
  • It requires drilling for installation

EAG Adjustable Truck Contractor Ladder Rack

If you are looking for a seriously advanced ladder rack that can be used to transport all kinds of equipment that a contractor might need with ease, then this is the option that you should consider most. Its price is higher than most products in this list, but let’s not forget that it is designed for professional use and that it is made of the highest quality materials.

This product has some great features that should be taken into consideration before deciding on other model. First of all, it is fully adjustable, which means that it can be customized in any way the user wants. Second, it has the highest capacity seen in this list so far. It supports a total weight of 1000 pounds. Its third advantage is that it is made of 2-inch tubing.

This product isn’t only practical and strong, but it also has a gorgeous design. It has a glossy black finish that screams care and professionalism. Another advantage worth mentioning is the fact that it comes with a removable rear bar. Also, it has a gusseted corner that offers extra strength. Last, but not least, it includes a built-in air deflector that helps eliminate cab noise. If you want to buy a product that is highly convenient and versatile in the context of any contractor type of work, you just found your match.

What’s to like?

  • It is made of the highest quality materials
  • It is fully adjustable
  • It supports up to 1000 pounds
  • It is made of .120 wall 2-inch tubing
  • It has glossy black finish
  • Its rear bar is removable
  • It includes gold zinc plated hardware
  • It is easy to install
  • It has built-in air deflector
  • It has built-in tie down in every leg

What’s not to like?

  • It only fits compact trucks
Posted in Commercial Van, Van Ladder Racks

How to Choose the Right Ladder Rack or Truck Rack

Decide if you prefer universal or model-specific
How to Choose the Right Ladder Rack or Truck Rack

For the person who likes to maximize their pickup truck’s working potential, selecting the right ladder rack or truck rack will lead to easier loading, hauling, and unloading day in and day out. Here are some of the factors to consider when looking for the best ladder rack for van:

Think about what you will be hauling

Think about what you will be hauling

If you plan on loading up a mix of items that include long skinny objects like ladders, kayaks, pipes or lumber, then a half-width rack might be for you. Half-width racks will only take up about half the space of a full-width rack, and they are perfect for narrow cargo while still providing space for tall or large items like furniture, building supplies, ATVs, etc. A full-width rack can easily carry wide, larger items such as plywood, or multiple kayaks, while still giving you open access to your truck bed. For the best of both worlds, consider installing two half-width racks for narrow items which will leave enough room for taller items in the center of your bed.


Find the maximum total weight your truck can haul

Find the maximum total weight your truck can haul

To make sure that your truck can handle the weight of a ladder rack and the additional load, find out your truck’s gross vehicle weight rating. This is usually located on a sticker inside your driver’s side door, or in your owner’s manual. If you have plans to transport larger, bulkier items, get a weight estimate on them and determine how much leeway you have on the weight of a truck rack. Ultimately, the combined weight of everything in or on your car, plus your car itself, should never exceed the gross vehicle weight rating. To find out more about vehicle weight ratings. If you typically haul light items, such as PVC pipes and aluminum ladders, then maybe a simple over bed rack set up or truck bed extender will be enough for your needs without adding too much weight.


Weigh the advantages of steel versus aluminum

Weigh the advantages of steel versus aluminum

Most truck racks are made from either steel or aluminum. Both materials have pros and cons, however one might make more sense that the other for your needs. Steel racks are extremely strong and durable, with greater resistance to fatigue and bending than aluminum. If you’re loading and unloading heavy materials multiple times a day, you definitely want a product that will hold up under the stress. Steel racks are generally less expensive than aluminum racks, and while many steel racks are powder-coated for a longer life, steel is still more susceptible to rust and corrosion than aluminum. This can especially become a concern if you travel in states that use salt on the roads in winter. On the other hand, rust-resistance is aluminum’s middle name! Aluminum is not as dense as steel, and aluminum racks typically weigh about one third less than their steel counterparts, which can contribute to better gas mileage.

Decide if you prefer universal or model-specific

Do you splurge on a truck rack that’s tailored for your make and model or do you spend wisely and invest in a universal truck rack that you can use in multiple trucks for years to come? If you prefer to upgrade trucks every few years, or if your current truck is looking worse for wear, then a universal truck rack might be a better investment. You’ll be able to take it with you to your next truck, or use it on someone else’s truck if needed. Model-specific trucks racks are designed for a flawless, custom fit to your specific truck with only a few clean welded joints. They’re aesthetically pleasing, and usually more expensive than universal truck racks.


Think about additional accessories

Think about additional accessories

As you deliberate on what rack is right for you, you can also look into additional features. Some over bed racks come with side rails and removable cross bars for hauling taller cargo. Integrated headache racks are another great feature included in some truck racks, and will protect your cab window from being broken by loose cargo. Whichever truck rack you decide to purchase, it is important to make sure that all of your cargo is safely secured on your truck rack and in your truck bed. Cargo bars, truck bed nets, anchors, and tie downs will all ensure you and your cargo safely reach your destination.