Posted in Ladder racks

Ladder Rack Safety Tips: How to Secure Your Ladder Properly

Ladder Rack Safety Tips: How to Secure Your Ladder Properly

Securing your ladder properly on a ladder rack is crucial for both your safety and the safety of others on the road. Whether you are a contractor, tradesperson, or DIY enthusiast, following ladder rack safety tips ensures that your ladder is securely mounted, reducing the risk of accidents and damage. 

Here’s a guide on how to secure your ladder properly on a ladder rack for a van:

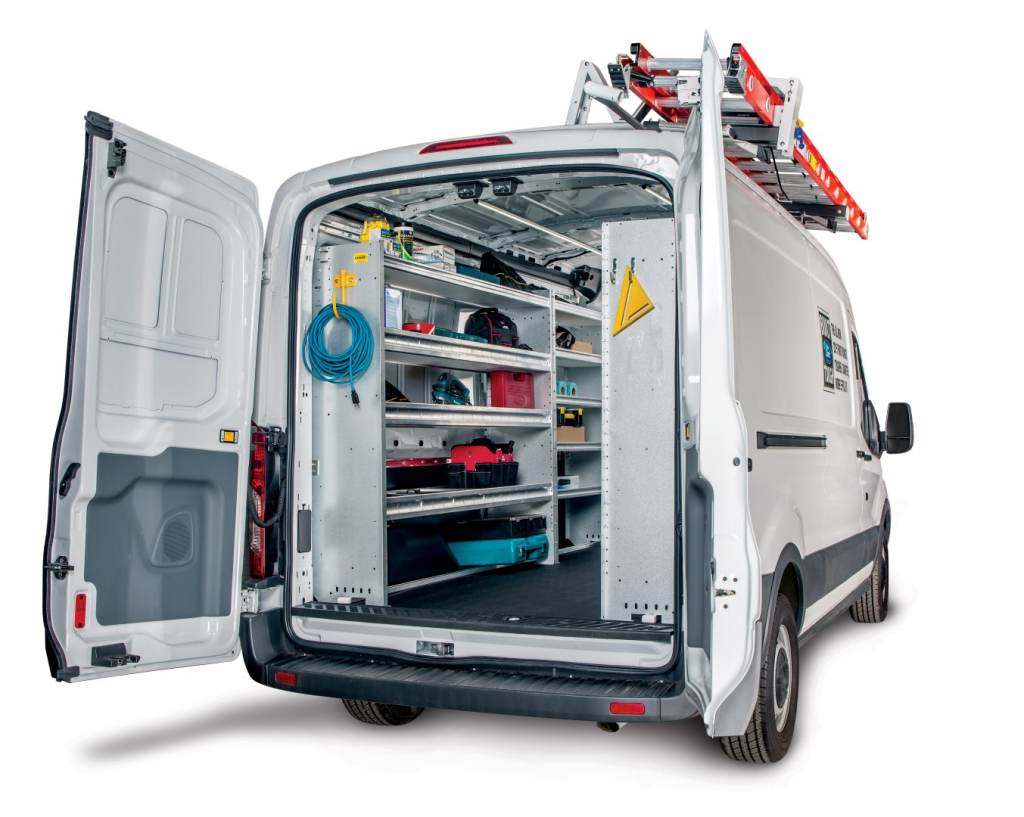
Choose the Right Ladder Rack: Begin by selecting a ladder rack that is suitable for your specific vehicle and ladder type. Ensure that the rack is designed to handle the length and weight of your ladder. Consider factors such as the material of the rack, its load capacity, and compatibility with your vehicle.

Inspect the Ladder: Before securing your ladder, inspect it for any signs of damage or wear. Check for bent or damaged rungs, cracks, or other structural issues. Ensure that the ladder is in good condition and meets safety standards. If you identify any defects, repair or replace the ladder before transporting it.

Measure and Adjust: Measure the length of your ladder and ensure that it aligns with the dimensions of your ladder rack. If your ladder rack is adjustable, customize its settings to match the size of your ladder. Proper measurements and adjustments prevent overhangs, reducing the risk of accidents during transportation.

Use Quality Straps and Tie-Downs: Invest in high-quality straps and tie-downs specifically designed for securing ladders. Ratchet straps or cam straps are commonly used for this purpose. Choose straps with adequate load capacity and ensure that they are in good condition without fraying or visible damage.

Follow the Manufacturer’s Guidelines: Adhere to the manufacturer’s guidelines for both the ladder and the ladder rack. Follow the recommended weight capacity, installation procedures, and any specific instructions provided by the manufacturer. This ensures that you are using the equipment as intended, promoting safety.

Position the Ladder Properly: Place the ladder on the ladder rack in a secure and balanced position. Ensure that it is centered and aligned with the vehicle. If your ladder is longer than the rack, use a flag or marker at the rear end to make it visible to other drivers, reducing the risk of collisions.

Secure Both Ends: Use tie-downs to secure both ends of the ladder to the ladder rack. Double-check that the ladder is tightly secured on both sides to prevent any movement during transit. Properly securing both ends minimizes the risk of the ladder shifting or coming loose while driving.

Apply Tension Evenly: When tightening the straps, apply tension evenly to both sides. Avoid over-tightening, as this can cause unnecessary stress on the ladder and the rack. The goal is to achieve a secure fit without causing damage to the ladder or the vehicle.

Secure Additional Equipment: If you have other equipment or materials on the ladder rack, secure them separately from the ladder. Use designated tie-down points or additional straps to prevent any items from interfering with the ladder or affecting its stability.

Regularly Check for Tightness: Periodically check the tightness of the straps during your journey, especially if you encounter rough terrain or significant vibrations. Regular checks ensure that the ladder remains securely fastened throughout the trip.

Avoid Excessive Speed: While driving with a ladder on the rack, adhere to speed limits and avoid excessive speeds. High speeds can create additional wind resistance and vibrations, increasing the stress on the ladder and the rack. Maintain a safe and controlled speed to ensure stability.

Use Flagging for Extended Loads: If your ladder extends beyond the rear of the vehicle, use bright-colored flagging or reflective markers. This improves visibility for other drivers, reducing the risk of accidents, especially during low-light conditions.

Securely Close Rear Doors: If your vehicle has rear doors, ensure that they are securely closed and latched. This prevents the possibility of the ladder interfering with the doors or causing damage during transit.

Consider Ladder Rack Accessories: Explore accessories designed specifically for ladder rack safety, such as ladder stabilizers or anti-sway brackets. These accessories enhance the stability of the ladder on the rack and reduce the risk of wobbling or shifting.

Training and Awareness: Train anyone who will be using the ladder rack on proper safety procedures. Emphasize the importance of following safety guidelines, securing the ladder correctly, and conducting regular checks. Awareness and training contribute to a safety-conscious culture.

By following these ladder rack safety tips, you can ensure that your ladder is securely and safely transported on your vehicle. Prioritizing proper securing methods, regular checks and adherence to safety guidelines minimizes the risk of accidents, protecting both you and other road users. Always prioritize safety when transporting ladders or other equipment to ensure a secure and incident-free journey.

Posted in Uncategorized

How to Customize Your Ladder Rack for Your Specific Needs?

How to Customize Your Ladder Rack for Your Specific Needs?

Customizing your ladder rack allows you to tailor it to your specific needs, making it more functional and efficient for your particular use case. Whether you’re a contractor, tradesperson, or outdoor enthusiast, a customized ladder rack can enhance your productivity and simplify your work. 

Here’s a guide on how to customize your ladder rack:

Assess Your Requirements: Before customizing your ladder rack, assess your specific requirements. Consider the types and sizes of ladders or equipment you need to transport regularly. Think about any additional items, such as tools, materials, or accessories, that you want to carry on your rack. This initial assessment will guide your customization efforts.

Choose the Right Material: Ladder racks come in various materials, including aluminum and steel. Each material has its own set of advantages. Aluminum is lightweight, corrosion-resistant, and suitable for applications where weight is a concern. Steel is more robust and durable, making it suitable for heavy-duty use. Choose the material that aligns with your preferences and usage requirements.

Select the Rack Type: Ladder racks for the vans come in different types, such as side-mounted racks, rear-mounted racks, and overhead racks. Each type has its advantages depending on the nature of your work and the accessibility you need. Side-mounted racks provide easy access, rear-mounted racks are ideal for vans with rear doors, and overhead racks maximize storage space.

Consider Adjustability: Opt for a ladder rack with adjustable features to accommodate different ladder sizes and shapes. Some racks come with adjustable crossbars, allowing you to customize the spacing based on your specific needs. An adjustable rack provides flexibility as your equipment requirements may change over time.

Incorporate Additional Tie-Down Points: Depending on the items you transport, consider adding extra tie-down points to your ladder rack. This is especially useful for securing irregularly shaped items, tools, or materials. Additional tie-down points provide enhanced stability during transit, ensuring that your load remains secure.

Install Locking Mechanisms: Security is crucial, especially if you leave your equipment unattended. Customize your ladder rack by installing locking mechanisms. Some racks come with built-in locks, while others may have provisions for adding padlocks or other security devices. This helps prevent theft and ensures that your valuable equipment remains safe.

Add Accessories for Versatility: Enhance the versatility of your ladder rack by adding accessories. Consider installing ladder rack accessories such as tool holders, conduit carriers, or cargo bins. These additions allow you to carry a variety of items beyond just ladders, making your rack more versatile and functional.

Implement Lighting Solutions: If you often work early in the morning or late into the evening, consider customizing your ladder rack with lighting solutions. LED lights or work lights can be mounted to the rack to provide illumination, improving visibility and safety during low-light conditions.

Explore Specialty Racks: Depending on your specific needs, explore specialty racks designed for particular equipment. For example, if you transport kayaks or other long items, consider a rack with adjustable and padded cradles. Specialty racks cater to unique requirements and ensure a secure and safe transport solution.

DIY Customizations: If you have specific customization ideas that aren’t available as off-the-shelf options, consider DIY modifications. This may include adding hooks, brackets, or storage solutions that you build or install yourself. Ensure that any DIY modifications maintain the structural integrity and safety of the ladder rack.

Regular Maintenance: Customizing your ladder rack isn’t a one-time process. Regular maintenance is essential to ensure that all customizations, including bolts, locks, and additional components, remain in good condition. Inspect your customized ladder rack periodically and address any issues promptly to maintain its functionality and safety.

In conclusion, customizing your ladder rack allows you to optimize its design for your specific needs, making it a valuable asset for your work or recreational activities. By assessing your requirements, choosing the right material, incorporating adjustability, and adding accessories, you can create a customized solution that enhances your efficiency and ensures the safe transport of your equipment. Whether you’re a professional tradesperson or an outdoor enthusiast, a customized ladder rack can be tailored to meet your unique needs.

Posted in Ranger Shelves

10 Creative Storage Ideas for Your Ranger Shelves

10 Creative Storage Ideas for Your Ranger Shelves

Ranger shelves, known for their versatility and functionality, provide a great opportunity to get creative with storage solutions. Whether you’re organizing a workspace, a garage, or a bedroom, maximizing the potential of your Ranger shelves can help declutter and enhance the overall aesthetic.

Here are 10 creative storage ideas for your Ranger shelves:

Color-Coded Bins: Utilize color-coded bins or storage baskets to add a pop of color while keeping items organized. Assign specific colors to different categories or types of items. This not only enhances the visual appeal but also makes it easy to locate items quickly.

Floating Bookshelves: Create a visually striking display by turning your Ranger shelves into floating bookshelves. Arrange books with the covers facing outward for a modern and artistic look. This not only provides easy access to your favorite reads but also adds a touch of sophistication to the space.

Magnetic Spice Rack: In a kitchen or pantry setting, transform your Ranger shelves into a magnetic spice rack. Attach magnetic strips or containers to the shelves, allowing you to neatly store and display your collection of spices. This not only saves space but also makes cooking more convenient.

Foldable Fabric Bins: Opt for foldable fabric bins or collapsible containers for a flexible storage solution. These bins can be easily folded and stored when not in use, allowing you to adapt the shelf space based on your current storage needs.

DIY Mason Jar Storage: Embrace a rustic and charming aesthetic by repurposing mason jars for storage. Attach the lids to the underside of your Ranger shelves and screw the jars onto the lids. This DIY mason jar storage solution is perfect for organizing small items like craft supplies, nuts and bolts, or stationery.

Cubbies for Shoes or Accessories: If your Ranger shelves are in a closet or entryway, transform them into cubbies for shoes, accessories, or even handbags. Use dividers or small bins to create designated spaces for each pair of shoes or category of accessories, ensuring a tidy and organized look.

Customized Drawer Units: Integrate drawer units into your Ranger shelves for concealed storage. These drawers can be customized to fit specific items or categories. Label each drawer for easy identification, creating a streamlined and organized appearance.

Vertical File Organizers: Convert your Ranger shelves into a vertical file organizer for documents, magazines, or mail. Install file holders directly onto the shelves or use freestanding vertical organizers to keep paperwork in order and easily accessible.

Pegboard Display: For a versatile and customizable solution, attach a pegboard to the back of your Ranger shelves. Use pegs, hooks, and baskets to hang and display various items such as tools, craft supplies, or kitchen utensils. This adds a practical and visually interesting element to your storage space.

Labeled Clear Containers: Maximize the visibility of your stored items by using clear containers. Label each container with its contents for quick identification. This approach works well for items like seasonal clothing, holiday decorations, or miscellaneous supplies.

Remember to consider both functionality and aesthetics when implementing these creative storage ideas. The key is to tailor the solutions to your specific needs while enhancing the overall look and organization of your space. With a bit of creativity, your Ranger shelves can become a stylish and efficient storage haven.

Posted in Ranger Shelves

How To Build Your Ranger Shelves for Your Van?

How To Build Your Ranger Shelves for Your Van?

Building ranger shelves for your van involves careful planning, precise measurements, and the use of sturdy materials. Ranger shelves, also known as modular shelving systems, offer a customizable and organized storage solution for your van. Here’s a step-by-step guide to help you build your ranger shelves:

Measure and Plan: Measure the interior dimensions of your van to determine the available space for the shelves. Consider the height, width, and depth of the shelving unit. Plan the layout based on your storage needs, taking into account the items you’ll be carrying.

Choose Materials: Select high-quality materials suitable for your van shelving. Plywood is a common choice for its strength and durability. Consider using materials that are lightweight to avoid adding unnecessary weight to your van.

Cut Plywood Sheets: Use a circular saw or a table saw to cut plywood sheets according to your measurements. Cut the pieces for the sides, back, bottom, and shelves. Ensure clean and precise cuts for a professional finish.

Assemble the Frame: Start by assembling the frame of the shelving unit. Attach the sides to the back using screws or bolts. Make sure the corners are square to ensure a stable and level structure. The back of the shelving unit should match the height of your van’s interior.

Add Horizontal Supports: Install horizontal supports between the sides to add stability and prevent sagging. These supports will also serve as attachment points for the shelves. Use screws or bolts to secure them in place.

Install Shelves: Position the shelves at the desired heights within the frame. Secure them to the vertical supports using screws or bolts. Ensure that each shelf is level and securely attached to support heavy loads.

Reinforce Joints: Reinforce the joints and connections by adding corner braces or brackets. This enhances the overall strength of the shelving unit and ensures it can withstand the vibrations and movements experienced during travel.

Consider Adjustable Shelves: For added flexibility, consider making some shelves adjustable. This allows you to customize the shelving arrangement based on the size of items you need to transport.

Add Backing: Consider adding a backing to the shelving unit for additional stability and to prevent items from sliding or falling out of the back. Plywood sheets can be used as a simple backing solution.

Sand and Finish: Sand the edges and surfaces of the shelves to create smooth and rounded corners. This not only enhances the appearance but also prevents injuries from sharp edges. Apply a finish or sealant to protect the wood and improve its longevity.

Install in Van: Carefully place the assembled shelving unit into your van. Ensure it fits snugly and securely. You may need to secure the shelving unit to the van’s interior using brackets or fasteners for added stability during transit.

Test and Adjust: Load the shelves with representative items to ensure they can withstand the weight and stay secure during movement. Make any necessary adjustments to the shelving unit based on your testing.

Add Dividers or Bins: To enhance organization, consider adding dividers or bins to individual shelves. This helps keep smaller items in place and prevents them from shifting during transit.

Building ranger shelves for your van requires precision, attention to detail, and a focus on creating a sturdy and functional storage solution. By carefully planning, measuring, and assembling the shelves, you can customize your van’s interior to meet your specific storage needs.

Posted in Ladder racks

The Different Types of Ladder Racks for Vans and Their Uses

The Different Types of Ladder Racks for Vans and Their Uses

Ladder racks for the vans are essential accessories for businesses and professionals in various industries, enabling efficient transportation of ladders and other long or oversized items. These racks come in different types, each designed to meet specific needs and preferences. 

Here are the different types of ladder racks for vans and their uses:

Conduit Racks: Conduit racks are designed to carry long, narrow items such as conduit pipes, PVC pipes, or trim pieces. These racks typically feature a series of tubes or channels that securely hold and organize the items, preventing them from shifting during transit. Conduit racks are commonly used by electricians, plumbers, and construction professionals.

Drop-Down Racks: Drop-down ladder racks provide a convenient mechanism for lowering the ladder to a more accessible height. This feature is especially beneficial for users who may have difficulty reaching or lifting heavy ladders onto the roof of the van. Drop-down racks enhance safety and ease of use, making them suitable for various professions.

Clamp-On Racks: Clamp-on ladder racks are versatile and can be easily installed on the roof or side of a van without the need for drilling or permanent modifications. They typically feature adjustable clamps that secure the ladder in place. Clamp-on racks are ideal for users who want a removable and adjustable solution that can accommodate different ladder sizes.

Overhead Racks: Overhead ladder racks are designed to carry ladders parallel to the van’s roof, providing a streamlined and aerodynamic profile. This design helps reduce wind resistance and noise during travel. Overhead racks are suitable for vans with limited roof space and are commonly used by contractors, painters, and other professionals requiring frequent access to their ladders.

Side-Mounted Racks: Side-mounted ladder racks are installed on the sides of the van, allowing easy access to the ladder without requiring it to be lifted onto the roof. These racks are suitable for users who prefer a more accessible and ergonomic solution for loading and unloading ladders. Side-mounted racks are commonly used by service technicians and maintenance professionals.

Interior Ladder Racks: Interior ladder racks are installed within the cargo area of the van, providing a secure and weather-protected storage solution. These racks are suitable for users who prefer to keep their ladders inside the van to protect them from the elements and potential theft. Interior racks are often used in combination with other storage systems.

Removable Racks: Removable ladder racks are designed for users who want the flexibility to install or remove the rack as needed. These racks often feature quick-release mechanisms, allowing users to easily detach the rack when it’s not in use. Removable racks are ideal for those who want the option to switch between different configurations or use their vans for different purposes.

Rotating Racks: Rotating ladder racks offer a unique design that allows users to rotate the ladder to a more accessible position. This feature is beneficial when loading or unloading ladders in confined spaces. Rotating racks provide added flexibility for users who may encounter challenging scenarios during their work.

Multi-Function Racks: Multi-function ladder racks are designed to accommodate various oversized items beyond ladders. These racks may feature adjustable components or additional accessories to secure different types of cargo, such as lumber, pipes, or other equipment. Multi-function racks provide versatility for users with diverse transportation needs.

Heavy-Duty Racks: Heavy-duty ladder racks are built to withstand the demands of heavy and frequent use. These racks are constructed from durable materials, such as steel or aluminum, and often feature reinforced components. Heavy-duty racks are suitable for users with larger or heavier ladders and those involved in rigorous work environments.

In conclusion, the choice of ladder rack for a van depends on the specific needs, preferences, and work requirements of the user. Whether you prioritize accessibility, ease of use, or additional functionality, there is a diverse range of ladder rack options available to accommodate various professional applications.

Posted in Van Conversions

The advantages of using open shelving in your van conversion

The advantages of using open shelving in your van conversion

Open shelving in van conversions has become a popular choice for several reasons, offering advantages that contribute to both functionality and aesthetics. When strategically designed and implemented, open shelving can enhance the storage, accessibility, and overall livability of your van. 

Here are the advantages of using shelves for the van:-

Accessibility and Visibility: Open shelving provides easy access to your belongings, allowing you to quickly locate and retrieve items. The visibility offered by open shelves eliminates the need to rummage through enclosed cabinets, making it convenient for daily use and ensuring that everything is within sight.

Weight Considerations: Open shelving can contribute to weight savings compared to traditional closed cabinets. Lightweight materials such as plywood or aluminum can be used for the construction of open shelves, helping to optimize the van’s weight distribution and potentially improve fuel efficiency.

Customization and Adaptability: Open shelving offers a high degree of customization. You can design and install shelves to fit the specific dimensions of your van, making the most efficient use of available space. This adaptability allows you to create a storage system tailored to your needs, whether for clothing, kitchen supplies, or outdoor gear.

Aesthetic Appeal: Open shelving adds a visual appeal to your van’s interior. The exposed shelves create a sense of openness and can showcase well-organized items, adding a decorative element to the space. This aesthetic quality can contribute to a more inviting and personalized living environment.

Efficient Use of Space: Open shelving encourages efficient use of available space. Without the constraints of cabinet doors, you can maximize the vertical and horizontal dimensions of your van interior. Utilizing wall space for storage helps prevent the feeling of clutter and promotes a more organized and spacious atmosphere.

Ventilation and Airflow: Unlike closed cabinets, open shelving allows for better ventilation and airflow around stored items. This can be particularly beneficial for items that may be sensitive to humidity or require proper ventilation, such as clothing or camping gear.

Cost-Effective Solution: Open shelving is often a more cost-effective solution compared to custom-built cabinets with doors. Materials for open shelves are typically less expensive, and the construction process may require fewer resources. This can be advantageous for those on a budget or looking for a simple and practical storage solution.

Showcasing Personal Items: Open shelving provides an opportunity to showcase personal items, decorations, or travel souvenirs. By integrating these elements into the design, you can personalize the interior of your van, turning it into a unique and reflective space that tells your story.

Easy Installation and Removal: Open shelving is relatively easy to install and modify, making it a practical choice for DIY van conversions. If adjustments or additions are needed, the process is straightforward, allowing for a more flexible and adaptable interior layout.

Weight Distribution and Balance: Strategic placement of open shelves can contribute to better weight distribution and balance within the van. By distributing the load evenly, you can enhance the stability and handling of the vehicle, especially important for those embarking on extended road trips or off-grid adventures.

Multifunctional Design: Open shelves can serve multiple functions beyond storage. They can be incorporated into seating areas, kitchenettes, or workspaces, adding versatility to the design of your van interior. This multifunctional approach maximizes the utility of the available space.

DIY Friendly: For individuals undertaking a DIY van conversion, open shelving is often more DIY-friendly than complex cabinetry. It requires fewer specialized tools and skills, making it accessible to those with varying levels of experience in carpentry or construction.

In conclusion, open shelving in van conversions offers a range of advantages, including accessibility, customization, aesthetic appeal, and efficient use of space. Whether you prioritize a lightweight and cost-effective solution or seek a visually appealing and personalized interior, open shelving provides a versatile and practical storage option for your van conversion project.

Posted in commercial vans

The most popular commercial vans in the market

The most popular commercial vans in the market

Commercial vans play a crucial role in various industries, providing businesses with the means to transport goods, equipment, and personnel efficiently. The popularity of commercial vans is often influenced by factors such as reliability, fuel efficiency, cargo capacity, and customization options. Here are some of the most popular commercial vans in the market:

Ford Transit: The Ford Transit is a versatile and widely popular commercial van known for its reliability and diverse configurations. Available in various roof heights, wheelbase lengths, and engine options, the Transit caters to a range of business needs. It offers ample cargo space, advanced safety features, and the availability of both gas and diesel engines. 

Mercedes-Benz Sprinter: The Mercedes-Benz Sprinter is renowned for its durability, innovative features, and high level of customization. With multiple roof heights and wheelbase options, the Sprinter can be tailored to suit different business requirements. Its advanced safety features, comfortable cabin, and efficient engines make it a preferred choice for various commercial applications.

Ram ProMaster: The Ram ProMaster is recognized for its user-friendly design and excellent cargo capacity. Its front-wheel-drive configuration allows for a low-load floor, making it easier to load and unload cargo. The ProMaster offers different roof heights and wheelbase lengths, and its wide-opening rear and side doors enhance accessibility.

Chevrolet Express/GMC Savana: The Chevrolet Express and its GMC counterpart, the Savana, are classic choices in the commercial van market. Known for their durability and straightforward design, these vans offer ample cargo space and can be configured to accommodate various business needs. They come with a range of engine options and are suitable for a variety of industries.

Nissan NV Cargo: The Nissan NV Cargo van stands out for its distinctive appearance and functional design. With a spacious interior and wide-opening doors, the NV Cargo provides easy access to the cargo area. It offers multiple configurations, including high roof options, making it suitable for various commercial applications.

Ford Transit Connect: For businesses with lighter cargo needs, the Ford Transit Connect offers a compact and fuel-efficient option. It is well-suited for urban deliveries and service-oriented businesses. Despite its smaller size, the Transit Connect provides a surprisingly spacious cargo area and is known for its maneuverability.

Ram ProMaster City: Similar to its larger sibling, the ProMaster City is a compact van designed for urban use. It combines a small footprint with a functional interior, making it suitable for businesses that require agility in city environments. The ProMaster City is known for its efficient use of space and ease of handling.

Chevrolet City Express: The Chevrolet City Express is a compact cargo van built for urban delivery tasks. Based on a Nissan platform, it offers a fuel-efficient option with a nimble size, making it suitable for maneuvering through tight city streets. The City Express provides a practical solution for businesses with moderate cargo needs.

Mercedes-Benz Metris: Positioned between the smaller vans and full-size Sprinter, the Mercedes-Benz Metris offers a midsize commercial van option. It provides a balance between cargo capacity and maneuverability, making it versatile for various business applications. The Metris is known for its premium features and smooth ride.

Nissan NV200: The Nissan NV200, often recognized as the “taxi van” in many cities, is a compact and fuel-efficient commercial van. Its compact size makes it easy to navigate urban environments, and it is well-suited for small business deliveries, courier services, and taxi fleets.

Choosing the right commercial van depends on the specific needs of your business, considering factors such as cargo volume, maneuverability, fuel efficiency, and customization options. Each of these popular commercial vans offers a range of configurations to meet the diverse requirements of businesses across different industries.

Posted in Refrigerated Van

Reasons To Choose A Refrigerated Van

Reasons To Choose A Refrigerated Van

Refrigerated vans, also known as reefer vans, are specialized vehicles equipped with a cooling or refrigeration system. These vans play a crucial role in transporting perishable goods and maintaining a controlled temperature environment to ensure the quality and safety of the cargo. Choosing a refrigerated van offers several advantages across various industries.

Here are compelling reasons to opt for a refrigerated van:

Preserving Freshness: The primary function of a refrigerated van is to preserve the freshness of perishable goods during transportation. Whether it’s transporting fruits, vegetables, dairy products, or other temperature-sensitive items, a refrigerated van provides a controlled environment that helps prevent spoilage and extends the shelf life of the cargo.

Meeting Regulatory Requirements: Certain industries, such as food and pharmaceuticals, are subject to stringent regulations regarding the transportation of perishable items. Refrigerated vans help businesses comply with these regulations by maintaining the required temperature conditions throughout the journey. This ensures that goods meet quality and safety standards upon arrival.

Versatility in Cargo: Refrigerated vans are versatile and can accommodate a wide range of temperature-sensitive cargo. From frozen goods requiring sub-zero temperatures to chilled products like fresh produce and flowers, the adjustable temperature controls in refrigerated vans make them suitable for various industries and cargo types.

Expanding Market Reach: Businesses that deal with perishable goods often need to reach distant markets. Refrigerated vans enable these businesses to expand their market reach by ensuring that their products arrive at their destination in optimal condition. This is particularly crucial for suppliers, distributors, and retailers looking to cater to a broader customer base.

Maintaining Product Quality: For businesses that prioritize delivering high-quality products, a refrigerated van is an essential asset. Maintaining the right temperature throughout the transportation process helps preserve the texture, flavor, and nutritional value of goods. This, in turn, contributes to customer satisfaction and loyalty.

Minimizing Product Loss: Without proper temperature control, perishable goods are at risk of spoilage, resulting in significant product loss. Refrigerated vans minimize the risk of product loss by providing a stable and controlled environment, reducing the likelihood of goods becoming unsuitable for sale or consumption.

Enhancing Efficiency in Logistics: The efficiency of the logistics chain is critical in various industries. Refrigerated vans contribute to streamlined logistics by ensuring that goods move seamlessly from production facilities to distribution centers and ultimately to retailers or consumers. This efficiency not only saves time but also reduces operational costs.

Adapting to Changing Demand: Businesses often face fluctuating demand for their products, especially during peak seasons or specific events. Refrigerated vans offer the flexibility to adapt to changing demand by adjusting the temperature settings based on the requirements of different products. This adaptability is valuable for businesses with dynamic inventory needs.

Preserving Pharmaceutical Products: Beyond the food industry, refrigerated vans play a crucial role in transporting pharmaceutical products that require specific temperature conditions. Medications, vaccines, and other healthcare products must be transported in a controlled environment to maintain their effectiveness and safety.

Building a Reliable Brand Image: For businesses involved in the supply chain of perishable goods, investing in refrigerated vans contributes to building a reliable brand image. Customers and partners are more likely to trust a brand that prioritizes the quality and safety of its products through proper transportation practices.

Choosing a refrigerated van is a strategic decision for businesses involved in the transportation of perishable goods. Whether you are in the food industry, pharmaceuticals, or any other sector requiring temperature-controlled transportation, a refrigerated van is a valuable asset that ensures the integrity of your cargo. From meeting regulatory requirements to expanding market reach and preserving product quality, the advantages of using a refrigerated van are significant for businesses aiming to deliver fresh and reliable goods to their customers.

Posted in commercial vans

From Deliveries to Adventures: How Commercial Vans Can Take You Places

From Deliveries to Adventures: How Commercial Vans Can Take You Places

Commercial vans, often associated with business logistics, are versatile vehicles that extend beyond the realm of deliveries. Their adaptability and spacious interiors make them ideal for a variety of purposes, including personal adventures and recreational activities. Let’s explore how commercial vans can take you places beyond the traditional delivery routes.

Road Trips and Travel Adventures: Commercial vans, with their ample cargo space and comfortable interiors, are perfect for road trips and travel adventures. Whether you’re exploring national parks, embarking on a cross-country journey, or simply taking a weekend getaway, a commercial van provides the flexibility to carry your gear and travel in comfort.

Equipped with features like foldable beds, kitchenettes, and storage compartments, some commercial vans are specifically designed for camping and road-tripping. This transforms your van into a mobile adventure hub, allowing you to explore new destinations without sacrificing comfort.

Camper Van Conversions: The trend of converting commercial vans into camper vans has gained popularity among outdoor enthusiasts. These conversions involve transforming the cargo area into a functional living space, complete with sleeping quarters, a small kitchen, and storage solutions.

Camper van conversions offer the freedom to travel on your terms. You can park in scenic locations, set up camp, and enjoy the outdoors without the constraints of traditional accommodations. The versatility of commercial vans makes them an excellent choice for those seeking a mobile and adventurous lifestyle.

Mobile Workshops and Studios: Commercial vans can serve as mobile workshops or studios for various professions. Whether you’re a photographer, artist, or craftsman, the spacious interior of a commercial van provides a mobile workspace. Customizing the van with storage solutions, workbenches, and specialized equipment allows you to take your work on the road.

Mobile workshops are not limited to creative endeavors. Contractors and tradespeople can also benefit from a well-equipped commercial van, carrying tools and equipment to job sites without the need for a fixed location.

Event and Catering Services: Commercial vans are valuable assets for event and catering businesses. The ability to transport supplies, equipment, and food makes vans an essential component of these industries. Mobile catering services, in particular, can set up pop-up kitchens at various locations, bringing culinary delights to diverse audiences.

The mobility of commercial vans enables businesses to participate in events, festivals, and markets, expanding their reach and providing on-the-go services. This flexibility is advantageous for entrepreneurs looking to establish a presence in different locations.

Mobile Retail and Pop-Up Shops: The rise of mobile retail and pop-up shops has seen commercial vans transformed into mobile storefronts. Entrepreneurs and small businesses can showcase their products directly to consumers by setting up pop-up shops in high-traffic areas or at events.

Commercial vans provide a cost-effective way to test markets and engage with customers. The mobility allows businesses to adapt quickly to changing trends and explore different locations, creating a dynamic and interactive shopping experience.

Community Outreach and Services: Nonprofit organizations and community services can utilize commercial vans to reach underserved populations. Mobile clinics, food banks, and outreach programs can bring essential services directly to communities in need.

The versatility of commercial vans ensures that they can be customized to accommodate specific requirements, making them valuable assets for organizations focused on community engagement and support.

Mobile Fitness and Wellness Studios: The wellness industry has embraced the concept of mobile fitness and wellness studios using commercial vans. Fitness trainers, yoga instructors, and wellness practitioners can offer classes and services at various locations, providing convenience for clients and reaching a broader audience.

The adaptable interior of a commercial van allows for the incorporation of fitness equipment, mirrors, and a serene atmosphere, creating a mobile studio experience for wellness enthusiasts.

Commercial vans, designed for logistical efficiency, have evolved into multifunctional vehicles that cater to diverse needs. From road trips and camper van conversions to mobile workshops, retail ventures, and community outreach, the adaptability of commercial vans opens up a world of possibilities. These versatile vehicles not only support businesses but also empower individuals to explore, create, and connect with communities in innovative and dynamic ways. Whether you’re seeking adventure or looking to bring your services directly to people, a commercial van can be the key to unlocking new opportunities and taking you places beyond conventional transportation.

Posted in Sprinter Camper Van

5 Budget-Friendly Upgrades to Transform Your Sprinter Camper Van

5 Budget-Friendly Upgrades to Transform Your Sprinter Camper Van

Transforming your Sprinter commercial van doesn’t have to break the bank. Several budget-friendly upgrades can enhance both the functionality and aesthetics of your van. 

Here are five cost-effective ways to upgrade your Sprinter camper van:

DIY Interior Lighting: Upgrading the interior lighting can dramatically change the ambiance of your camper van. Consider installing LED strip lights along the ceiling or under cabinets for a warm and inviting glow. LED lights are energy-efficient, easy to install, and come in various colors, allowing you to customize the lighting to suit your preferences. Additionally, battery-operated LED puck lights can be a convenient and affordable solution for illuminating specific areas.

Curtains or Reflectix Window Coverings: Window coverings not only provide privacy but also contribute to insulation within the van. For a budget-friendly option, consider making your curtains or shades using inexpensive fabric or Reflectix insulation. Reflectix is a reflective foil insulation that can be cut to fit the windows, helping to regulate the interior temperature by blocking sunlight and retaining warmth. This simple upgrade enhances comfort and privacy in your camper van.

DIY Storage Solutions: Maximize your storage space with DIY solutions. Utilize stackable storage bins, hanging organizers, and under-bed storage to keep your belongings organized and easily accessible. You can repurpose household items like shoe organizers, hanging shelves, or tension rods to create additional storage pockets for small items. A well-organized interior not only improves functionality but also enhances the overall comfort of your living space.

Vinyl Flooring or Area Rugs: Enhance the flooring of your Sprinter camper van with budget-friendly options. Vinyl flooring is an affordable and easy-to-install choice that is durable and easy to clean. Alternatively, consider adding area rugs to sections of the floor to create a cozy and homey atmosphere. Rugs are not only decorative but also provide insulation and comfort for your feet.

DIY Magnetic Bug Screens: Enjoy the fresh air without dealing with pesky insects by creating your magnetic bug screens for windows and doors. Purchase magnetic tape and attach it to the edges of lightweight mesh fabric, creating a screen that can easily be attached and detached as needed. This budget-friendly solution allows you to keep the doors and windows open, promoting ventilation while keeping insects out.

These budget-friendly upgrades can significantly improve the comfort, functionality, and aesthetics of your Sprinter camper van without a substantial financial investment. Whether you’re focusing on lighting, window coverings, storage solutions, flooring, or bug protection, each upgrade contributes to creating a more enjoyable and personalized living space on the road.