Installing van shelving systems turns an empty van into a fully functioning service vehicle. By helping you accommodate your work tools and keeping your space organized and safe, a van shelving system makes your work day more professional and profitable.
A proper organization system facilitates intuitive handling and time saving. Shelving and storage bins are available in hundreds of different configurations of height, length and depth, giving you the chance to choose what fits both your vehicle and your workspace best.
Advantages Of Installing Van Shelving Systems
The advantages of a good van shelving system are time saving. Installing the proper system helps you be more efficient and productive by spending less time looking for tools and items.
Installing a good shelving system saves you money. The materials and features added to the car during installation are designed to protect both your work materials and your vehicle.
Customers will feel satisfied by your organization skills, giving your company a much more professional presence in the field.
The type of van shelving you choose will represent greater organization, structure and safety -making the workflow much more targeted and efficient. Every second you used to spend searching for tools can now be used to offer your customers a greater service, by helping employees structure their tasks in a more professional manner.
You can contribute to the environment and economy by choosing a lightweight racking system. This allows for an increased load capacity and lower fuel consumption, which reduces CO2 emissions.
Some manufacturers offer extended functionality by providing accessories that create a more efficient workspace. Van shelving goes further by making high quality materials that offer robust, durable and collision safe vehicle ranking conversions.
Van shelving systems are a great boost for your commercial vehicles and for your company’s image and efficiency. Consult the experts to discover more about the van shelving systems available for installation.
Building out your van conversion is a complex process with lots of moving parts. While it’s fun to choose paint colors and flooring, one of the most important elements is actually something you never see: insulation. Ok, insulation might not be all that exciting but it’s a key player for year-round comfort. Whether you’re spending time in cold weather or beating the heat in the summer, choosing the right van insulation is critical.
There are lots of different ways to insulate your van, ranging in price and effectiveness. With so many different options, searching for the best type of insulation can be confusing, so we’ve done the work for you. With lots of research under our belts, we’ve put together this camper van insulation guide to summarize our findings and explain what worked best in our van build.
Insulation or van insulationis one of the most important steps of any van build, and it pays to take the time to do it right. There’s also a lot of confusion and debate over the best way to insulate a campervan, and it can be tough to wade through all the opinions and figure out what to do.
Van life is commonly associated with willy-nilly travel and glamorous images on social media, but the reality of this lifestyle is often far different than it is portrayed. Van life is the process of taking control of your life. It’s about leaning into your fear of the unknown in order to pursue what makes you feel alive.
It’s about meeting strangers from all over the world and accepting them for their differences, while openly seeing the commonalities we all share with each other. There are many reasons why people choose this lifestyle. Some do this part time, some for a temporary road trip. Still others sell off their belongings and commit to van life full time.
If you want to stay comfortable in your van no matter the weather, there is need of van insulation. van insulation is one of the most important steps of any van build, and it pays to take the time to do it right.
There’s also a lot of confusion and debate over the best way to insulate a campervan, and it can be tough to wade through all the opinions and figure out what to do.
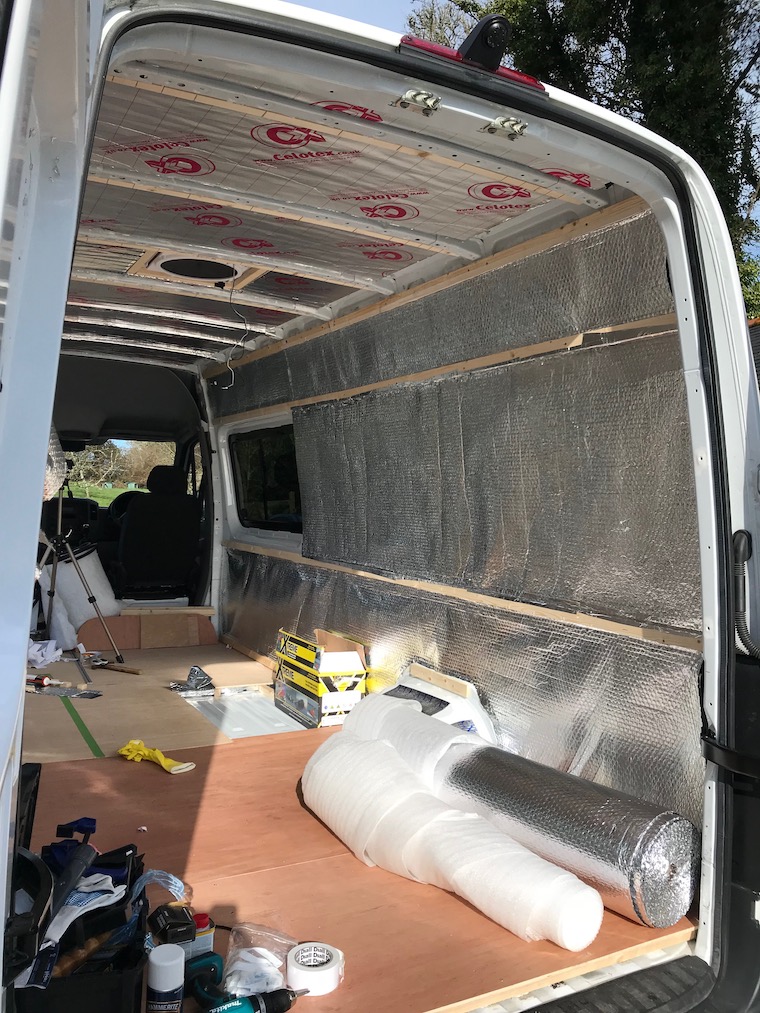
Insulating inside your van’s hollow frame can help reduce the effect of thermal bridging. If you spend a lot of time in very cold weather.
It might be a good idea to put up thermal breaks, which are basically non-conductive materials (i.e. insulation) placed in the pathway of a thermal bridge to block the flow of heat. If you put up additional insulation on top of your van’s ribs, that would be a thermal break.
Another way to ensure proper insulation is by creating insulated window covers. This is the area where warm or cold air will most likely infiltrate your van.
One of the easiest ways to create DIY window covers is by using reflectix as the form of internal insulation. It can be easily glued or sewn between materials. Consider using a heavier material for the outside, such as canvas or water-resistant duck cloth.
Inevitably, once you are done insulating your van, there will be areas too small for the larger forms of insulation.
One of the best options for filling in small details and tiny cracks is “Great Stuff,” an insulating foam sealant. It’s easy to apply and is especially useful for filling in the tight areas around door and window frames. Keep in mind – it will likely require many, many cans.
You want to make sure the van is warm in the winter and cool in the summer. You want to reduce the risk of condensation forming in the van, and on metal surfaces which could lead to rust. You will also want to reduce sound transmission and road noise.
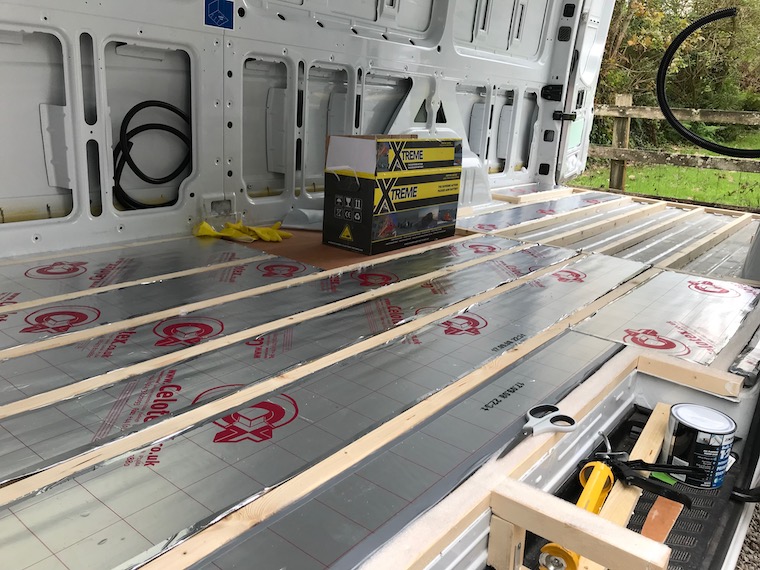
he most common insulating materials available are normal insulation. Rigid foam (PIR Insulation), or wool insulation (glasswool, rockwool or sheepswool), rubber foam (like thick swimming float), but my personal favourite is Low-E Insulation, a high-spec reflective foil with a recycled closed cell foam core.
Once you’ve purchased the best van for your conversion project, insulating is the first big job.
Insulation for Campervan can be a bit tedious because it involves some expense and hard labor and it’s not cosmetic; most of your hard insulating work will be covered up in future steps.
So while you’re planning for van insulation, it can help to keep your eyes on the prize: A comfortable traveling and living environment that will last for many years of exciting adventure.
Do you need to insulate a campervan?
The obvious answer is yes. But the bigger question is, what are we’re insulating against?
Consider insulation systems in houses. Builders and engineers have a long list of factors to consider. They draw from decades of hard earned experience, often based on issues specific to region.
But since you’ll be traveling to many different areas (I hope), the work of insulation for campervan build success goes beyond region.
For example I live in Washington state where I can spend a week in the dry desert, then some days in snowy mountains, head to the coast for a few days at the beach.
In this short time my van could be exposed to direct sunlight, wind, dust, snowfall, driving rain, ocean mist (full of corrosive salt) and more sun.
What is the best insulation for a Campervan?
Our recommendation for the best insulation for campervan builds isn’t just one type of material, but several in combination. While we’d love to be able to suggest one material, it takes some thought and planning to get insulation for your camper van right.
I recommend a combination of materials and gear for campervan insulation:
Sound deadening mat for rattle and other noise reduction
Mass Loaded Vinyl for stopping cold and heat transfer through steel from outside.
Thinsulate blanket insulation for filling large and small voids and most wall insulation.
Recycled Denim blanket insulation for large and small voids.
Foam Panel for floors and filling some small voids.
Reflectix for reducing light and some R value and vapor barrier.
The design philosophy starts with the worker – how can we make the job safer, easier and more comfortable for the human body? That is because the firmly believe that a product’s design and how it impacts the user is every bit as important as the quality of materials and construction.
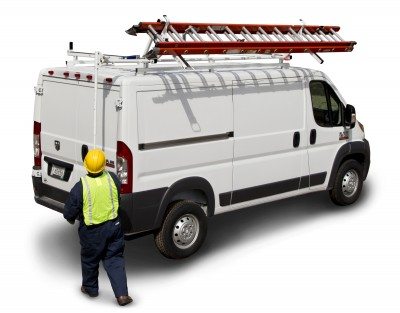
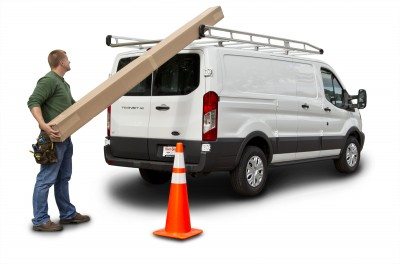
The ErgoRack to reduce muscle stress, eliminate risk of injury and speed the job of loading and unloading ladders from a work van.
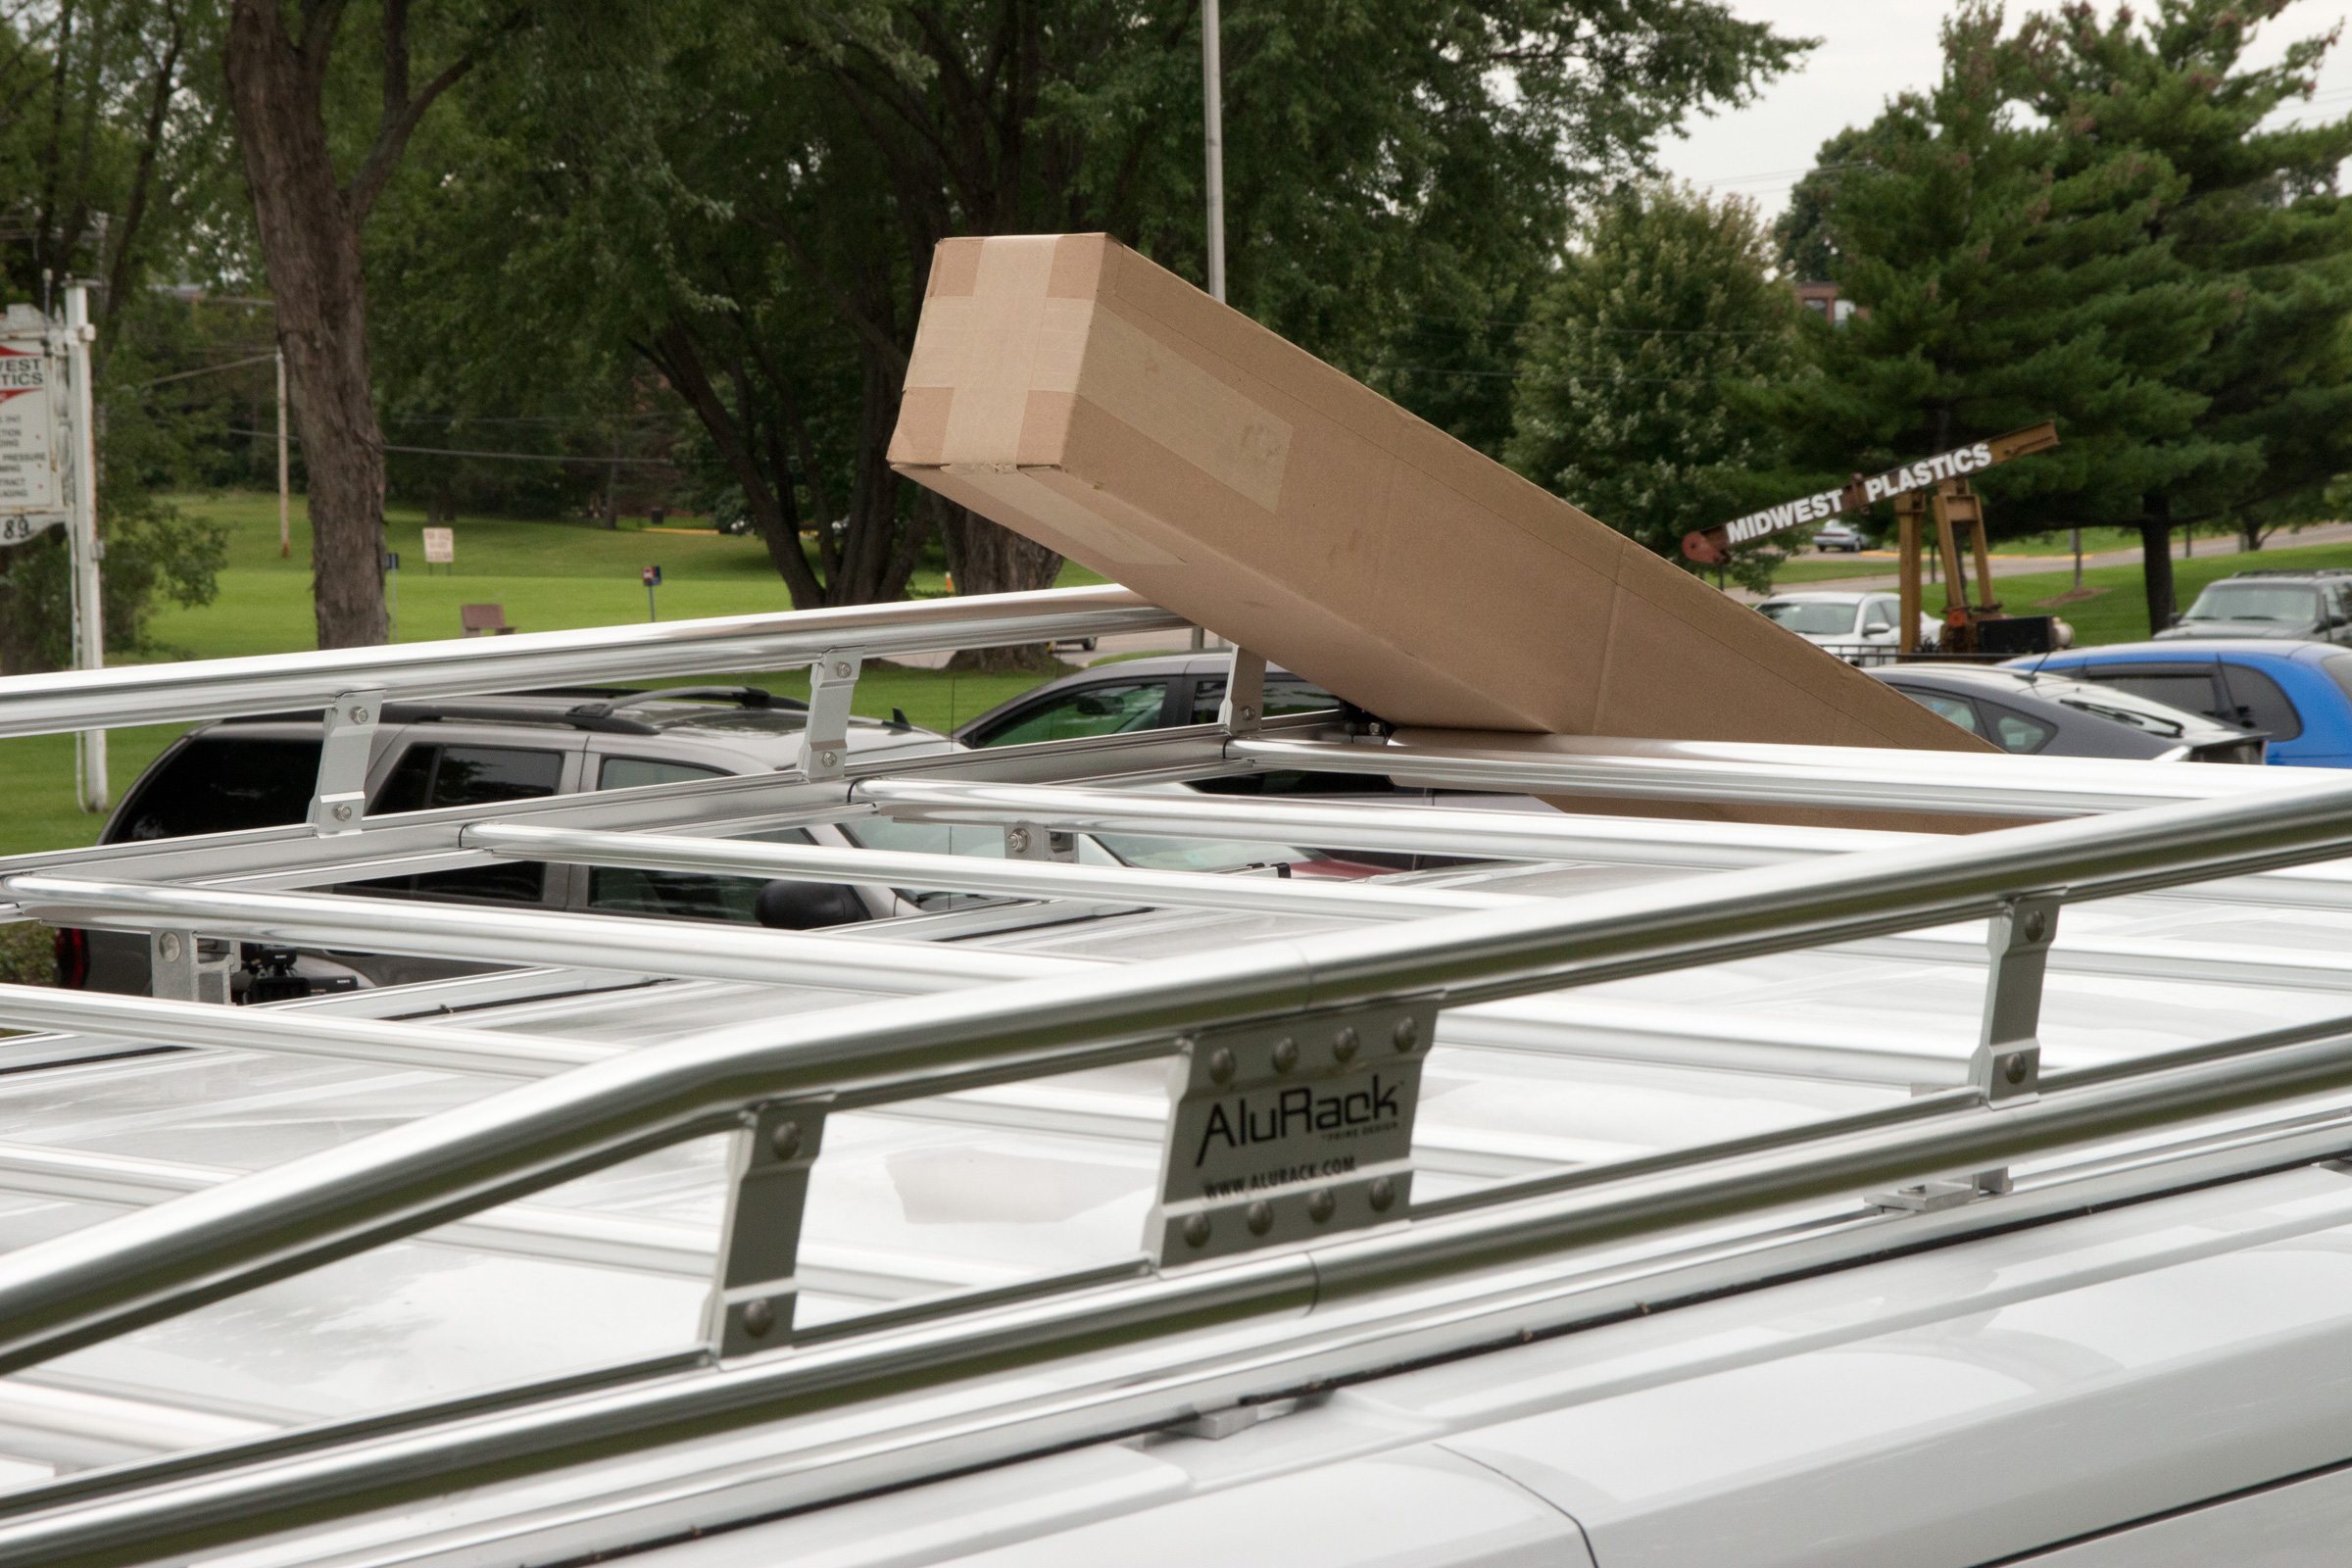
AluRack
Aerodynamic and Lightweight
Work hard, look stylish and stay safe. The AluRack features the industry’s original rolling bar, which makes it safe and easy to load bulky sheets of plywood, drywall, pipe and even weekend toys from the back of the truck. The lightweight, yet rugged design can carry all of your cargo and withstand challenging weather conditions.
Plus, the aerodynamic design looks modern, reduces fuel consumption and ensures almost silent travel.
DeployPro™
Safe, ergonomic, and productive
Upgrade your fleet vehicle’s ladder storage solution with the DeployPro™ system – the industry’s only ergonomic, rear deploying solution for safe and productive fleet vehicles.
The DeployPro™ design philosophy started with the worker – how can the job be safer, easier and more comfortable for the human body?
The rear deploying design allows the user to safely load and unload ladders from behind the vehicle, shielded from potential road hazards or traffic. The system’s ergonomic features help to protect the operator from muscle stress, strain and fatigue.
This system mounts to the crossbars of a compatible ErgoRack. Get your fleet or business started today on the road to safety and productivity.
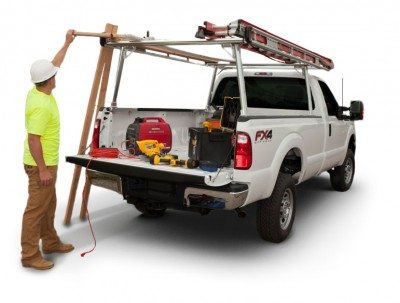
Professional Truck Rack
Lightweight, Truck Tough
The Professional Truck Rack™ is lightweight, yet rugged enough for the construction site. It works hard and plays hard, and can carry the necessary equipment for both.
The ergonomic design helps keep employees safe and worker compensation claims low, while the patented base model mounts easily to the truck bed and transfers from vehicle to vehicle.
ErgoRack Low Profile
Simply the Most Advanced Rack Technology
The S.M.A.R.T. generation ErgoRack has arrived! Designed to fit within the narrow dimensions of a rail car when installed on your work van, the latest innovation shifts installation from delivering dealership to original up-fitter for consistent, quality, professional installation, easier delivery, and cost reduction.
The award-winning, ergonomic ladder racks have helped fleets around the world reduce muscle strain, reduce risk of injury, and speed the job of loading and unloading ladders from a work van.
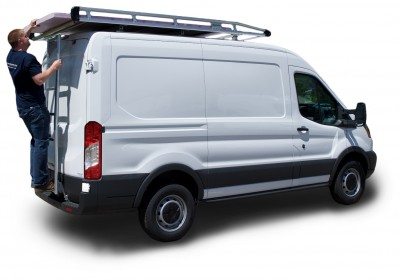
Rear Door Access Ladder
Add capability and enhance worker safety and productivity
The rear access ladder, made of aluminum, can be fixed to the vehicle without drilling and thereby avoiding any damage to the bodywork. Additionally, this ladder can be re-used on the next vehicle of the same type.
Enclosed Utility Body
Lower risks. Reduce Costs. Improve productivity.
Keep productivity high and lower the risk of injuries and worker compensation claims by installing the only ergonomic ladder racks for vans. With different configurations for open and enclosed service bodies, chances are to meet your needs.
Each van ladder racks has its own purpose. Professionalize your car with additional accessories to adapt your working vehicle to your daily needs. Discover our range of accessories for the different AluRack roof racks.
S-CLAMPS-CLAMP, THE UNIQUE FEATURE FOR EASY AND EFFICIENT TRANSPORT OF LIGHT STEP AND EXTENSION LADDERS ON LOW ROOF VEHICLES.
Every S-Clamp secures the ladder with a gas spring assisted hook. The hook at the front of the rack assists the operator to position the ladder on the roof rack. By using the handle, the hook in the back comes in an upright position and fixes the ladder for safe transport. No straps and ties are required. The use of a padlock prevents easy theft of the ladder.
An important effect is the reduction in handling time : the time to (un)load a ladder can be reduced from 240 seconds (4 minutes) to 20 seconds which is a reduction by 80%. This is an investment with a high ROI.
CLAMPABLE ALUMINIUM LADDER
Discover the benefits of our backdoor ladder
Our new ladder guarantees optimum safety for the daily loading and unloading of your goods on our AluRack roof rack.
Thanks to a handy clamping system this light aluminium ladder can easily be installed by one person without having to drill into the bodywork. That way, your vehicle preserves a high second-hand value.
You can easily re-use the ladder on your next vehicle of the same type.
The aesthetic, light aluminium design is corrosion resistant and durable. On top of this, the low weight of the ladder ensures reduced fuel consumption.
The door ladder is currently custom-designed for the Ducato, Sprinter, Crafter, Boxer, Jumper, Movano, NV400, Master and Daily. Your ladder will precisely fit the dimensions of the rear of your company vehicle and will not interfere with your daily work. Soon it will be available for other models as well!
MORE HELPFUL ACCESSORIES FOR THE ALURACK ROOF RACK SOLUTIONS
Aluminium conduit tube
Aluminium conduit tube (2-5m long, 125 mm in square), lockable on both sides. Mounting with a bracket onto crossbars, so that the interior space can be completely used for loading.
Conduit tube bracket
Special round brackets to fix standard plastic tubes.
Beacon mounting bracket
With special mounting brackets the beacon may be mounted onto the crossbars.
Cargostops for AluBars
Cargostops to position long objects on the crossbars.
Roller for AluBars
The additional roller for easy (un)loading of long objects from the rear.
Roller for AluRack
The roller, which can be easily installed at the rear of the roof rack ensures comfortable (un)loading of long objects.
Platform elements
Aluminium ribbed profiles can be mounted on top of the crossbars to form a cargo platform (length 2-5 m, width 17cm)
Cargostops for AluRack
Adjustable cargo stops to fix long objects on the roof rack.
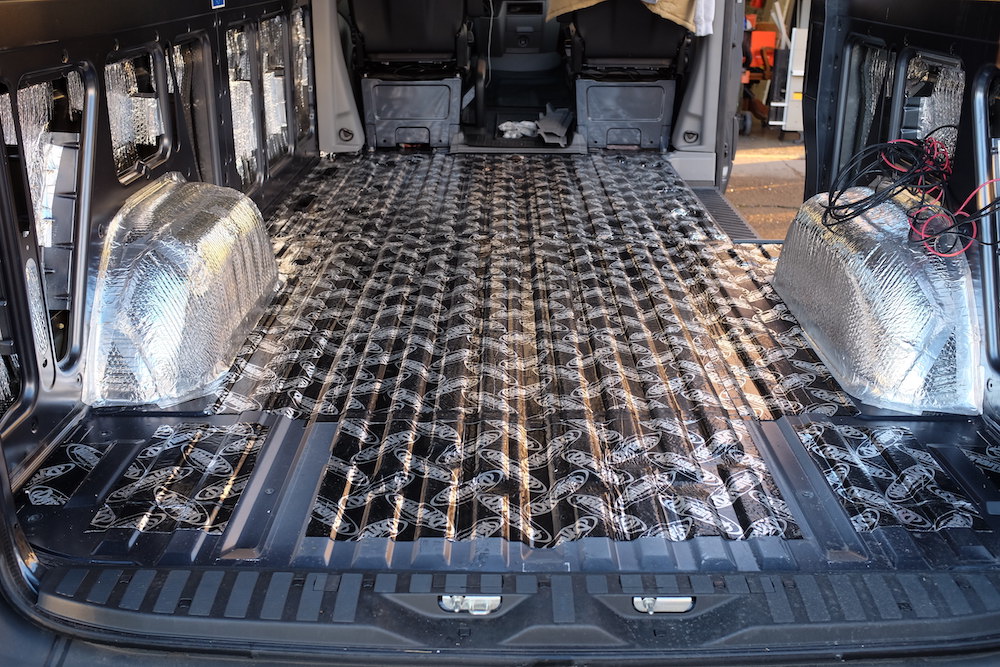
A van build is a large project that requires extensive research, detailed planning, and implementing a comprehensive layout design. A helpful suggestion is to break down the van build by phases and just focus on one phase at a time. If you do look at an entire van design outline from start to finish, it can be extremely overwhelming. However, the one thing most vanlifers can agree on is that sound-deadening and insulation is a great place to start. It is nearly instant gratification because there is no drying or waiting process involved. As soon as the camper van insulation and sound-deadening materials are installed, you’re able to immediately get up and drive your van around!
Sound-Deadening
One of the first noticeable features of an empty, pre-converted van is the way that it echoes like a tin can. When you first drive your van after purchase, you may notice all the rattling of the metal. Even when parked, an empty van can echo like a tin can. Recognizing how hard it will be to make phone calls, whether to friends and family, or business calls, in an echoing van is important. From there, you can decide whether you think this is something worth fixing. Dynamat is a very simple solution, although there are many other options as well: FatMat Rattle Trap, Noico, and Kilmat.
All this material requires for installation is cutting it with a utility knife, peeling off the back paper, and sticking it on the necessary areas. Some people choose to place sound-deadening material only in certain regions, such as focusing specifically on the front cab, which will really help with noise and rattle comfort when driving. Further down the road, this will also help keep noise inside the van (during movies, conversations, etc.) as well as keep any exterior noise outside of the van.
If you’re lucky, your van might even come with sound-deadening materials at the time of purchase!
Camper Van Insulation
There are an endless amount of options for van insulation. The number of windows you have will also heavily influence what kind of insulation you use and how much insulation you need to properly ensure your van will stay warm or cool. Some swear by spray foam, while others swear by rigid foam board. The different options have various benefits and downfalls. For example, spray foam is extremely messy and is oftentimes recommended to have professionally installed in order to avoid a mess. Reflectix is nice for smaller regions, and rigid foam board is great for straight, flat areas, such as insulating the ceiling or floors.
A personal preference is to primarily use camper van insulation that you can stuff and squeeze into smaller spaces, as most vans have different compartments and sections that are hard to fit exactly. Some options here are fiberglass insulation or recycled denim batting. You’ll want to keep in mind that fiberglass may be harmful to breathe over time. Don’t be afraid to mix and match! Certain forms of insulation are better for certain areas of the van. Our preferred combo? A mix of recycled denim batting, rigid foam board, and reflectix. Here is a breakdown of the different kinds of insulation available with detailed pros and cons for each.
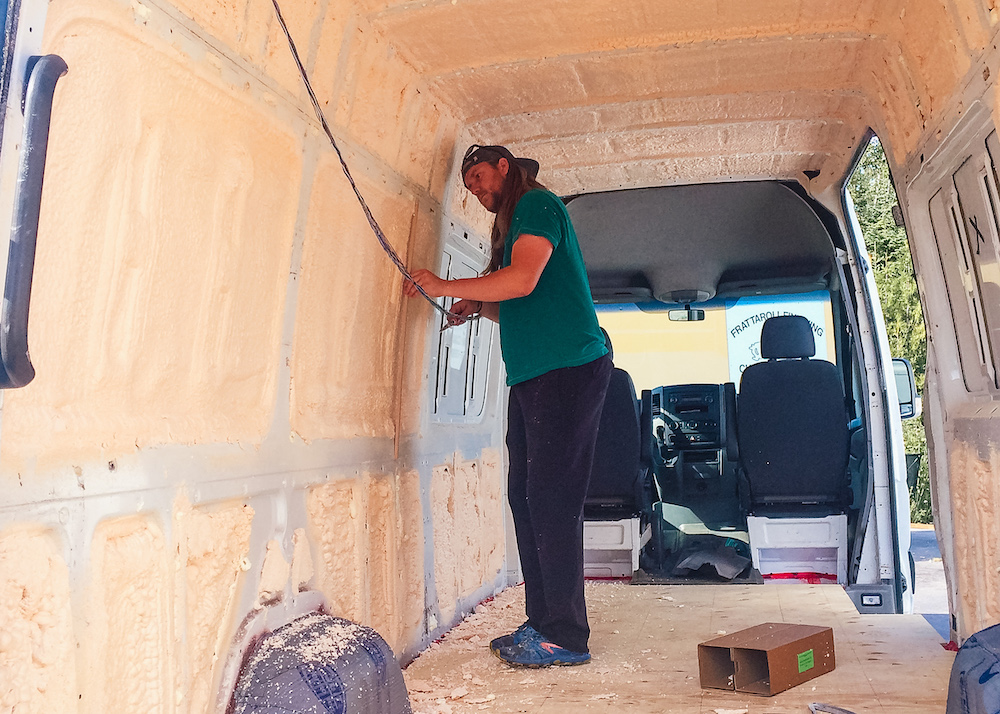
Spray Foam
While spray foam is considered one of the most efficient forms of camper van insulation, it can be very challenging to install. Nearly everybody I’ve ever spoken to agrees to this fact: if you plan on using spray foam to insulate your van, pay to have it done professionally. Additionally, closed-cell spray foam does a better job sealing all air gaps and gives you the highest R-value per inch.
One of the many reasons that we recommend having spray foam installed professionally is because of the above-mentioned metal warping.
Additionally, we have heard horror stories of spray foam leaking into certain areas of vans, such as seat belt devices, and having to wait on expensive replacement parts for the van that were not intended to be replaced. Make sure you tell the professionals completing your installation of any cavities you don’t want filled. For example, map out where your windows will go and share this information, and provide door and seatbelt mechanism locations as well. Taping off or sealing certain areas yourself, such as the cab of your van, may help ensure a clean job and less potential of finding foam in unwanted areas.
Knowing how to heat your van in winter is essential to comfort and overall enjoyment when living in a van. There is more involved than grabbing a portable heater and hitting the road. It may go without saying, but the most effective way to avoid the cold is to head south for the winter. If you do happen to find yourself in a colder area, there are a few common and affordable options to heat your van.
The five most common heating solutions for people in vans, RVs, or tiny houses are: electric heaters, wood stoves, propane, butane and diesel heaters.
Each has their advantages and disadvantages and it’s important to come up with a heating solution that’s tailored to your needs. What may work for one van might not be economic or efficient for others.
Alternatives To Heating Your Van
Proper insulation is the most important factor keeping your van warm. Before turning on a heater be sure to insulate the walls, floors and windows of your van. The more insulation involved, the less energy you need to spend keeping warm. Spray foam and silicon caulking are your friend.
If you do not have the money or means to do a full van insulation, a cost effective and fast solution is to purchase insulation panels for the windows. Insulation panels are typically made out of reflective foil that can be stuck to the glass.
A slight increase in your van’s temperature will be noticeable with just this simple step. Not to mention, insulation panels are great for privacy. No more peeping neighbors!
Wear Quality Gear
A few must-have winter items can make a huge difference in your comfort level.
Feet: Always keep a pair of warm socks or slippers nearby.
Wool: Wool is tried-and true material because it can retain heat even when wet. Wool fibers are also durable and made to last for years. The makeup of wool fabric allows for small air pockets within the fibers which increases the insulation level significantly compared to cotton.
Head: Keep your head and feet covered against cool drafts. Your head loses more heat than the rest of the body when left uncovered so don’t neglect this crucial body part!
Blankets: Store lots of blankets and duvet covers within the van. Many people choose to sleep in a high-quality sleeping bag that is rated to zero degree weather.
Be aware that even the highest quality sleeping bags on the market are rated for survival. They are not rated based on a comfort level. What this means is if the bag is rated for 30 degree weather, you will not freeze in 30 degrees. However, this doesn’t mean you will be cozy all night.
Layers: When planning your sleeping set up, use layers. You may have one blanket that works well in the summer, one sleeping bag for the fall, and an extra comforter that you can combine with all three for extra cold nights.
Add this to a good hat and socks and you will be able to adjust for most situations.
Warm Yourself With The Hot Water Bottle Method
If you happen to find yourself on a cold night with no Mr. Buddy heater around hot water bottles are a cheap and easy way to stay toasty. Simply boil some water and pour it into a water bottle or covered container that you can use to heat the bed or lay next to. Water bottles can stay warm for up to 6-8 hours at night and may be all you need.
Cover the bottle with a towel or cloth while pouring warm water inside, use extra caution not to burn yourself. Make sure the lid is twisted on tightly so there are no spills. A word of warning: Do not overfill the water bottle. ¾ full is all that is necessary to keep hot.
Finally, never use a hot water bottle at the same time you are using an electric blanket for heat. You do not want to take the risk of water and electricity coming into contact with each other.
Electric Heaters
If you are parked in a friend’s driveway or have the luxury of a campsite with hookups, electric heating is a great option. Electric heaters are lightweight, emit no sound, have no smell, and are safe to use in tight spaces.
There are many different types of electric heaters with the most common being ceramic, infrared, and oil radiators. Although they may seem like the ideal solution, do not assume your van’s battery will keep you warm all night and startup in the morning – it won’t.
Ceramic heaters can be a great option if you have a power source. Electric heaters produce a consistent heat output that can be easily adjusted. Plus, they will expel hot air in one direction allowing you to aim the heat where you need it.
Most electric heaters will range between 500 and 1500 watts. The lower the wattage, the longer it will take to heat an area. Electric heaters are relatively inexpensive to purchase, often they can be found for under $50. Once you own one, it’s just the cost of electricity you need to worry about.
When running an electric heater there are a few things you need to remain cautious about. Many heaters have safeguards built-in to avoid overheating or tipping over. Being in a small area like a vehicle, you should be aware of your surroundings to avoid burns. In addition, not all electric heaters are quiet, so be prepared for a soft hum.
Keeping warm inside your campervan when it’s cold outside will make travelling in a campervan an absolute pleasure. But, get it wrong, and you will soon find yourself checking into the nearest hotel for some much-needed warmth. This is why van insulation is so important.
If you want to stay comfortable inside your campervan, then insulating the vehicle correctly will have such a dramatic effect. When it comes to keeping the heat in or out, insulation is one of the most important steps you can do for your campervan conversion.
There is also quite a lot of confusion when it comes to the correct type of insulation to choose from for your van build. So, to keep it as simple as possible, here are some frequently asked questions when insulating a campervan.
Frequently Asked Campervan Insulation Questions:
What’s the best material to use?
How do I install it correctly?
Is a vapour barrier important?
How much is it to insulate my campervan conversion?
What are R and K-values?
Do I still need to insulate if I am going to travel to hot countries?
In this article, we will try to give you all the answers you need about insulating a campervan. We also take an in-depth look at the most commonly used materials, their pros and cons, and whether you should use them.
Before we jump in, we must first understand the properties of heat transfer and see precisely how it works.
Campervan Insulation and Heat Transfer: What You Need To Know
There are three types of heat transfer: radiation, conduction, and convection;
Campervan Radiation, Conduction and Convection process.
Radiation
Radiation is a method of heat transfer. It does not rely upon any contact between the heat source and the heated object. One of the most notable examples of radiation heat transfer is the heat of the sun beaming down onto the earth.
One of the primary sources for radiating heat coming into your campervan is going to be your windows. They allow sunlight to pass through, which heats the inside of the vehicle.
In winter, this is a great benefit as it will soon warm up the inside of the campervan. However, it can have the opposite effect in summer, making it extremely hot and stuffy inside. By installing reflective window coverings, this will help deflect unwanted sunlight coming into the campervan.
It will also have a huge benefit in keeping the van cool and creating a pleasant, ambient temperature.
Conduction
Conduction is the transfer of heat between two solid bodies. A good example of conduction heat transfer is leaving a teaspoon in a hot cup of tea; due to conduction heat transfer, eventually, the end of the spoon sticking out of the cup will get hot.
When the sun shines down and heats the external body of your van, the heat will eventually make its way inside, through the body and the walls of the vehicle through heat conduction.
Installing the correct insulation can slow down the process of heat transfer. In winter, insulation will have the opposite effect, slowing down the heat transfer out of the vehicle.
Convection
Convection occurs when the heat is transferred through a gas or liquid by the hotter material moving into a cooler area. A brilliant example is a hot air balloon. The gas heater inside the balloon heats the air, and so the air moves towards the top of the balloon. It then causes the balloon to rise because of the trapped hot air. When the pilot wants to descend, they let out some of the hot air from the top. Cooler air is drawn in from the bottom, causing the balloon to lower.
Because of the way that convection works, when the van begins to warm up, the heat will naturally rise. By installing thicker insulation in your roof, this will help considerably slow down heat loss through convection. It will keep the van interior nice and warm for longer, as well as making the van more efficient as it will require less energy to keep the van warm.
And when it gets a little too hot, you can use a ventilation fan to draw out the warmer air near the ceiling. It will also draw cooled air into the vehicle from any low-lying vents or open windows, making the whole interior of the campervan cooler.
Understanding Insulation
Simply put, insulation will slow heat transfer. This will help make it easier to maintain the internal temperature of your campervan.
What is K-Value? (Lambda Value, Thermal Conductivity, Λ)
K-value, also known as the Lambda value, Thermal Conductivity, and sometimes represented as the Greek letter λ, indicates the ability of such material to conduct heat. Materials with lower K-value do not easily allow heat energy to pass through.
Campervan Insulation – Find the best way to insulate your van!
Why is van insulation important?
Van insulation is really important in order to moderate the temperature within your van. Typical campervan conversions will use a panel van as a base vehicle, but the thin metal walls will very easily transfer heat and equalise to external temperatures. If you’re in extremely hot or cold climates this could mean a lot of discomfort. Van insulation will ensure that the temperature equalisation proces is slowed way down and you stay comfortable in your tiny home!
What types of insulation can you use in a campervan?
You’ll come across quite a few options in choosing the best van insulation material for you. Some of these are the same as you’ll find in many standard homes. Others, however, are more bespoke and harder to come by, and therefore far costlier to your wallet but potentially a much better insulation investment.
We recommend considering the following when choosing your van insulation material:
Toxicity – This was a big deal for us, as we didn’t want any particulates or gases contaminating our small living space. We were running away from the city because of air pollution so didn’t want any respiratory aggravators or health risks.
High R-value – As you’ll need to maximise the space in your van, it’s important to use a material which has a high insulating value per inch.
Moisture resistance – In a small space you’ll generate moisture from cooking, showers, breathing etc. You’ll want to use insulation which is moisture resistant to stop any mould growth or take precautions to ensure no moisture can access your insulation using a vapour barrier.
Cost – We learnt that converting a van can become very expensive very quickly. Plan ahead to get products which do the job well but don’t cost the earth.
Eco friendliness – Some insulation options are very eco friendly, as they are made from recycled plastics or old clothes. Others not so much. If you want to be more eco conscious this is something to consider, and there are a variety of options now available. More on this further on!
With these key points in mind, here are the options you have available: Show entriesSearch:
Type of insulation
R value
Price
Toxicity
Eco-Friendliness
Closed Cell Spray Foam
7
£££
2
2
Polyisocyanurate (Polyiso/PIR/Celotex)
6
££
3
2
Extruded Polystyrene
5
££
3
1
Expanded Polystyrene
3.9
££
3
2
Fiberglass
3.8
£
5
2
Rock wool
4.3
£
4
2
Denim
3.7
££
2
4
Sheep wool
3.7
££
1
5
Thinsulate/Polyester
3.7
££££
1
4
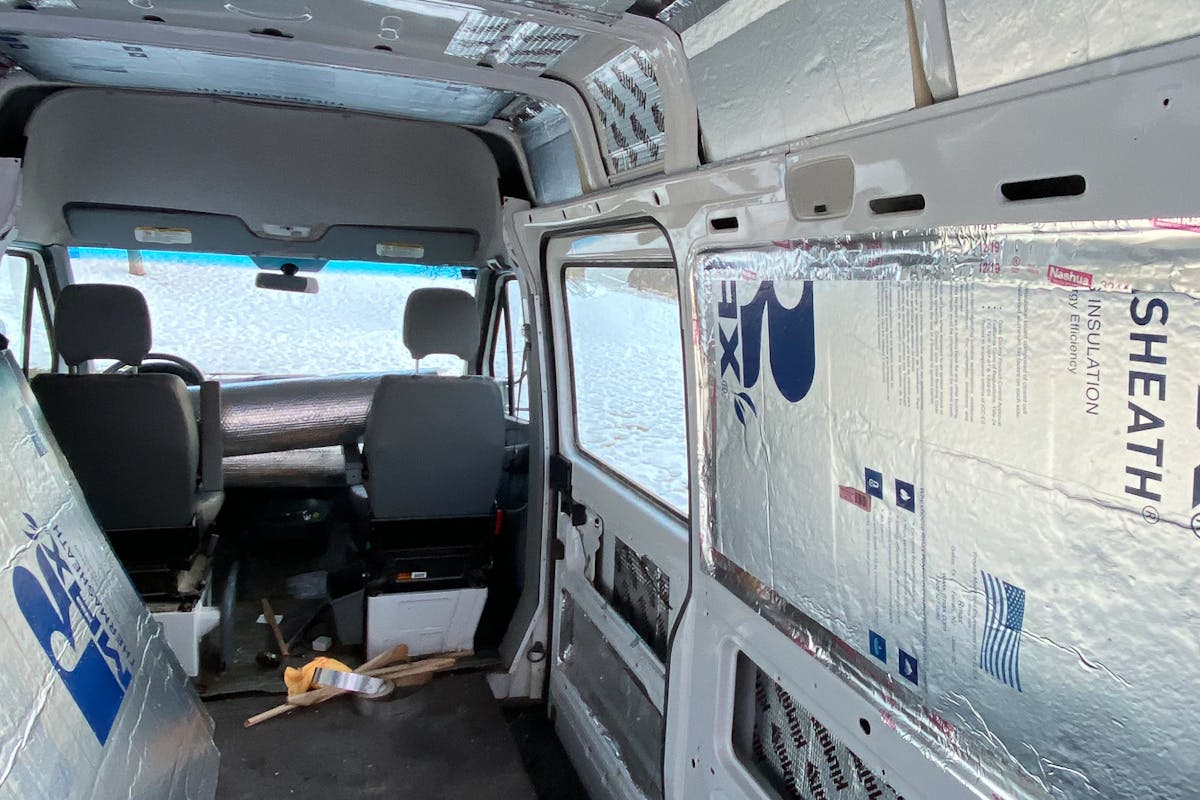
Polyisocyanurate (PIR) van insulation
In the UK this is commonly known by the primary manufacturer of the product, Celotex. Within the US, it’s most frequently called foam board insulation.
PIR insulation is an excellent choice because it is lightweight, moisture resistant, affordable, non-toxic and fire resistant.
PIR boards come in a range of thicknesses and are excellent choices for insulating the ceiling and floor of a van conversion. The only danger is from inhaling the dust created when cutting the boards. We found using a sharp knife created a very clean cut with minimal dust, but we were also careful to use masks when cutting. Either side of PIR insulation is usually a reflective barrier which helps keep radiant heat within your van.
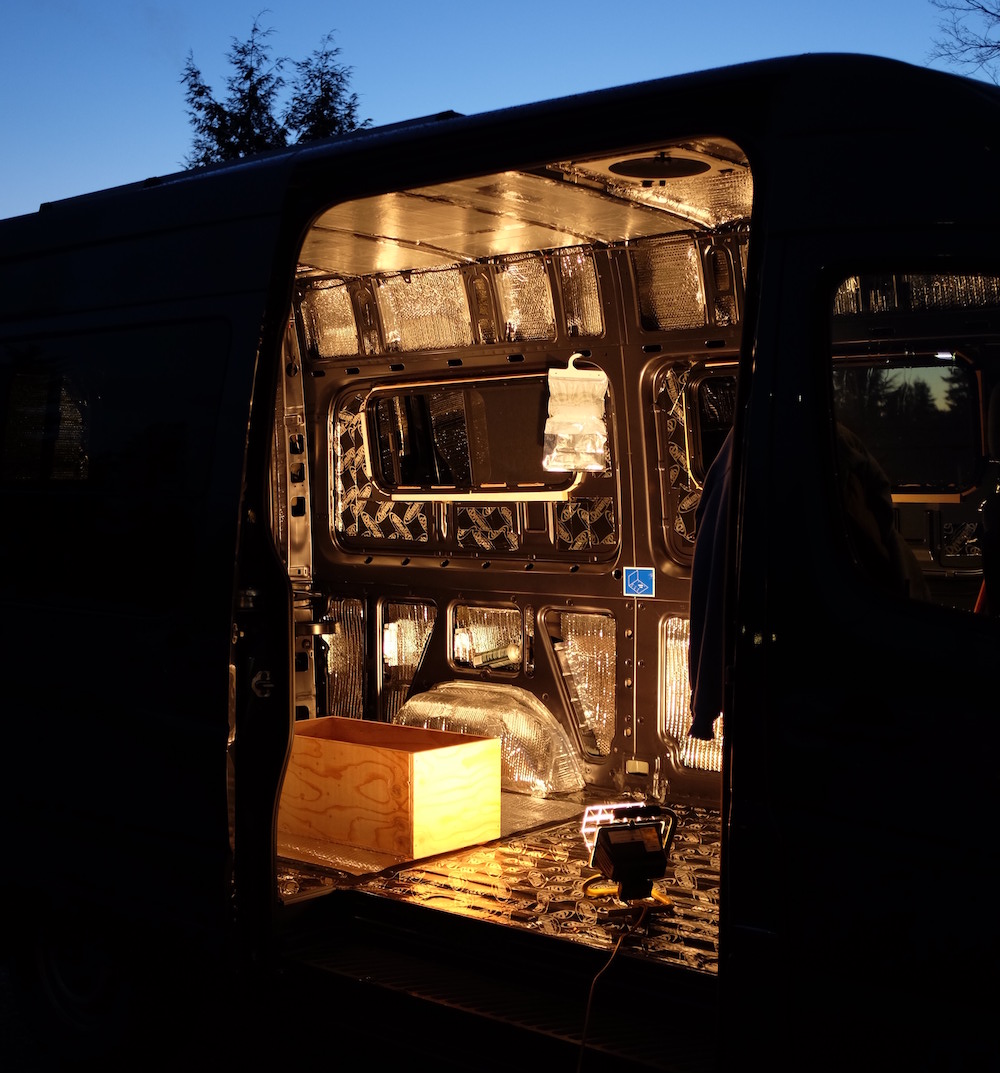
Reflectix – Campervan foil insulation
This material is very widely used in van conversions, but often incorrectly! It’s a thin bubble wrap with a reflective coating and holds a very low R value.
Reflectix is excellent at reflecting radiant heat but it is not efficient at stopping the transfer of heat. The common mistake is adhering Reflectix straight onto the metal of a van and then adding another layer on top. Heat passes straight through the reflectix from contact with the metal through conduction and makes it totally ineffective.
Reflectix is great when being used as a window blind as it reflects heat back. To make it more attractive, we covered it in thick cloth. It’s also moisture resistant and can be used as a vapour barrier which is how we used this material in our van build.
Polystyrene van insulation
What is the difference between extruded and expanded polystyrene?
Extruded polystyrene is arguably one of the most environmentally unfriendly products in this list. This is due to the manufacturing methods using hydrofluorocarbons via an extrusion process and polystyrene polymer.
Expanded polystyrene is manufactured without these gases as by-products and has a far more air gaps within its structure. The trade off is that this renders it slightly less moisture resistant.
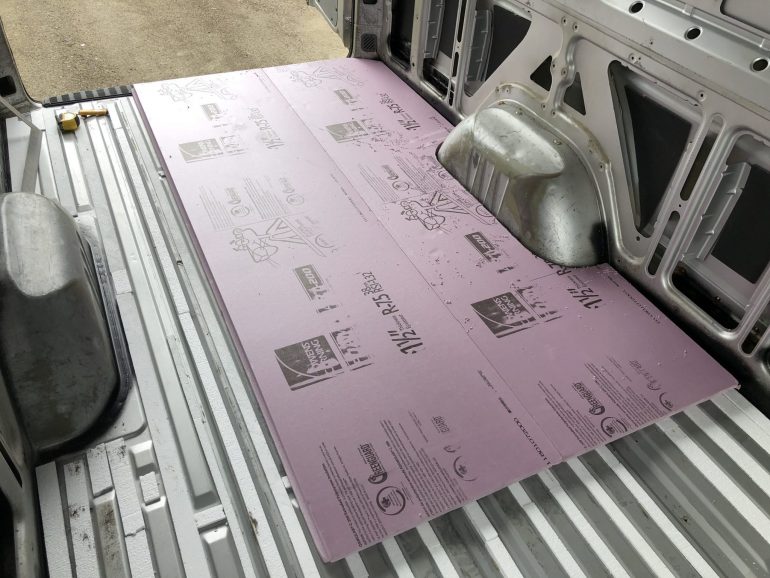
Both types of polystyrene are similar in structure to PIR insulation which comes in a range of thicknesses. The major health consideration is the inhalation of particles from cutting or from abrasion within your van.
It has a good R value slightly less than that of PIR but both types are slightly cheaper. It’s far more resistant to compression than PIR which makes it a popular choice for use in flooring. It is however far less flame resistant and when it combusts gives off styrene gas which can causes CNS damage.


/cdn.vox-cdn.com/uploads/chorus_image/image/64699892/CREDIT_ROAMERICA___delta_spreadsheetqueen.0.jpg)