Let’s start by going through the advantages of fitting a campervan awning. When do they come in handy? Why do they help? Keep reading to find out.
1. Space
Whether you enjoy frequent camping trips or you’ve made the transition to full-time van life, you can’t deny that space is a premium onboard.
The biggest perk of a van awning is that it literally doubles your living space in just a few seconds. It’s like having a whole new room to spend time in.
2. Shelter
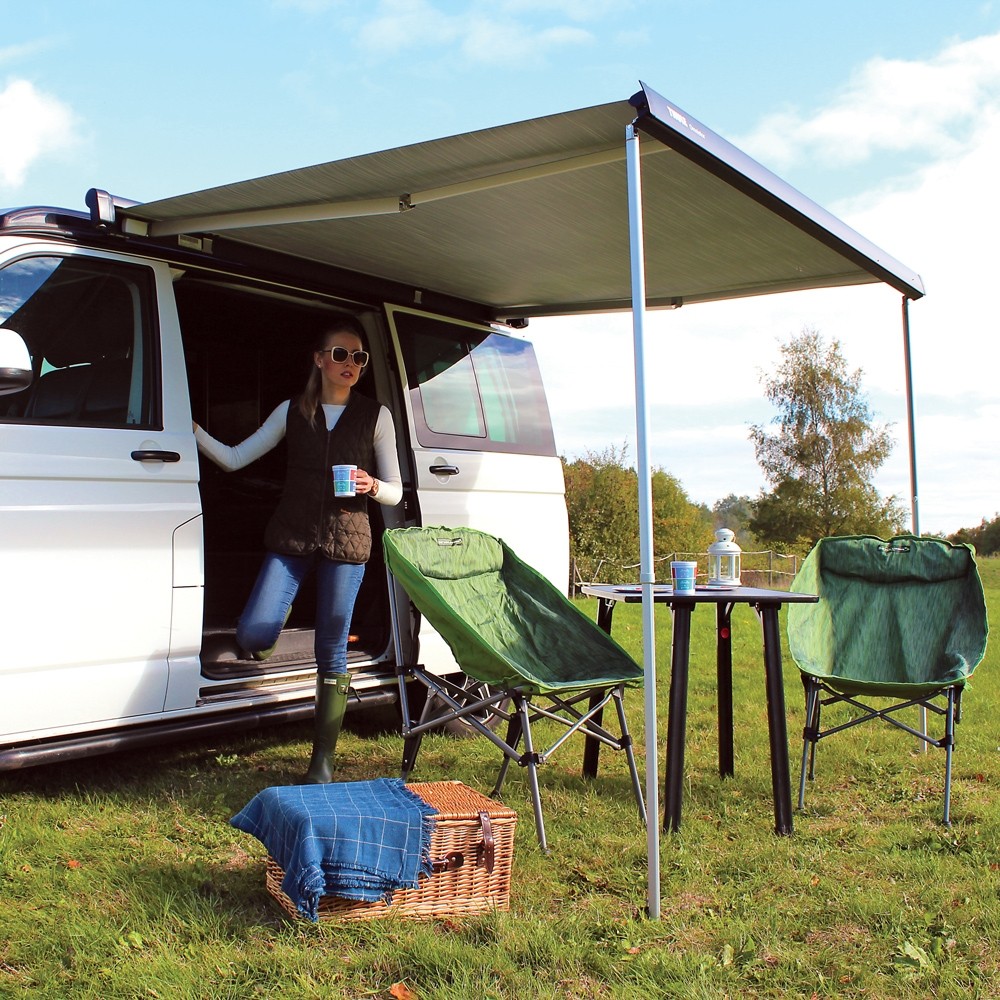
Need a place to escape the scorching sun? Want to spread out some folding chairs, relax, and enjoy the view? Ready to share a meal, play some board games, or read your favourite book?
With a campervan awning, it doesn’t matter what the weather’s doing. You don’t have to retreat inside if it’s too sunny or starts to rain.
Assuming it isn’t too windy and your awning’s fit-for-purpose, you can stay outside and simply take shelter under the awning instead.
3. Fun Outdoor Opportunities
The possibilities with your extra space are endless too.
For example, if you have some guests joining you, they can roll out their sleeping bags and have their own place to call ‘home.’
And if you want to enjoy the sunrise while you brew your morning cup of coffee, youcan step outside and still have a “roof” over your head.
4. Extra Functionality
Awnings for campervans are more than just a roof though.
Some models act more like tents, with drop-down flaps or mosquito nets to keep those biting critters away.
This can also help to keep you (and whatever belongings you have outside) drier if there’s rain, fog, mist, or light snow.
Something else I appreciate about campervan awnings is the ability to be ‘outside’ and still have everything I need within arm’s reach, inside the van.
All told, if you’ve been looking for the best gadgets to enhance your campervan lifestyle, then this one belongs at the top of your list!
When travelling in your camper vehicle you have the privilege of being free to stop at the most beautiful places. Simply turn off the ignition, get the table and chairs out, and enjoy the marvelous view.
An RV awning gives you added pleasure: It turns the area in front of your vehicle into your mobile patio, which will give you many relaxing hours!
The awning provides shade as well as protection against rain, wind and weather and it can do so much more. With the right accessories you can quickly create an extra living or sleeping room for your mobile home, complete with windows, doors, curtains, fly screens and lighting.
Van awnings protect the campers from the harsh and harmful UV rays of the sun when they are sitting outside the camper van.
The awnings will also save the campers from getting soaked.
The camper awnings will protect the front doorway portion of the camper van in rainy season by creating an overhead shelter so that the rain water does not fall directly on the front glass of the vehicle.
Camping experiences are often disturbed because of insects and mosquitos and the repellent creams and lotions which we carry don’t really help. In this case, the awnings help keeping the mosquitoes and insects away with the help of netted extensions.
When not in use these camping awnings can be installed by at houses to make them energy efficient.
How to Install RV Slide Out Awning in 3 Easy Steps
Slide-out rooms tend to be in the rear of the RV, and they can accommodate various configurations such as sleeping quarters, dining rooms, and bathrooms. However, these slide-out areas are prone to damage if you do not do an RV slide out awning installation.
With that said, you are now left wondering, how to install RV slide out awning? First, you need to gather the essential materials and tools, such as an awning rail, the RV slide out covers, and a basic set of tools.
Then, make sure that the mounting brackets are secure. That way, the travel trailer slide out awning will not fall.
At first, the process might look relatively straightforward. But be wary as missing some important details can make you commit costly errors. Keep reading to know more about the things you will need for this project and how to complete it efficiently.
What You’ll Need
In certain cases, the RV slide out installation should only take about 2 to 4 hours. But before you start, acquire the measurements for the RV slide out awning installation. Remember to measure the entire length and depth of the flange.
The awning should extend at least 2.5 inches in either direction. Check out the following list of some slideout widths and their compatible awning sizes for your reference:
56 to 61.5 inches: 66-inch awnings
75 to 68 inches: 75-inch awnings
25 to 74 inches: 78-inch awnings
25 to 80 inches: 84-inch awnings
25 to 86 inches: 90-inch awnings
After getting the ideal measurements for slide toppers for RVs, you can proceed with gathering the other important pieces of equipment for the project. These items include the following:
RV slide-out awning kit: With so many options for RV slide out awnings, it can be challenging to narrow down your search. By keeping certain factors in mind, you can limit your options and arrive at a clear purchasing decision.
Aside from the size of the awning, you should also consider the fabric’s construction. Two popular options that are also quite durable are acrylic and vinyl.
Take note that these two fabric options have their distinct pros and cons. For example, in many cases, vinyl is more water-resistant compared to acrylic. On the other hand, acrylic is cooler than vinyl.
You can also check out the product descriptions and owner’s manual of specific slide-out awning kits.
For example, doing a Carefree slide out awning installation might mean that you need to comply with distinct setup instructions to make the awning fit properly.
Stepladder: Many RVs are tall vehicles, which means that you need a stepladder in installing slide out awnings. It is because you need to attach some parts near the roof of the rig.
You can easily pick up a stepladder from a local hardware store. But purchasing the wrong model can increase the risks of accidents.
Therefore, make sure that the ladder has a fairly sturdy construction. It should have no problem carrying the weight of an average-sized adult.
Search for stepladders made of aluminum or fiberglass as these materials tend to outshine others in terms of durability. You may also buy steel ladders, although these options tend to be more expensive than other models.
Other tools: Aside from the awning kit and stepladder, you need to have the right handheld tools for the project. Some of the equipment that this task requires are:
Clear sealant
Drill (and the right drill bits)
Screws
Pencil (to mark placements for the holes & the rail)
Make sure that these items are within your hand’s reach while you are doing the RV slide out awning installation. Otherwise, it is also a good idea to have someone nearby to give you the items when needed.
Step-by-Step Instructions
Before you start, make sure that you have the items nearby and accounted for the job. Check if you need additional screws for the job. Otherwise, you may need to return to the hardware store to buy extra screws.
After that, you can start with the installation process. Make sure to follow each step accordingly. Avoid getting worked up and hurrying each step. Otherwise, you might commit some costly mistakes.
Step 1: Mount the Brackets
Mounting the brackets is the first step to install an RV slide-out awning properly. The surface where the mount will go should have enough framing or thickness for the brackets and screws to adhere to.
Do not skip this inspection first because aluminum or fiberglass skins must hold well onto the mounting hardware. Then, align the brackets to the inside edges of the flange’s top and side room areas.
Coat the surface with your preferred sealant. But pay attention to the mounting holes. Consider sealing these areas after you put in the screws to avoid water leaking into them during rainfall.
Also, you may need to use a stepladder for this step. Large campers, motorhomes, and fifth wheels tend to have a height of 10 feet or over. However, if you have a smaller travel trailer, a stepladder might not be necessary.
Step 2: Mount the Roller Tube
After the brackets are securely in place, you need to mount the slide-out awning’s roller tube.
With the help of a flat-head screwdriver, open one end of the rail slightly. Again, do not be hasty and apply more force than necessary. Clean the rail if it is dirty, and spray it with silicone lubricant.
Next, unroll a bit of the awning’s fabric from the tube. Slide that small amount of the fabric into the awning rail while ensuring that it stays in the center. If it has some slack, roll the extra fabric back into the roller tube.
Get the end-cap in the roller’s tube right side. Also, use one pan-head screw to hold the roller tube’s end-cap. Do the same rolling procedure for the other end.
Step 3: Secure the Slide-out Awning
The last step is to secure the fabric onto the slide-out bracket. Do this step by positioning both the fabric and roller tube until both items are at the center of the slide-out.
Secure both end-cap arms to the mounting brackets. Use two pan-head screws to affix both end-caps on both ends. Start the process from the bottom so it is easier for you to catch the top end if it falls out.
Remove the locking pin with the spring mechanism from the roller tube. The fabric should be rolling straight back into the tube. Test the functionality of the awning by opening and closing it a few times.
Finally, use another pair of screws to secure the roller attachment to the rail.
Conclusion
Did you like this guide on how to install RV slide out awning? Share with us your thoughts in the comments. Also, make sure to share this article with other RVers that may need help in installing their slide-out awnings.
In summary, make sure to purchase the items needed for this project, such as an RV slide out awning kit, a ladder, and some basic tools. Next, stay patient when installing the fabric, especially when unrolling it from the roller tube.
Practice diligence and patience. If done correctly, you can now enjoy your fully functional RV slide-out awning.
When you set up your RV at your latest camping destination, do you roll out your slide-outs and then forget all about them? You should be unrolling your slide awnings as well! If your rig isn’t equipped with RV slide awnings, you could be at higher risk for water damage.
Here we discuss the importance of camper slide awnings and explain how to measure and install your own.
You may have seen your neighbor’s rig with the mini awnings over their slides. These are RV slide awnings or RV slide toppers. When you ask: “do I need slide toppers?” Well, there’s a reason your neighbors have them!
There are 2 major benefits to equipping your camper with them:
Slide awnings keep debris, leaves, and branches, and bird messes from accumulating on your RV slides. If you allow debris to sit on your slides, it can cause discoloration but can also mess with the seals. If you retract your slides with branches or debris on top, you are bringing all that mess inside plus you’re inviting water in.
RV awning help prevents rain and snow from amassing on your slides. Water and RVs don’t mix well. So by diverting the water off your slide roof, you are less likely to end up with water penetrating your rig and leaving you with water damage.
In short, slide awnings are instrumental in helping keep your RV nice and dry. A properly installed cover can help protect your seals and prevent water damage that is common in RV slide corners.
What Makes Van Awnings Useful All Year Round For Outdoor Workers?
Come sun, rain, wind or snow, van awnings deserve their place on your vehicle and will be one of your greatest assets throughout the year.
Van awnings provide welcome shade in the sun
If you work as a mobile technician, emergency service worker or as roadside assistance, then you likely spend a lot of your time working outdoors. Working in the full-heat of the sun without protection can be very uncomfortable, expose you to harmful UV rays and make it difficult to concentrate and do your job well.
A new van awning is the perfect solution for keeping you and your work out of the sun, so you no longer need to be worried about overheating or keeping your tools inside your van so they don’t become too hot.
Van awnings can provide a lit work space when it’s dark
Lack of light can be extremely limiting for outdoor workers, especially during the winter when daylight hours are greatly reduced. Some businesses may have to close earlier than in the summer because they are unable to work effectively, whilst others who do work through the darkness may be frustrated having to carry and set up extra torches and lamps.
Many of our van awnings come with the option of integrated LED lighting, making darkness a total non-issue for outdoor workers and allowing them to work both day and night throughout the year, increasing productivity.
Van awnings offer protection against adverse weather
It’s not nice to work outside in a storm and having to contend with constant wind and rain can not only make you miserable but impede your work progress too, as many electrical tools will be inoperable.
Wonderfully versatile and fully customisable, vehicle awnings can be used for any number of purposes that is limited only by your imagination.
1) Pro 1 creates a mobile café
Our large Anexe Pro 1 is fast to use with simple crank handle operation or operated by pressing the switch with integrated motor. Clients have taken full advantage of this and created undercover dining areas, complete with side panels and windows, right next to the catering trailer to ensure customers had a fabulous time, were protected from the elements and left remembering their brand.
2) An outstanding showroom at an event
Van awning is a popular choice for businesses hoping to stand out from the crowd at events. With a customized awning that boasts your brand colors, logo, and name, your stand is much more likely to catch the eye of all those potential passing customers than a standard display.
3) All-weather workspace
The awning is a fantastic choice for those who work directly out of their vans, such as windscreen replacement technicians, mobile mechanics and plumbers. The awning creates a dedicated area that’s sheltered from the elements right next to where your tools and equipment are stored. This means you can carry on working no matter the weather, and users always see a fast return on their investment with bad weather downtime being minimised.
4) Chill out zone for busy racers
Another fantastic use for a vehicle awning motorsport trucks and motorsport motorhomes. Creating an area of quiet and relaxation amid busy, high adrenaline surroundings and being able to work on motorcycles, motocross bikes, race karts or race cars or simply to entertain sponsors. When at a sporting event, such as motor racing, it’s important racer and crew have a place to go to prepare for the upcoming event and somewhere to wind down afterwards and a vehicle awning provides the perfect space for just that as well as promotes sponsors with branded awnings.
5) Sheltered area for excited horses
It’s not just motorsports that benefit from a horse box awning. Those in the equine industry have used their vehicle awning to protect rider and horse alike from intense sunshine and heavy downpours. It also gives you valuable additional space right outside your horsebox in which to sort and prepare tack, riding kit and a place to unwind and socialise with friends between events.
Van awnings are a simple solution to help protect you from the elements at the side of your van, truck, motorhome, bus, trailer, or horsebox. No matter what your industry, if it requires you to operate from a vehicle, you’ll understand the difficulties of working outside.
Commercial van awnings
Whether you’re a roadside assistant, mobile technician or tradesperson, when your profession requires you to work from the side of your vehicle, it’s crucial that you can perform your job whatever the weather.
Motorsport awnings
Vehicle awning is a popular choice for motorsport enthusiasts as it transforms the side of your vehicle into a useful, protected space in which to carry out essential maintenance or even celebrate your win! A Broadview motorsport quality awning can be fitted to most small panel vans, large specialist trucks or motorhomes and are available in a range of sizes and customisable designs.
Horsebox awnings
Awning help protect rider and horse from England’s ever-changing weather at the side of your horsebox or trailer. The extra space can be set up or put away with a simple touch of a button or smooth crank handle and can be tailored to your specific needs.
Promotional awnings
Our heavy-duty promotional awnings are made-to-measure and fully bespoke to ensure your business gets the recognition it deserves at hospitality events. Use the practical space created by your awning to display your products in a showstopping exhibition or draw in potential customers with a welcoming living area!
If you’re travelling somewhere extremely sunny and only care about a bit of shade, you might just need a basic sunshade or pop-up awning.
Rather than staying permanently on your van, they act like a portable canopy that you can set up and store anywhere.
A variation of this design is a tailgate awning that creates shade and space at the back of your vehicle instead of the side. This could be a great option if your main entrance is at the rear of your campervan or if you want to extend your outdoor area around the back.
Canopy or Slide-Out Awnings
Another popular option is a slide-out or canopy awning.
As the name suggests, this type of awning attaches permanently to the side or top of your van.
When you’re ready to use it, simply unroll iand secure it with the integrated poles and arms. When it’s time to go, roll it back up, secure it in its cover, and drive onto your next location.
One important note about canopy awnings:
Pay attention to where you’re supposed to mount them.
Roof-mounted models are designed to attach to your van’s roof rack or bars, which could be problematic if your van doesn’t have them!
Wall-mounted awnings could be a good solution here, although it does involve drilling holes into the side of your van.
You’ll definitely want to consider each option and which makes the most sense for your van.
Drive-Away Awnings
If you’re looking for a premium option, you might consider a “drive-away” awning.
Think of it almost as an actual ‘tent’ with one side that attaches to your campervan.
These awnings create a fully enclosed, waterproof space that’s ideal for cooking, eating, sleeping, or just hanging out. If you’re travelling somewhere notorious for bugs, you’ll love the ability to sit outside without getting eaten alive.
Another great feature of van awnings is their ability to transform into an extra storage space.
If you have a stack of stuff you don’t want to haul around in your campervan all day, simply leave it in your ‘tent’ and zip up the remaining side. Easy!
As usual, every van and awning installation will be different and you’ll need to find the best way to install the awning you choose on your particular van.
Tips for installing a camper van awnings on your van
First, make sure the width of the awning you choose is right for your van
Search Google and Youtube for your van make and model and the awning you’re interested in to find forum and blog posts with specific details about your combo
Contact awning manufacturers to make sure the awning you’re interested in will fit your van
Take your time! If you get stuck on some mechanical issue, don’t plow ahead, take some time to learn how to do it right, obtain the best fools, as a more experienced builder…
Don’t dawdle. Get the awning out of the box right away and make sure it’s going to fit your needs so you can return it if necessary.
Campervan Awnings Recap
Van awnings expand your van space and make for cozy, personalized campsites
Create an outdoor space free of direct sunlight and drizzle
Add an awning room for a bug free sitting or sleeping area
Sun shades, slide out, tent/drive away… just a few of the awning types
Make sure your chosen awning will fit your van
Research products, manufactures and reviews in terms of your specific van to find the best awning for your van
Take your time when installing a camper awning to get it right the first time
Camper van awnings can transform your basic campsite into a cozy, personal, and highly functional space.
A few of the advantages of van awnings include
Cooling the van by providing shade
Creating a place to stay dry from rain, mist, lite snow…
A place to set up camping chairs, cooking, eating or just relaxing
Create a feeling of expanded space outside of, but connected to the van
Add screens for a bug proof area for sleeping or just hanging out.
And there are a wide range of campervans awnings available of all types of vehicles.
There are a variety of types of awnings available, each designed for a variety of needs and types of campervans.
How wide are camper van awnings?
This depends on the awning, and it’s a very important question because you need to buy the right width for your campervan.
Each of the products we’ve researched shows the full dimensions of the awning in the product description.
Make sure to carefully measure your van roof or roof rack before purchasing an awning.
Please see our “How to install a campervan awning” section, below for more details about finding the best awning for your van.
Basic sun shades
Light, easy to handle, tend to be lower in price and pack away in a bag. It’s a section of nylon or polyester that slides into and attaches to a rail to the roof of the van.
Sun shades are held up with poles, cord and pegs and they’ll fit almost any van type.
Shapes and features vary widely and you’ll find many types to fit your needs.
The simpler sun shade awnings for vans will not withstand any serious weather. Keep this in mind when planning your routes.
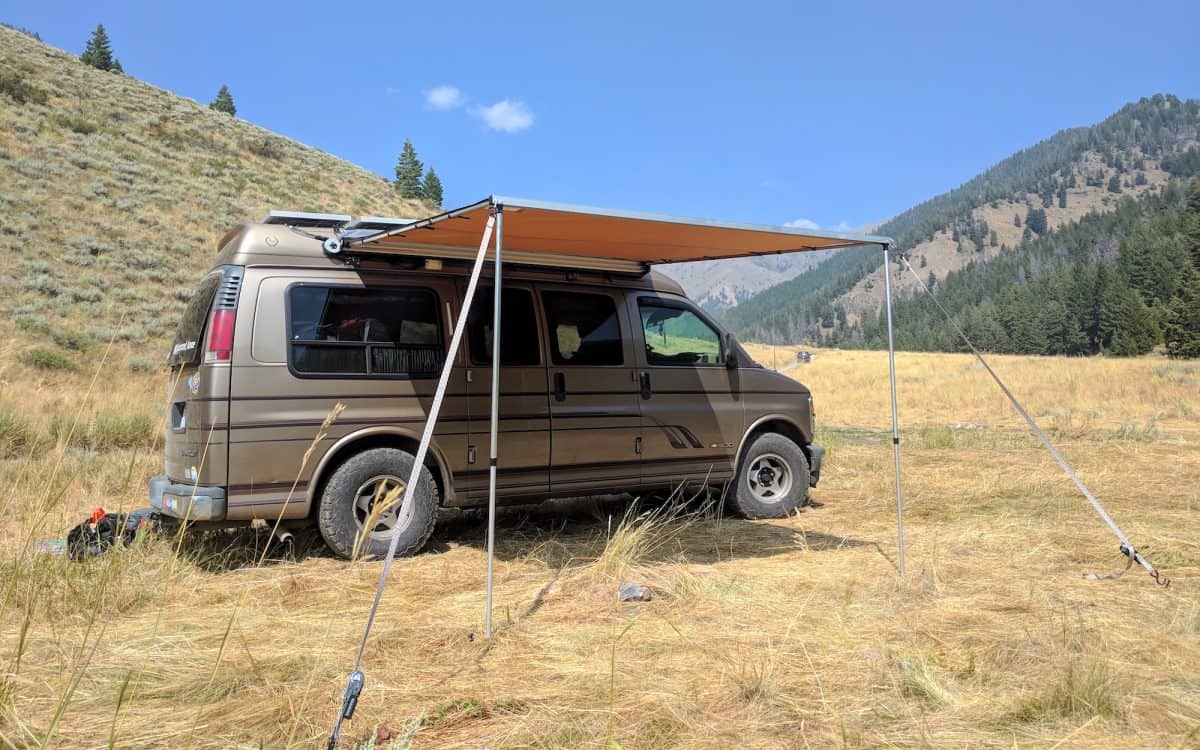
Slide out awnings
These are more substantial for greater weather protection and permanently mounted on your van. They come in a range of features from light and basic to super deluxe.
These include integrated supporting arms and poles. Slide out awnings tend to have durability features like rot resistance, wash-ability and rip/weather proof fabric.
Adjustable length, walls for sides and front are options. There’s lots of sizing and mounting variability for a wide range of van types.
Tent style, or drive away awning tents
We wrote about these at length. If you need more sleeping space, you’ll want to click here to read all about them. You might consider getting one of these and a simple bag type for flexibility. Or go all out and get the deluxe shade, too.