Posted in cargo van, Ideas & Tips

Why Do I Need Work Van Flooring?

Why Do I Need Work Van Flooring?

Work van flooring protects your investment, provides a safe environment for your employees, and makes sure your work van is the ultimate work tool.

Work Van Flooring Is Important For a Professional Workspace

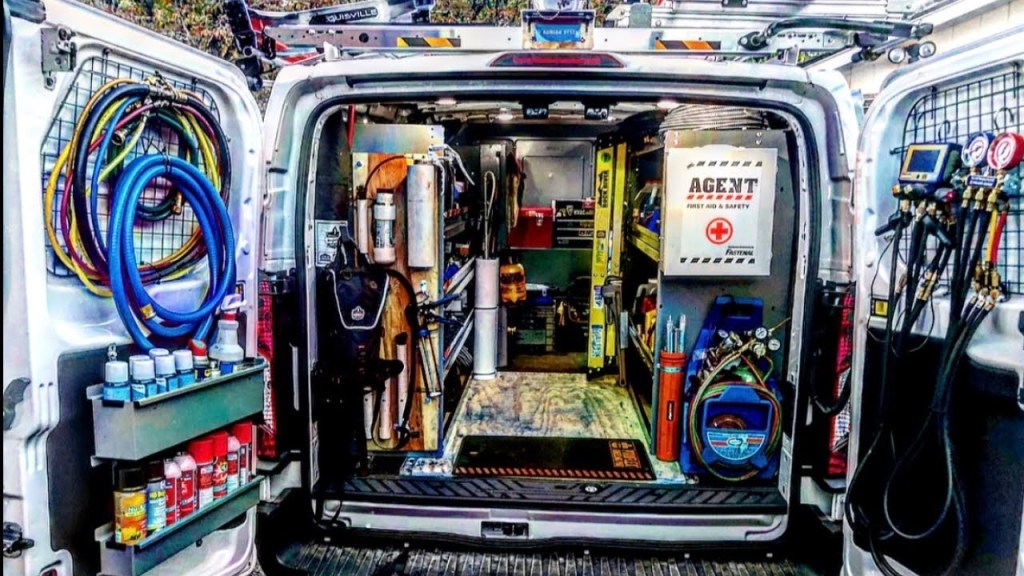
Many people consider shelving, workbenches, ladders, and conduit carriers to be the goal of upfitting, and an organized work van is important, but the flooring for vans should never be overlooked. In fact, work van flooring is the base where all upfits should start. The right flooring is certainly visually appealing, but the benefits go well beyond simple aesthetics.

This blog will take a look at why work van flooring is vital to protecting your investment and providing a safe work environment for your employees, while also exploring popular flooring materials and other design considerations that will make your work van the ultimate work tool.

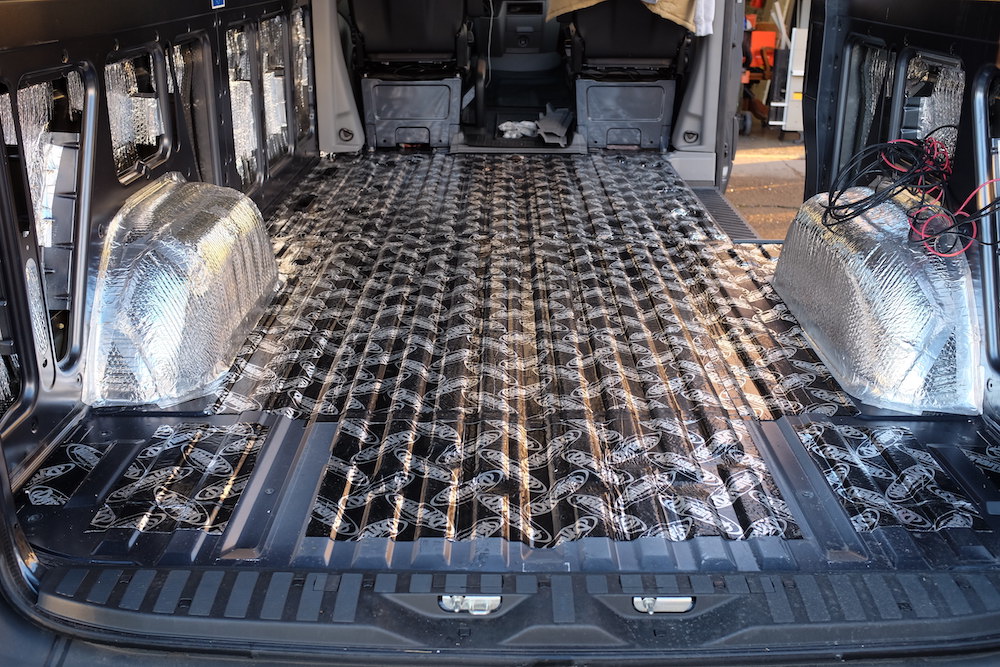
CUSTOM WORK VAN FLOORING IS THE FOUNDATION OF YOUR WORK VEHICLE

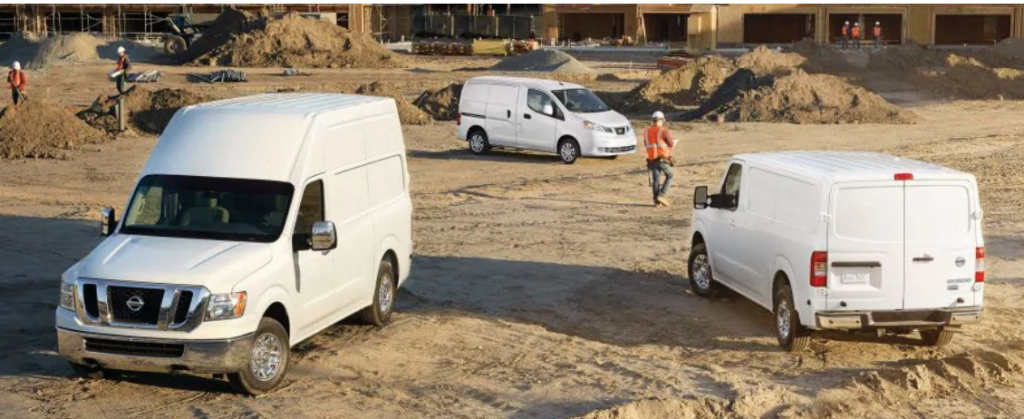
Most factory-direct vehicles feature bare-metal flooring. This is mainly because manufacturers know that fleet operators and van owners have specific flooring needs. Flooring is an integral part of most upfits and here’s why:

Protect Your Investment – When you bring your van to the job site, whether it be for plumbing, HVAC, construction, landscaping, or dog washing, it is going to take a beating, and the flooring will most likely be the target of most of the abuse. Hammers get dropped, remainders of conduit get tossed on the floor, equipment can leak chemicals, and a sharp turn or sudden stop can scatter parts. Work vans even double as mobile workstations, which means they need to be treated with the same care and forethought as a stationary workspace. Flooring is a wise investment that absorbs this damage, so you never have to worry about accidents spoiling the floor or wear and tear taking its toll. Even small punctures in the floor can allow chemicals and moisture to get beneath the floor and cause major damage in the long run. By protecting your vehicle, you protect its resale value.

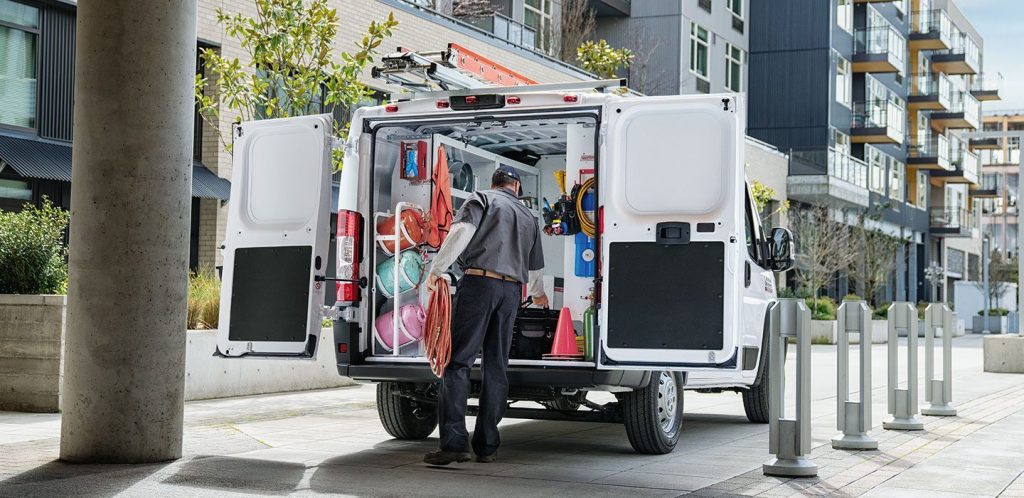
Provide a Safe Workspace – It’s no secret that safety is paramount, but one fact that is often overlooked is that everything you do to enhance safety is also an investment in efficiency and productivity. Work van flooring can prevent slips, especially in wet weather or at muddy or icy job sites. Losing your grip in a work van when surrounded by metal tools and caustic chemicals is a major risk. Rubberized and grip flooring provides traction, which allows staff to easily and safely load and unload large and bulky items with ease. Never take chances with the health and safety of employees; install sturdy, rubberized flooring to keep workers safe on the job. 

Reduced Noise – Work vans are loud. Even with the best shelving and equipment storage possible, items will still rattle around in the back. Rubber work mats and flooring stop shifting cargo and help dampen noise from the cargo area, reducing distractions and further increasing safety. 

Easy to Clean – Work vans get messy, and bare metal floors aren’t designed to be cleaned, especially if they have been beaten out of shape and worn down by rough use. Custom van flooring is molded to fit specific vehicles, can withstand the dirt, grime, and dust, and can be cleaned with ease.

Flooring Can Be the Difference Between an Old, Worn-Out Van, and One that Looks Brand New

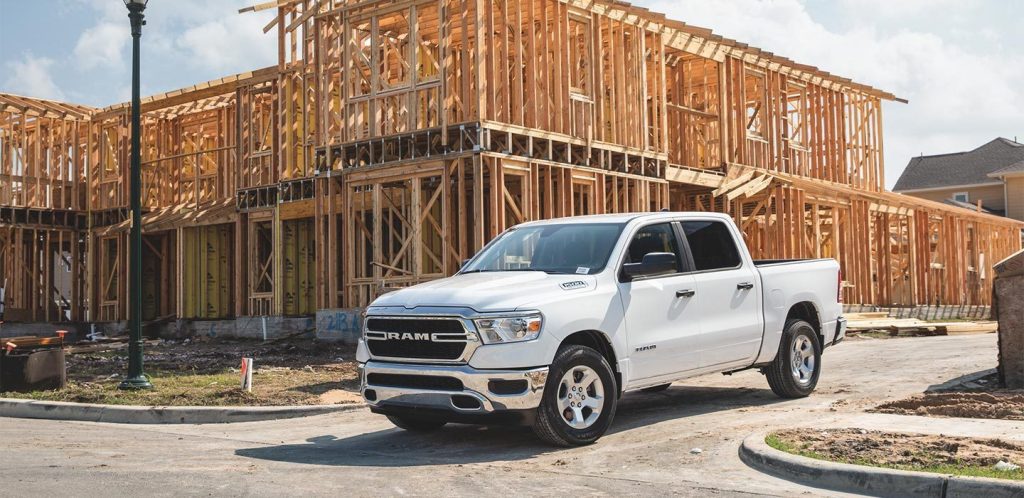
Your work van is a representation of your business, and a van that can’t stand up to wear and tear or always has a dirty, disorganized appearance is a bad sign for customers. Not only is work van flooring easier to clean, but it also looks much nicer than the bare metal from the manufacturer. Custom van shelving ideas delivers a polished, professional appearance that makes your van look and feel well-maintained. A company that takes good care of its equipment and tools also takes care of its customers.

The Styles of Cargo Van Floor Protection

Rubberized Cargo Van Mats – Rubber mats are cut for specific vehicle models and wheelbases. They are a great option for upfitters that need the protection of rubberized flooring but the flexibility to provide great traction while still making it easy on knees. Rubber is shock absorbent, strong, and sturdy enough to maintain good looks for a long time. Rubber flooring for cargo vans is an important upgrade. 

Composite Van Flooring Material – Composite materials combine the anti-slip safety of rubber with enhanced protection from dropped tools and general wear and tear. Layered with a rubberized top for traction, a mesh center for flexibility, and a TPO bottom for strength and durability, they come in panels of two or three for easy installation depending on the wheelbase of your vehicle.

At Advantage Outfitters, we excel at helping you get the most out of your work van build, from the floorboards up. We offer competitive online prices, quick shipping times, and personalized service that guides you through the entire upfitting process and helps you customize one van or a fleet of 100 or more. Call to speak to one of our experts or head to our how to buy page for more information about how we can help you get the ultimate work tool that will transform everything you do.

Posted in cargo van, Ideas & Tips

Five Ways To Upfit Your Forklift Service Van

Five Ways To Upfit Your Forklift Service Van

A practical forklift service van setup is crucial for a productive mobile workspace. When your van is upfitted, it ensures efficiency, employee safety, and quality customer service. Here are five ways to start upfitting your forklift service van.

1. Put Shelving Units In

Putting shelving units in your forklift service van maximizes cargo space. Shelving systems offer modular flexibility, meaning they’re easily customizable depending on the size and model of your van. Even if something happens with your work vehicle and you have to replace it with a new one, the shelves are easily transferable and can last up to two or three vehicle lifespans.

Ranger Design shelving options work in the following vehicles:

  • Chevrolet Express/GMC Savana
  • Mercedes Metris
  • Mercedes Sprinter (Aluminum Package)
  • Mercedes Sprinter (Steel Package)
  • RAM ProMaster
  • RAM ProMaster City
  • Ford Transit

2. Insert Parts Storage Cabinets

Parts storage cabinets keep all your equipment handy and accessible inside and outside the van. These heavy duty parts storage cabinets are modular and expandable for any piece of equipment; they come as convenient carrying cases so your workers can customize their case based on the project and bring the best parts for the job.

Parts storage cabinets are an efficient and productive way to organize and store small components and universally fit in any van; they can be mounted under shelves, inset into shelving, or stack as stand-alone units.

3. Apply Van Flooring

Van flooring is a good starting point for any efficient van upfit. When you get your van from the manufacturer, they generally come with a sheet metal floor or thin vinyl mat; these surfaces are not comfortable to walk on and can be hazardous if your shoes are wet or oily.

When it comes to a sufficient machinery service van setup, Aluminum Diamond plate and Stabil grip are the most suggested van floor coverings. Aluminum Diamond plate is thick yet lightweight and durable; it has superior impact sustainability and is puncture resistant, so it retains its appearance for an extended period. On the other hand, Stabil grip flooring is anti-slip and maximizes worker safety and efficiency. It can also endure all temperatures without buckling.

4. Install Liftgates or Ramps

Liftgates and cargo van ramps make work easier and minimizes physical strain on your employees. When you transport materials to and from the jobsite, assistance is often needed to move bulky items in and out of the service van. Liftgates and ramps reduce the effort needed for these tasks and prevent potentially costly and lasting injuries.

If you frequently move lightweight loads and wheeled equipment in and out of the van, a foldable ramp is your best solution. For heavier items such as pallets and machinery, a liftgate is the perfect tool for the job.

5. Introduce Interior Lighting

Introducing interior lighting in your van’s cargo space allows you to see what you’re doing after the sun goes down or before it comes up. It saves you and your workers’ frustration from hunting for a flashlight when you need to open the back doors; it saves time and allows you to do your job as efficiently as possible. In addition, interior lighting reduces the risk of injury because your workers are able to see where they’re walking to avoid tripping hazards.

Surface-Mount Interior Lighting and Recessed-Mount Interior Lighting are the recommended interior lighting options for commercial vans. These lighting fixtures do not eliminate any cargo headroom, and they have a 50,000 hour lifespan.

Take Advantage of Your Forklift Mechanic Van Setup

A proper forklift mechanic van setup allows you and your workers to complete projects efficiently and safely. At Advantage Outfitters, we know your time is valuable, which is why we’re here to help you upfit your on-the-go workspace.

KNOW YOUR VEHICLE

Not all vans are built the same, so it’s vital to understand your vehicle’s model along with its strengths. Before upfitting, it’s essential to consider the van’s size as well as its capabilities, such as weight capacity and balance. Implementing heavy equipment in the cargo may uneven the vehicle, which could cause significant maintenance damage down the road.

Commercial van upfits intend to satisfy the needs of your team. When upfitting your vehicle, listen to your employees to get their input on what they believe would be the most beneficial to implement in the van. All and all, your service crew will be utilizing the van most, so it’s important to keep their productivity and safety in mind.

Posted in cargo van, Commercial Van, Ideas & Tips

4 Hidden Benefits of Commercial Auto Insurance Policy

The Best Cargo Vans for Small Businesses in 2021 | Digital Trends
4 Hidden Benefits of Commercial Auto Insurance Policy

There are many benefits of commercial auto insurance. All drivers to carry adequate and approved insurance coverage. This is even more important for businesses who depend on their vehicles to deliver products and services for profit. Without the right auto insurance coverage, you could find yourself suddenly put out of business by an accident.

However, asset protection isn’t the only reason why you need commercial auto insurance. Here are several additional benefits you’ll gain from your auto coverage.

You Become a Better Credit Risk

Banks and lending institutions consider a variety of factors during the loan application process. Besides your credit score and income, lenders look at other things that could affect your ability to repay. One of them is your insurance coverage. 

If you are financing your commercial van purchase, your lender will most likely require a certain level of insurance coverage. Getting a policy with greater coverage limits may be the move that makes a lender give your application a little extra consideration.

Your Equipment is Covered Too

While the details of each insurance contract vary, commercial auto insurance generally covers any equipment that’s carried in your work vehicle. So if you get in an accident and destroy your inventory, you may be able to add that to your insurance claim.

Your insurance also covers things like theft and vandalism, which is a big advantage for delivery-based businesses that work in high-incident areas.

You Might Qualify for Better Lease Terms

Businesses who lease their vehicles traditionally struggle with controlling costs. Cleaning and maintenance fees often add up to some impressive charges at the end of the agreement period. Training your drivers in proper driving techniques is an effective way to reduce the scraps and scratches that pump up your leasing payments.

However, even safe driving has its limits. Your commercial auto insurance policy can be customized to include special protections for leased vehicles that can convince sales lots to significantly lower your liabilities.

Get More Customers

In competitive markets, your business needs every possible advantage to draw positive attention. Customer service is a primary concern when buyers are looking for a place to shop. More than just a solution to their problem, consumers want to believe that the company they’re doing business with cares about their wellbeing.

Having adequate insurance coverage is an easy way to show your customers that you care. With your valid auto insurance policy, your customers know that their property and personal space will always be financially protected from any blunders or accidents.

Understand the Benefits of Commercial Auto Insurance

Now that we’ve addressed some of the major benefits of commercial auto insurance, it’s important to note that being properly and fully covered doesn’t need to break that bank. While auto insurance is definitely no place to be overly frugal, there are some cost-saving measure of which you may not be aware.

Posted in cargo van, Commercial Van, Ideas & Tips

Four Decisions to Make Before Buying a Van

https://cdn.carbuzz.com/gallery-images/1600/340000/200/340219.jpg
Four Decisions to Make Before Buying a Van

When I first discovered van life, I thought there were three kinds of commercial vans: standard, long, and high. As I got further into my research and became more committed to making this idea a reality, I was blown away by the number of options. Standard, long, and high were just three options available for each model, and it seemed like every auto manufacturer had at least one model of van. Some had multiple models, or a cargo model and a passenger model. Some had two kinds of “high” or “long.”

I’m not what you’d call “mechanically savvy,” and the number of differences to look at completely overwhelmed me. And while there’s tons of articles, videos, and guides about the differences between van models online, none of them run down the how to make a decision about a van.

The Four Major Decisions that Narrowed the Field:

Gas or diesel?

There are pros and cons to both. Gasoline engines run down based on mileage, while diesel runs down based on how well the engine is maintained. This means diesel engines have the potential to go hundreds of thousands of miles — I’ve even heard about a fellow whose van has nearly 1,000,000 miles. This sounds great: a van that can go forever? Sign me up!

The problem is, diesel engines are also much needier than gas engines. They require more frequent maintenance and the maintenance is more expensive. If you plan on going a million miles it may be worth it, but many van lifers get a second van after a few years because they’ve figured out what they should have done the first time around and are ready to give it another go and commit to the lifestyle for another several years. Plus, there’s always the environmental consideration: diesel is dirty.

High or low roof?

This is something I decided I couldn’t yield on. I hate the idea that I’d have to crouch and hunch over in my home; that I’d have to be bent in half while cooking, getting ready for the day, even spending a sick day in the van. It kept coming back to that for me: I’m doing this so I can bring my home with me everywhere I go. The low roof makes me feel trapped even without the extra inches of insulation and paneling and the space taken up by the bed, counter and whatever I would need to sit on so I could cook. Anxiety isn’t something I want to associate with “home,” and I think going with a low roof would be setting myself up for failure, not success.

Everyone’s different. My mom has spent the last few months trying to convince me that a low roof would be better because it would have greater accessibility to parking garages and the like. To her, it doesn’t matter if the roof is low, because it’s really just a place to sleep. And I have no doubt she’d be completely comfortable with the low roof.

This point really just comes down to what matters more to you: invisibility and accessibility, or space and comfort. I tried to compromise by going with the mid-roof option on the Ford. In truth, though, I think the mid-roof is only slightly lower than most high-roof vans, and the Ford high-roof is the extra high option. Don’t hold me to that. I meant to write up a spreadsheet comparing every van on the market, but that was completely chaotic and impossible, so I don’t actually know all the specs on all the vans.

I thought about mentioning wheelbase, too; ultimately I decided that wheelbase wasn’t much of a deciding factor for me because I’m going to notice if I can stand up straight much more than if there’s an extra foot of counter space. Wheelbase definitely has an impact, but there are wheelbase options for every van model, except some of the vintage ones, and although they vary, I don’t think there are any models where the wheelbase options are unreasonable. Once you figure out which van to get, choosing a long or short wheelbase is pretty simple.

Drives like a car or drives like a truck?

That’s probably an inaccurate comparison, but that’s really what this point boiled down to for me. Some vans have a relatively compact cab and handle smoothly, which makes you feel like it’s just a big car. Some feel like stepping into an eighteen-wheeler the second you open the door.

I was really into the Ram ProMaster when I first started looking at physical vans on dealership lots. Sprinters are huge and fancy, but ProMasters are huge, fancy, and durable, so they’re like the castle of van living. They were a little out of my price range, but I was hoping I might be able to find a used one for cheap if I got lucky.

Actually sitting in one completely turned me off. These things are massive in the cab. The cupholders are nearly on the ground, and everything feels a lot more spread out. I’ve got short arms and short legs, and I quickly realized the ProMaster would be really uncomfortable for me to drive. Just sitting in it made me feel six inches tall. I couldn’t imagine actually handing that machine on the road on a daily basis.

I’m sure it’s doable, and I could have gotten used to it, but driving the Ford Transit was so comfortable I almost forgot that it wasn’t the same car I’d been driving for seven years. I decided that feeling comfortable in the driver’s seat from the get-go was important to me.

New or Used?

Sure, you can find some used vans for $10,000 or less. A lot of these vans probably aren’t in the best condition, but there are tons of vanlifers out there who got something like this and reported that it all worked out well. But a lot of these vanlifers also say that you should try to find something under 5 years old, especially if you plan to live in it for a long time. These vans tend to be in better condition and sometimes still have time on the warranty in case you do discover a problem early on.

Looking at used vans under 5 years old, most of them are not much cheaper than new vans, particularly if you qualify for rebates or other discounts. My mom is pretty worried about this whole endeavor, and said she was willing to pay the difference for me to get something new, both because it would ensure that I had the full warranty and she thought ‘new’ just sounded safer. So I was lucky enough to be able to get something new, and I think if you can afford it, that’s probably the best option. I also realize that most prospective vanlifers can’t afford a new van.

There’s a book that does a great job of covering what to look for before you purchase a used van to make sure you don’t get ripped off. It’s called How to Live in a Van and Travel by Mike Hudson. Mike’s perspective on vanlife is honest, practical, funny, and inspiring. The book mostly covers the ins and outs of navigating life in a van, but the first 60 pages or so discuss choosing a van, and helped me to clarify what I needed to focus on. I definitely recommend it.

I’d also like to slip a big thank you in here. One of the biggest pros of buying from a dealership, whether new or used, is if you find a salesman who is a total rockstar. While we were checking out vans at dealership lots to try to figure out what kind I might want, we met Dan Nichols, who is the fleet manager at Reno GMC. Everyone I met at Reno GMC was warm, friendly, and genuinely supportive of my plans with the van, but Dan was really incredible. He went out of his way to give me honest pros and cons for different models, talked to me (the 23-year-old girl with almost zero knowledge about cars) with respect and explained all the details that I didn’t understand without complaint. Dan listened to my vague, twisted descriptions of what I was looking for and diligently hunted down a vehicle that met all my requirements at a Ford dealership in California. Then he arranged everything so we could buy my 2018 Ford Transit mid-roof 148″ wheelbase with rear windows from his dealership in Reno and not have to deal with the hassle of buying across state lines. Dan went above and beyond and is truly a stand up guy, and I recommend Reno GMC to anyone who is in the market for a vehicle.

I don’t really think the kind of van you get makes much difference.

I spent a lot of time trying to figure out the “perfect” van for me. I wanted to make sure that every specification was ideal for my plans. I tried to make comparison charts, looked at all kinds of details that made absolutely no sense to me, and tried to figure out how to become a mechanical guru overnight.

Here’s the problem: plans change, and so do people.

Let’s say I actually managed to figure out the exact van that would be perfect for all my wildest dreams. In a year, those plans might have changed. I will certainly have changed, and I might not care about the same things that I do now when looking at vans. Some of those “perfect” details will probably turn out to be totally unnecessary or even detrimental. The only way for me to know what aspects matter the most to me is to get out on the road.

All vans are more or less the same: they have an engine, a cab, and a big empty space. All of them will do the job. No matter how my plans change, no matter how I change, my van is going to stay the same, and I will have to find a way to make it work.

That’s not to say that I think buying the first van you come across is the way to go. I think you need to have some basic knowledge about what the differences between makes are, and have an idea of what options are most important to you. I wasn’t willing to drive a van without rear windows, because I like being able to see what’s behind me. Being able to see the sliver of a car tailgating me but not being able to really keep an eye on it would drive me insane. That’s something I wasn’t willing to compromise on. Figuring these things out helped me eventually find the van that’s going to be my home for the foreseeable future.

But at the end of the day, I would have gotten used to not having rear windows. It would have driven me mental for six months, but people are adaptable. Eventually I wouldn’t even notice.

We always hope for the best case scenario. But even the most ill-fitted van has the potential to become a home. All it needs is some TLC and a little time. In the coming months, I’m going to give my van some TLC and a whole lot of character, and you’ll be able to watch the progress here as I turn it into a home.

Posted in cargo van, Commercial Van, Ideas & Tips, sprinter work van

3 Reasons a Cargo Van Is Better Than a Pickup Truck

a white Ram work truck on the job
3 Reasons a Cargo Van Is Better Than a Pickup Truck

When it comes to getting the job done, pickup trucks immediately come to mind. But trucks aren’t the only option for a good, sturdy, get ‘er done type working vehicle. Pickups have their purpose, but so do cargo vans. In fact, there are some ways a cargo van is better than a pickup truck. Here are three of them.

1. Protected cargo

The first and probably most obvious reason cargo vans are better than pickup trucks is their ability to protect cargo. Sure, pickup trucks have plenty of space in the bed. You can even buy a shell to protect cargo from the weather. However, cargo vans come really equipped with workhorse payloads and covered cargo. A covered cargo that is both weatherproof and private.

the rear interior cargo of a Ram ProMaster being used on a job
Ram ProMaster Interior | Ram Trucks

You can’t drop anything out of the enclosed space that a van offers. That means no damaged goods and the elimination of the liability of unexpected road hazards. There’s also the fact that although you can build out a truck for overlanding or equip it with a nice tent, camper conversions are largely more practical in a cargo van. The vast protected box provided by the cargo area makes for a great living space for overland travel.

2. A more professional appearance

There’s no denying that most pickup trucks look infinitely cooler than a cargo van. However, if you are using your truck for commercial use a cargo van is probably a more professional option. In terms of appearance, trucks are more fashionable.

A cargo van will look more commercial on the job. First impressions mean a lot, and the highly professional and undeniably commercial styling of a cargo van may go a long way in terms of branding. For commercial use, a cargo van looks a lot more professional. They just have a more business-designated feeling in the eyes of the customer.

nissan's commercial van lineupdirt field with
Nissan Commercial Vans | Nissan

3. You don’t have to forgo a long list of options

Pickup trucks are loved for their rugged looks and strong capability. They are also appreciated for the incredible amount of options buyers have to choose from when choosing a truck. While there aren’t as many different brands that offer a cargo van, the ones that do offer the vans in a wide variety of options and configurations for your business needs.

The Ford Transit and the Mercedes-Benz Sprinter both come available with factory 4×4. Additionally, the Transit now has a crew cab option. The Nissan NV and the Ram ProMaster don’t come with the 4×4 capability, but they do offer several different wheelbase and roof height options. Plus, they come in the 1500, 2500, and 3500 classifications just like a pickup truck.

Cargo van or pickup truck?

Cargo vans and pickup trucks serve many of the same purposes. Pickup trucks are inarguably more stylish and come with the possibility for luxury trim levels a cargo van would never even dream of. But they are also workhorses.

Posted in Commercial Van, Ideas & Tips

Can Your Business Benefit From A Commercial Vehicle?

https://di-uploads-pod16.dealerinspire.com/edvoylescdjr/uploads/2018/10/2018_Ram_Promaster_FamilyShotAtJobsite.jpg.image_.1440-1024x576.jpg
Can Your Business Benefit From A Commercial Vehicle?

If you are a business owner, you may have wondered if adding a fleet of commercial vehicles is right for your business. Commercial vans can offer numerous benefits and be an essential part of your daily business routine. Whether you are a small local business or rapidly expanding, a commercial vehicle fleet may be right for your business. Discover the benefits of commercial vehicles and learn more about your commercial vehicle options.

Benefits of Commercial Vehicle Ownership for Business Owners

Adding commercial vehicles to your fleet is great for efficiency. Plus, you’ll enjoy tax write-off benefits at the end of the year. Many of the costs of maintaining a commercial fleet, even if the fleet only contains a couple of vehicles, can be written off at the end of the year. Depreciation, mileage, and interest on your auto loan can be written off as a tax deduction.

Another great benefit of commercial vehicle ownership is that commercial vehicles are built specifically to match your business needs. Commercial vehicles like cargo vans can help you stay organized while making deliveries and commercial pickup trucks are designed to help tackle the toughest job sites. Having commercial vehicles can help increase efficiency just by having everything organized.

Commercial Vehicle Options for Different Types of Jobs

Whether you are a general contractor, farmer, or other small business owner, you can have the commercial vehicle that meets your needs. You can browse cargo vans, haulers, pickup trucks, passenger vans and more. Search Ram commercial vehicles, like the Ram 3500 and Ram 4500, and take a look at our cargo vans, like the Ram ProMaster 3500. Whether it is Platform, Service, Utility, or cargo, you can find it in inventory. Start browsing commercial trucks and vans.

Posted in Commercial Van, Ideas & Tips

Camper Van Insulation and Sound-Deadening

Camper Van Insulation and Sound-Deadening

A van build is a large project that requires extensive research, detailed planning, and implementing a comprehensive layout design. A helpful suggestion is to break down the van build by phases and just focus on one phase at a time. If you do look at an entire van design outline from start to finish, it can be extremely overwhelming. However, the one thing most vanlifers can agree on is that sound-deadening and insulation is a great place to start. It is nearly instant gratification because there is no drying or waiting process involved. As soon as the camper van insulation and sound-deadening materials are installed, you’re able to immediately get up and drive your van around!

Sound-Deadening

One of the first noticeable features of an empty, pre-converted van is the way that it echoes like a tin can. When you first drive your van after purchase, you may notice all the rattling of the metal. Even when parked, an empty van can echo like a tin can. Recognizing how hard it will be to make phone calls, whether to friends and family, or business calls, in an echoing van is important. From there, you can decide whether you think this is something worth fixing. Dynamat is a very simple solution, although there are many other options as well: FatMat Rattle Trap, Noico, and Kilmat. 

All this material requires for installation is cutting it with a utility knife, peeling off the back paper, and sticking it on the necessary areas. Some people choose to place sound-deadening material only in certain regions, such as focusing specifically on the front cab, which will really help with noise and rattle comfort when driving. Further down the road, this will also help keep noise inside the van (during movies, conversations, etc.) as well as keep any exterior noise outside of the van.

If you’re lucky, your van might even come with sound-deadening materials at the time of purchase!

Camper Van Insulation

There are an endless amount of options for van insulation. The number of windows you have will also heavily influence what kind of insulation you use and how much insulation you need to properly ensure your van will stay warm or cool. Some swear by spray foam, while others swear by rigid foam board. The different options have various benefits and downfalls. For example, spray foam is extremely messy and is oftentimes recommended to have professionally installed in order to avoid a mess. Reflectix is nice for smaller regions, and rigid foam board is great for straight, flat areas, such as insulating the ceiling or floors.

A personal preference is to primarily use camper van insulation that you can stuff and squeeze into smaller spaces, as most vans have different compartments and sections that are hard to fit exactly. Some options here are fiberglass insulation or recycled denim batting. You’ll want to keep in mind that fiberglass may be harmful to breathe over time. Don’t be afraid to mix and match! Certain forms of insulation are better for certain areas of the van. Our preferred combo? A mix of recycled denim batting, rigid foam board, and reflectix. Here is a breakdown of the different kinds of insulation available with detailed pros and cons for each.

Spray Foam

While spray foam is considered one of the most efficient forms of camper van insulation, it can be very challenging to install. Nearly everybody I’ve ever spoken to agrees to this fact: if you plan on using spray foam to insulate your van, pay to have it done professionally. Additionally, closed-cell spray foam does a better job sealing all air gaps and gives you the highest R-value per inch.

One of the many reasons that we recommend having spray foam installed professionally is because of the above-mentioned metal warping.

Additionally, we have heard horror stories of spray foam leaking into certain areas of vans, such as seat belt devices, and having to wait on expensive replacement parts for the van that were not intended to be replaced. Make sure you tell the professionals completing your installation of any cavities you don’t want filled. For example, map out where your windows will go and share this information, and provide door and seatbelt mechanism locations as well. Taping off or sealing certain areas yourself, such as the cab of your van, may help ensure a clean job and less potential of finding foam in unwanted areas. 

Posted in cargo van, Commercial Van, Ideas & Tips

Is Sheep Wool Insulation Safe?

Is Sheep Wool Insulation Safe?

Sheep wool insulation has become a popular form of insulation for camper vans. Living in the close confines of the camper van, you are in close contact with all the materials used to build the van. When you spend so much time in a small metal box, you want to make sure that everything used to customize the box is safe.

Is sheep wool insulation safe?

Sheep wool is one of the safest forms of insulation for a camper van. It is no more dangerous than a wool sweater. Not only is wool safe, but it also improves the environment inside your van. It is the best insulation you can use for air quality and moisture control.

Benefits Of Wool Insulation

Van insulation is important for keeping your camper comfortable in hot and cold weather. However, many kinds of insulation can cause problems. These problems include releasing toxic chemicals into the air, trapping moisture leading to rust, and fire danger. Wool insulation does not pose any of these risks.

Wool is hair from sheep. It is 100% natural and does not pose any risks. Wool is one of the safest kinds of insulation you can put in your van. Various types of insulation can cause problems with air quality, flammability, and moisture-trapping. Let’s see how wool stacks up against some of the common issues with other types of insulation.

Air Quality

Some forms of insulation can contain chemicals that can be toxic or carcinogenic. During installation, some of these chemicals may be released. The motion of a moving van releases some and some are continually released throughout the life of the insulation. Wool contains no toxic chemicals. In fact, wool can help purify the air.

Studies show that wool can absorb contaminants, such as sulfur dioxide, nitrogen dioxide, and formaldehyde. Some kinds of man-made insulation emit these gases. Because of this, wool insulation makes your van safer. Using wool insulation will help reduce some of the nasty compounds released by other items in your van, such as vinyl.

Moisture Control

When warm, humid air inside the van comes in contact with cold metal walls, water vapor condenses on the walls. Some kinds of insulation seal this moisture against the metal. As we all know, wet metal rusts and rust can be a big problem in a van. Not only does wool not trap moisture, but it also absorbs moisture from the air when humidity is high. Even better, it will release moisture when the humidity is low. These features of wool help prevent moisture trapping.

The ability of wool to trap and release moisture helps fight rust. Instead of letting the outside wall of the van get wet and trapping water there, wool helps keep the camper van’s walls dry. As a bonus, wool does not lose its ability to insulate when it’s wet. Some kinds of insulation do. Rust starts as a small problem; however, if left unchecked, it can cause significant damage with costly repairs.

Fire Safety

Some forms of insulation are highly flammable. Wool is not. In fact, wool insulation is a flame retardant. Should a fire break out in your van, wool will help slow the fire down. It’s not fun to think about what can go wrong, but you’ll sleep better knowing you have taken some steps to prevent fire.

Reducing the possibility of fire is always the best option; nonetheless, should a fire start, make sure you are prepared by having a fire extinguisher in your camper van that is designed specifically for travel.

But How Well Does Sheep Wool Insulation Work?

The safest, most moisture and flame-retardant materials in the world are useless as insulation if it doesn’t insulate. How does wool stack up in the heat-holding department? Very well. In addition to holding heat, van insulation should be easy to fit into the oddly-shaped spaces that make up a van wall.

Holding Heat

Have you ever seen a cold shivering sheep? Wool is terrific insulation; that’s why we use it to make sweaters and coats. The heat-trapping power of insulation is measured with R-value. Wool has a higher R-value per inch of insulation than the pink fiberglass insulation that contractors commonly use in homes. It is one of the best heat-holders you can get for your van. Not that this is related to heat—but it’s nice to know that wool also helps block noise!

Fitting In

Vans often need special insulation products because there are lots of weird little gaps and compartments in the walls. Homes are built according to standard specifications, so insulation products are designed to fit these spaces. To insulate a van, you must adjust the insulation to make it fit what you have. Wool is great for this, too.

Fiber insulation is excellent for vans because you can bend, cram and poke it into all kinds of nooks and crannies. It is much simpler to install fiber insulation than rigid products like foam boards. Wool is terrific for this. Since it’s a fiber, it’s easy to adjust the size of wool insulation. You can pull pieces off the roll for the small spots, or if you want to be neater, you can cut it with scissors.

Unlike rock wool or fiberglass insulation, you can install wool insulation with your bare hands. It won’t cause itching or allergic reactions. You peel it apart, poke it where you want it, and you are good to go.

One more benefit of wool is that it doesn’t settle. Some other kinds of fiber insulation will slump down over time, leaving bare spots with no insulation. You will have to either be cold or open up the walls to add insulation. Wool will hold its shape for decades – likely longer than your van lasts.

Sound Blocking

Wool is also an excellent sound blocker. Foam panels and radiant barriers don’t block much sound, so you will hear everything that is going on outside your van at night. Wool keeps the noise away and lets you get a good night’s sleep.

Sustainability

Wool is also a good choice for sustainability. It’s a renewable resource because sheep grow new wool every year. Processing wool for insulation requires very little energy input. Technically, the wool itself is solar-powered, since the sheep eat grass to make it.

Wool also sequesters some carbon dioxide. The carbon to make the wool fibers comes from the grass sheep eat. The carbon in the grass comes from the carbon dioxide the plants pulled from the air. By using wool to insulate your van, you are helping fight global warming!

Wool has a better end-of-life disposal process than other forms of insulation, too. Since it’s just hair, old insulation can be composted instead of dumped into a landfill. From beginning to end, wool is easily the most sustainable form of insulation for your van.

Posted in Commercial Van, Ideas & Tips

Van Insulation Guide: Make an Educated Decision

https://i2.wp.com/parkedinparadise.com/wp-content/uploads/roamingwithrob.jpg
Van Insulation Guide: Make an Educated Decision

Heat Transfer 101

The goal of adding insulation is to combat heat loss. Heat loss happens because of heat transfert (a.k.a.heat flow). Heat is always transferred from warm to cool and continues as long as there is a temperature difference; a larger temperature difference means more heat transfer potential.  There are 3 heat transfer mechanisms: Conduction, Radiation & Convection.

Conduction

  • Conduction is heat transfer through a material.

Examples:

  • A pot handle (see picture above!)
  • A spoon in a hot cup of tea
  • A van metal surfaces getting hot inside the cargo area on a sunny day
HOW:

Energy is stored in the vibration of atoms. More heat = more energy = more vibrations. The collision of atoms between each others transfer heat.

Insulating for conduction:

The more dense a material, the closer the atoms are from each others and the more they transfer energy to their adjacent atoms (by physically colliding to each others). Therefore:

Radiation

  • Radiation is heat transfer through electromagnetic waves.

Examples:

  • The sun
  • A Mr. Heater Buddy (there is some convection too but it’s mainly radiant)
  • A van dash getting hot when exposed to the sun
HOW:

Any hot (or warm) object radiate electromagnetic waves and can heat up other objets at distance (and therefore loose heat themselves). Energy is transferred through the electromagnetic waves, therefore thermal radiation can propage through vacuum (without the presence of matter).

Insulating for radiation:

Convection

  • Convection is heat transfer through fluid (or gas) movement.

Examples:

  • Hot air rising above an intense heat source (i.e. electric heater); Cold water falling towards the bottom of a lake
  • A vehicle ventilation system (hot/cold air travels with the air being pushed by the fan)
HOW:

Heat is “transported” from one part of a fluid (or gas) to another by the bulk movement of the fluid itself. Hot regions are less dense, so they tend to rise and are replaced by cooler fluid from above. 

Insulating for Convection:

While heat transfer can be separated in 3 separate mechanisms, heat loss normally implies all 3 of them together. For example, a hot cup of coffee:

  • Heat is transferred from the liquid to the cup surfaces (conduction + convection from the circulation),
  • From the cup to the air and objects nearby (convection+radiation), 
  • From the cup to the cold table underneath (conduction),
  • Blowing on coffee to cool it down (convection).
  • (Heat is also lost through evaporation -change of phase-, but that’s out of our scope)

2.2- R-Value

Insulation materials are good at resisting heat flow. To quantify how good is an insulating material and compare them between each others, a neat dude came up with R-value.

R-VALUE

R-value denotes the capacity of an insulating material to resist heat flow. The higher the R-value, the greater the insulating power. It is normally noted (for example) “6.5 per inch“; it means applying one inch thickness of the material will provide 6.5 R-value; applying two inches will provide 13.0 R-value; and so on. R-value takes into account all three heat transfer mechanisms (conduction, radiation, convection). R-value is determined with test ASTM C518 (“Standard Test Method for Steady-State Thermal Transmission Properties by Means of the Heat Flow Meter Apparatus”).

2.3- Condensation and Moisture Control

Vapor Barrier or not?

The purpose of a vapor barrier is to prevent moist air (from inside the van) of migrating towards cold surfaces. The idea is that moist air from respiration, cooking, drying gear, etc. won’t reach cold surfaces and therefore that eliminates condensation issues. However if, for any reason, moist air makes its way past the vapor barrier, it would be very hard to dry that moist air because it would be sandwiched between two vapor barrier layers (remember that metal is a vapor barrier too).

Even if one could achieve the perfect vapor barrier (which is unlikely sorry), there are paths for outside air (charged with moisture) to infiltrate and there are potential leak points as well:

Van-Insulation-Issues-Water-Infiltration-Outside-Air-Circulation

Therefore, we believe that moist air will inevitably come in contact with cold structure, so our approach is to let the insulation layers “breathe” (no vapor barrier).

Condensation and moisture is quite complex, there is much more to talk about… we think this article should help you understand the phenomenon and help you take a better informed decision about your insulation:

Moisture-Condensation-Control-Van-Heading-(Fullpx)

CONDENSATION AND MOISTURE IN A VAN | WHY IT HAPPENS AND HOW TO CONTROL IT

2.4- Thermal Bridges

A thermal bridge is a path of least resistance for heat transfer. In other words, it’s a path for heat to “cheat” your insulation and find a way around it. It normally occurs via conduction through a dense material (such as metal).

Take for example the following picture. We added Thinsulate pretty much everywhere, except on the frames and pillars where we will attach our structure (cabinets, etc). All the exposed metal is considered a thermal bridge and heat will flow through it around the Thinsulate.

Van-Insulation-Conductivity-Thermal-Bridges-Annotated

To mitigate the thermal bridges, a thermal break is added. We added Low-E EZ-COOL since it pretty resistant to compression (applied by the structure attached to the van’s frames).

That’s important, especially if you’re using 80/20 aluminum extrusions for your build (structure, cabinets, etc). Indeed, attaching the 80/20 aluminum directly to the van metal creates excellent thermal bridges and as a result, the 80/20 inside your van will be almost as cold as the van metal!

2.5- Air Loops

Hot air is less dense, so it tend to rise and be replaced by cooler air from above. That’s called an air loop and it’s a phenomenon that happen in non-insulated hollow structure, such as in frames and in pillars. So, to the question “Is it worth shoving insulation inside frames, knowing heat will find a way around (thermal bridges)?”, we think it’s worth it. The total heat loss of your van is the sum of all the small pieces and bits… It all adds up! 

Air-Loop-Convection-Heat-Transfer
Van-Insulation-Convection-Hollow-Structure

3- Van Insulation Materials

At this point, we’re still on our quest to find THE BEST van insulation material… But in order to find out, let’s review our different options:

Thinsulate

  • R-Value: 3.3 per inch.

PROS

  • Very easy to install
  • Hydrophobic (doesn’t retain moisture)
  • Doesn’t off-gas
  • Doesn’t loose fibers and not itchy
  • Good noise insulation
  • Can be stuffed in hard-to-reach places

CONS

  • More expensive

Bottom word: it’s a popular tried-and-true product that gives a added value to higher-end builds.

Polyiso Rigid Board

  • R-Value: 5.6 per inch at 75F, 5.0 per inch at 15F.

PROS

  • Impermeable to water vapor.

CONS

  • R-value decrease substantially at cold temperature.
  • Create air gaps on funky surfaces (which is mostly the case in vans) = water traps.

XPS Rigid Board

Home Depot

  • R-Value: 5.0 per inch at 75F, 6.0 per inch at 15F.

PROS

  • Provides more reliable thermal performance than Polyiso.
  • Impermeable to water vapor.

CONS

  • Create air gaps on funky surfaces (which is mostly the case in vans) = water traps.
  • Maximum service temperature: 165F. (dark painted roof will get hotter than that in the sun! source: phys.org)

By now we know that efficient insulation materials are low-density. A coat of paint is everything except low density…

The manufacturers don’t provide any data (i.e. R-value, etc.) to backup their claims; there’s probably a good reason why (it would be fairly easy to test and publish data).

According to this American Scientific Article, EPA does not recommend insulating paint: “We haven’t seen any independent studies that can verify their insulating qualities“. They noted some heat gain reduction on surfaces directly exposed to sun only, and that “the reflectivity of the painted surfaces decline considerably with time”. It’s all about reflectivity, not insulation capacity. Are you really gonna paint the exterior or your van with insulating paint..?

Until independent studies show a benefit of insulating paint through standardized test, save your money and your time.

4- Insulation Strategy

Going from theory to real-life implies making compromises; there is no perfect solution! The best van insulation is not just about R-Value, it’s also about:

  • Ease of installation for the average DIYer
  • Risk of messing things up (i.e. warped van panels)
  • Condensation and moisture control
  • Conformity to curved and uneven surfaces
  • Material properties (i.e. maximum temperature, resistance to pressure)

With that in mind, here is how we insulated our campervan:

4.1- Floor

  • XPS RIGID BOARD

To be efficient, any compressible insulation material (thinsulate, wool, etc.) must be fully expanded. As a result, they’re not ideal for floor insulation. On the other hand, XPS is an excellent insulator, provides a solid and flat fondation for our floor, it’s quite cheap and readily available at your local hardware store.

So, does it work in real-life? Definitely! We installed our Webasto so it blows hot air in our living space near and parallel to our floor; as a result the floor is nice and warm, even in sub-freezing temperatures. But don’t get us wrong: the farther you go from the Webasto, the colder the floor gets. Cold air falls, remember? So even a perfectly insulated floor won’t be nice and warm all over, unless it’s heated somehow. No, we don’t think radiant heated floor is necessary (but could be a nice luxury); a pair of slippers is just fine and much more energy efficient!

We chose XPS Rigid Board C-200 to insulate our floor. The C-200 is rated 20PSI capable; human footprint = 16 PSI.

Here are our layers from bottom-up:

  • 1/2″ thick XPS (to fill the corrugations)
  • 1″ thick XPS
  • MLV -not show on the picture- (noise insulation, but we’d skip that layer if we had to start over)
  • 1/2″ thick Plywood
  • Vinyl Flooring -not shown on the picture-
Van Conversion, Floor, weigth on top

4.2- Walls, Ceiling, Overhead cabin & Sliding Door

  • THINSULATE

Installing Thinsulate insulation to a DIY conversion is a piece of cake: there’s no mess, no risk of messing things up, it’s not permanent and it’s easy to work with. You’ll be all done in a weekend. Here is how it goes:

  1. Cut Thinsulate to size (using tailor scissors)
  2. Apply 3M 90 spray adhesive to the van wall and on the white face of the Thinsulate
  3. Wait 30-60 seconds for the adhesive to become tacky
  4. Press the Thinsulate against the wall
  5. That’s all!

How does it performs in real-life? Since we moved full-time in our van (2017), we had anything between -22F (-30C) and +95F (+35C) and we’re in a good position to say it’s a tried-and-true van insulation material. If we had to build another van, we’d use Thinsulate insulation again without any hesitation.

Posted in cargo van, Commercial Van, Ideas & Tips

The million dollar question: ‘How do i insulate my van?

https://gnomadhome.com/wp-content/uploads/2018/01/Van-Build-Insulation_2000x1250-1024x640.jpg
The million dollar question: ‘How do i insulate my van?

How you decide to insulate (and ventilate) your van conversion could mean the difference between living comfortably for years to come or handing in the towel as soon as you experience a cold night. Sleeping in a freezing cold van, damp from condensation is not something anyone wants. Good insulation is paramount for living a long and happy vanlife.

A quick google or search through van conversion forums and you’ll find yourself a bottomless pit of opinions. It’s a bit of a minefield and it can sometimes leave you with more questions than answers.

By no means am I claiming to know the absolute best method for insulating your van; I am simply sharing a guide to what I have done, why I have done it and most importantly, sharing my opinion on how well it has or hasn’t worked.

BENEFITS OF GOOD INSULATION AND VENTILATION:

  • Temperature Control: Quicker to warm in the winter and easier to keep cool in the summer.
  • Minimise Condensation: helps keep condensation to a minimum = no damp/mould.
  • Smells better:  Good ventilation helps reduce any odours, such as cooking, dogs or damp smells.
  • Protects your van:  Your van may last longer. less damp means less rust/rot.
  • Creates a sound barrier: Insulation can significantly help block outside noise.

These are just some of benefits from a well insulated van. For me, installing the insulation and creating good airflow was a game changer and has made our van a more comfortable place to live.

No doubt, there will be plenty who say our idea of insulation is wrong and you should follow their way. One look online and you see hundreds of different opinions on the “correct” way to insulate. My advice is to take advice from those who have real experience with building and living in a van and then do what makes sense to you.

For me, good insulation comes down to two things:

  1. A sealed moisture barrier that prevents condensation.
  2. A good quality non-absorbant insulator to retain heat.

Condensation is the bane of Vanlife. It leads to damp, which leads to mould and rot, which leads to a very unhappy camper.
I cannot stress enough just how important it is to keep moisture at bay, it will be one of the biggest factors to your comfort level while travelling.

As well as keeping moisture away, you’ll want to keep heat in. Whichever way you decide to heat your van, you’ll want to retain that heat for as long as possible, a good insulator like Celotex is essential for keeping warm.

 FLOOR

STEP 1: LAY BATTENS AND FOAM INSULATION. 

Once the paint had cured and we had applied the sound deadening, we then measured and cut  the wooden battens and foam boards to fit and rested them in place, spacing roughly 30cm apart. (NOTE: our van floor is not flat, it has high and low ridges, we made sure they all sat at the same depth ridge to ensure a level floor).

TIP: This may be an ideal time to pre-cut the ply sheets roughly to size to make it easier later. We didn’t do this and found it difficult lifting the sheets in and out once the supports and foam were installed. The reason i measured and cut afterwards was because our van (Mercedes Sprinter) widens and narrows over the height of the van and i was worried i’d cut the ply too small if i measured before the battens were in.

STEP 2: LAY THE FOIL MOISTURE BARRIER.

One of the key components in keeping condensation at bay is a good moisture barrier. This such a crucial step as it stops any moist, cold air from making contact with the metal panels behind the insulation, which in turn will create condensation. For this to work, the space between the moisture barrier and the van needs to be completely sealed. Any gaps in the barrier will allow moisture build up and before you know it, you’ll have a damp and smelly camper van.

WALLS AND CEILING

The walls and ceiling are fitted with roughly the same method as described for the floor. Celotex boards were cut to shape and held in place with adhesive spray, and expanding foam used to fill any awkward gaps. The battens were then fixed vertically every 500mm using self 35mm self drilling screws and adhesive spray was used to hold the foil barrier in place while we used foil tape to secure and seal.

It could have done the same thing and only used only cladding on the walls, but it wouldn’t have had the same strength and stability as ply. Ply-lining also has the added benefit of being able to fix cabinets etc at any place on the wall.

VENTILATION:

Insulation without ventilation is a train without its tracks, to have a comfortable home-on-wheels, you need a balance of the two. Air circulation is essential for providing sufficient clean air and to help remove water vapour and pollutants. We achieved this by installing a skylight that has fixed ventilation at the front of the van (Dometic Seitz Mini Heki) and windows (Dometic S4 window) that have the ability to lock in a vented position at the rear.

This allow us to keep the van secure, allow ventilation and help keep the van cool in the summer months. I have seen people tackle this in many different combinations, such as two skylights (one at either end of the van), or a floor vent and a skylight/window, some skylights even have fans built in, some may work better than others and it will largely depend on you interior layout. One thing that is for sure: Ventilation is key.

CONCLUSION:

Van insulation can be perplexing, especially when there are infinite options and methods on how to go about it. My advice is to keep in mind that although your van may be your ‘home’ it’s definitely not a ‘house’ and you can’t apply the same rules as you would to brick and mortar. A well sealed moisture barrier and good ventilation are key, this is the process we used to insulate our camper and after living in it through this cold and wet winter, its safe to say it’s been an absolute success.